


To get started making the chocolate high heels filled with cake pops you will first need a Chocolate High Heel mold! I got mine HERE! I actually got a few, so I can make several at a time;)! Next you will need a pair of small scissors. I started with big scissors and an Exacto knife, but it took way to long…In my opinion the embroidery scissors are much easier and faster to use, so if you don’t own a pair I would recommend making the small investment. You will also need the micro mini clips that are pictured! The next few things pictured are somewhat optional, but without them I don’t know how you will display or transport them without them falling over or getting smeared with fingerprints. The red box is actually the base to the BRP Box Shop’s Cake Pop Box ! In order to use this box, you will also need a skewer and a short 4.5 inch or smaller cake pop stick.

So it is time to cut out the high heel mold! you will want to leave about 1/4 of inch around the perimeter of the shoe and when you get to the opening you want to cut that part completely out.

Next take a look at the mold and see which side of the heel is bigger, on my mold one side has more room at the base of the heel then the other. You want to then take the wooden skewer and poke a hole through the plastic of the bigger side.

This hole is the perfect diameter for the cake pop stick (which is what we want!). Next, take that skewer out and get the candy melt color of your choice, melt it down and put it in a piping bag. Now start piping on your design. I find the dots are the easiest and look the nicest! Just make sure they are warm, not hot! If they are too hot it will take too long for them to set and the dots could start running.

Now it is time to take the cake pop stick and stick it into the hole you make with the skewer!

You want it to stick out of the mold just enough to go into the cake pop box securely so the heel rests on the box. Don’t forget to take in account there is a little 1/4 inch lip on the mold. Make sure to move the stick up into the mold that 1/4 of an inch so that your stick wont show when the shoe is placed on the Cake pop box stand.

Now that you have all that figured out it’s time to get those little micro mini clips out! Place your 2 halves together, making sure all the seems line up and clip away! I say the more the better;)! Clip all the way around.

All that is left to finish off the show now, is to fill it in with chocolate!! Melt down about 7 ounces of chocolate and pour it into the shoe opening. Make sure the chocolate is on the cooler side of warm, but still fluid. If it is too hot you will melt your dots;)!

Now just start twisting and turning the shoe until all the interior plastic is coated….


A good rule of thumb for a good mold thickness is when you can no longer see the dots come through the chocolate. Place it in the freezer to set up fast! When the plastic looks foggy, the chocolate mold will be ready will be ready to take out of the plastic. Remove your clips…

It should peel off really easy, if it doesn’t its probably just not set all the way, so continue to let it dry.

Start to remove the “stick side” first! Pull the mold away while holding the other side of the plastic mold. You don’t want any fingerprints, right?! Once the mold is lose on the stick side pull it away and down the stick.

Once you have twisted off the mold on the stick side, grab the shoe by the stick (again, no fingerprints!!) and pull off the other side! This side should come off much easier! Have your cake pop base ready and once you have removed the mold, place the shoe stick into the boxes’ cake pop stick hole. The shoe fits nice if you use one of the corner holes.

Next it is time to make your 1 inch cake pops!! To make them only 1 inch in diameter of course we use the Easy Roller with the optional 1 inch insert to roll cake dough into little one inch cake balls. (I forgot to get a picture of the cake balls, so this is the Oreo balls – crushed Oreo’s and cream cheese)

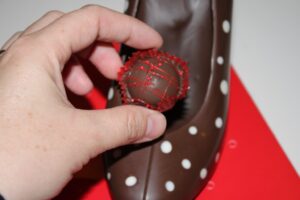
I just dipped them in milk chocolate and a few in red candy melts just to mix it up! Then drizzled the opposite colors on them and added some sprinkles! I used little red BonBon wrappers! Just pick them up the same time you get the Chocolate High Heel Mold (or you can make 2 trips like I did… oops!!)

Now just fill your shoes!

How cool does this look!! Perfect for Valentines Day, Girls Night Out, Bridal Shower, Birthdays! Chocolate & Heels…It’s just a girl’s dream come true 🙂


Now if you would like to make these Chocolate High Heels to give as gifts or sell them, you will need some sort of a box, and let me tell you these are an awkward size and I had quite a time finding a box that would fit this size shoe! However, since I make cake pops most of the time, I stock these boxes and make sure I have a few dozen on hand at all times! They were actually quite perfect and I am happy I tried them as a last resort. The size of the box was near perfection, you can see through the it, it has a handle, and of course those stick holes to stabilize the shoe!! Great work BRP Box Shop for putting this box together:) Check it out!!
 Don’t forget to check out our Easy Roller, it is how we keep these tutorials coming:)!