If you want to learn how to make this Tall Army Men Cake & “Camo” Cake Pops stick with me! I love making custom birthday or occasion cakes and then pairing it with matching cake pops. Besides, what else are you going to do with all the cake scraps!
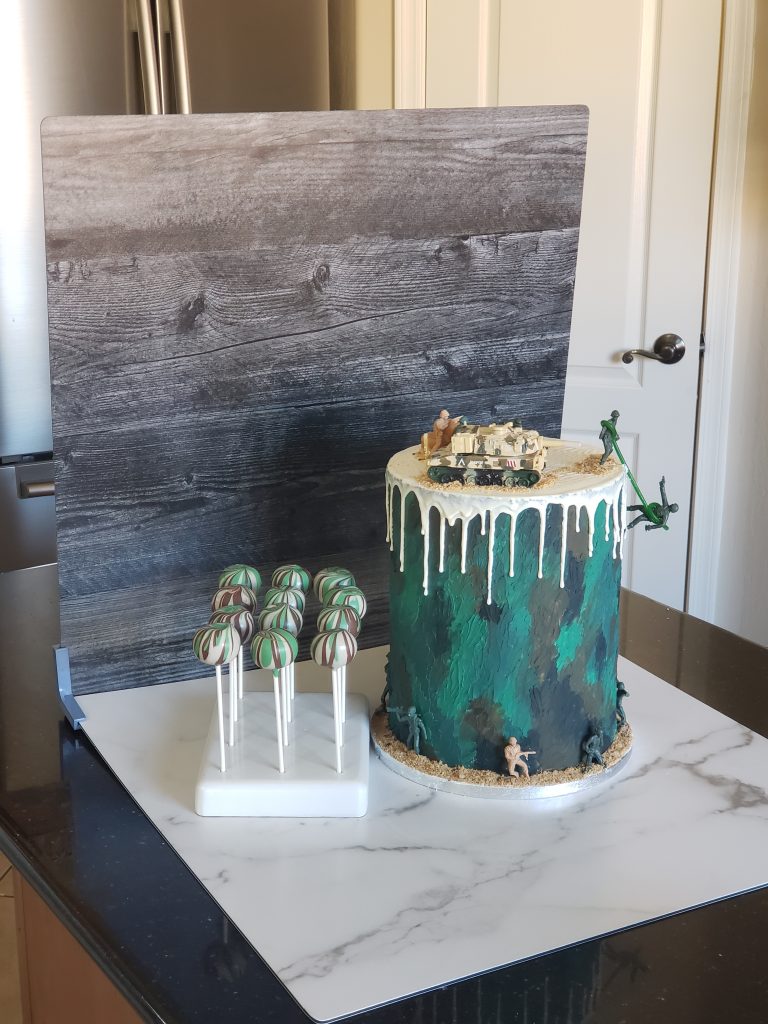
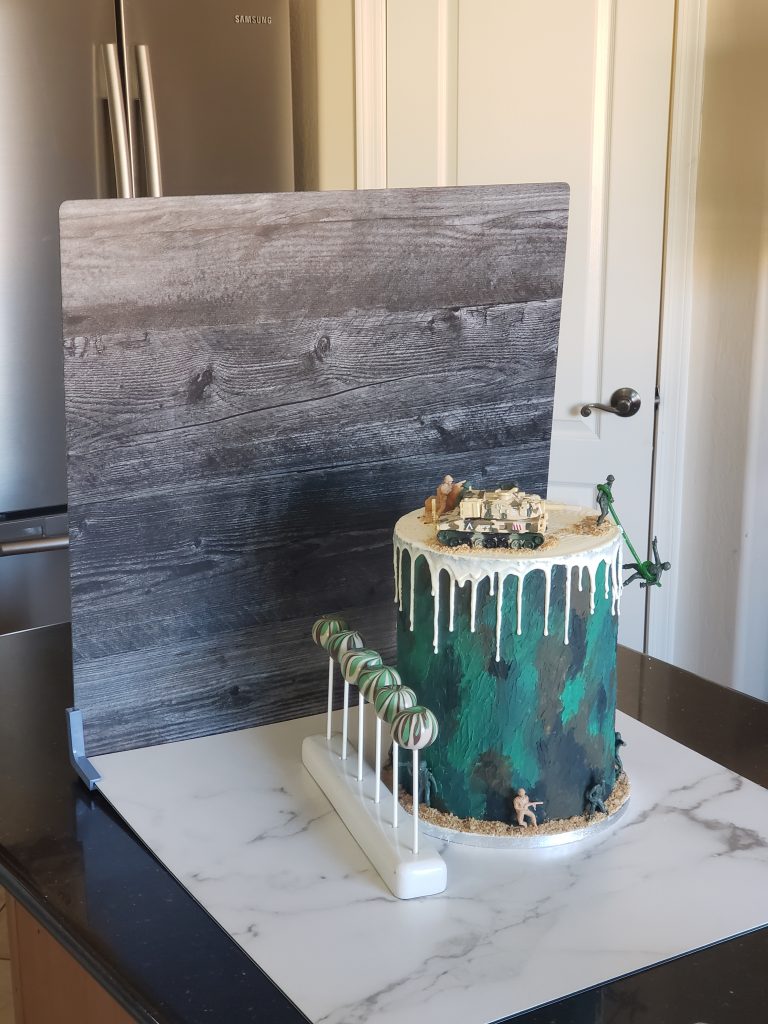
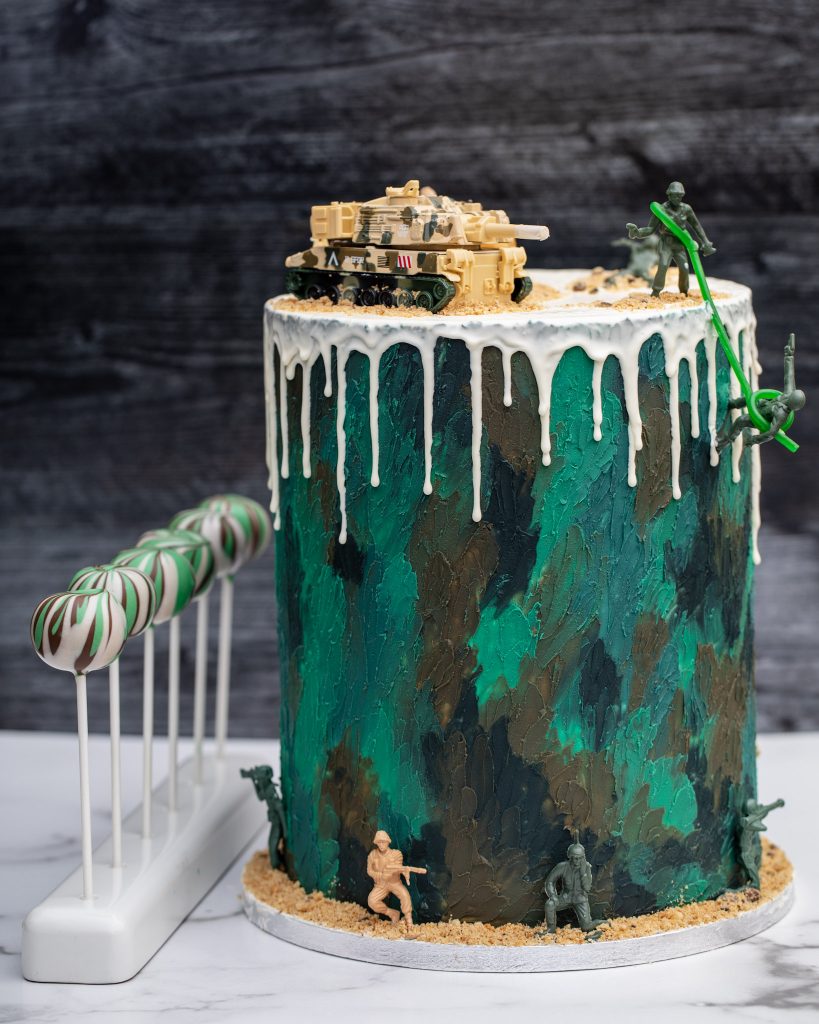
This Tall Army Men Drip Cake might just be one of my favorite tall cakes to date!! Just look at that texture<3 <3! And check out those matching “Camo” Cake Pops I made with the Easy Roller!!
Let’s get started by making the cakes! I have 2 Fat Daddio’s pans in each size to help speed things up! However, I do wish I had 4 of the 8 inch ones!!

Doctored Cake Mixes are my jam for my decorated custom cakes! They are sturdy enough to stack and there isn’t too much extra thinking involved;)! To one box cake mix just add the following:
- 4 eggs
- 1 cup of milk
- 1/2 package of instant pudding mix
- 1/3 cup of oil
- 1/2 cup of Sour Cream
For this tall army men 8″ cake, I baked 4 boxes of cake! Each cake I split between the 2 pans for baking.
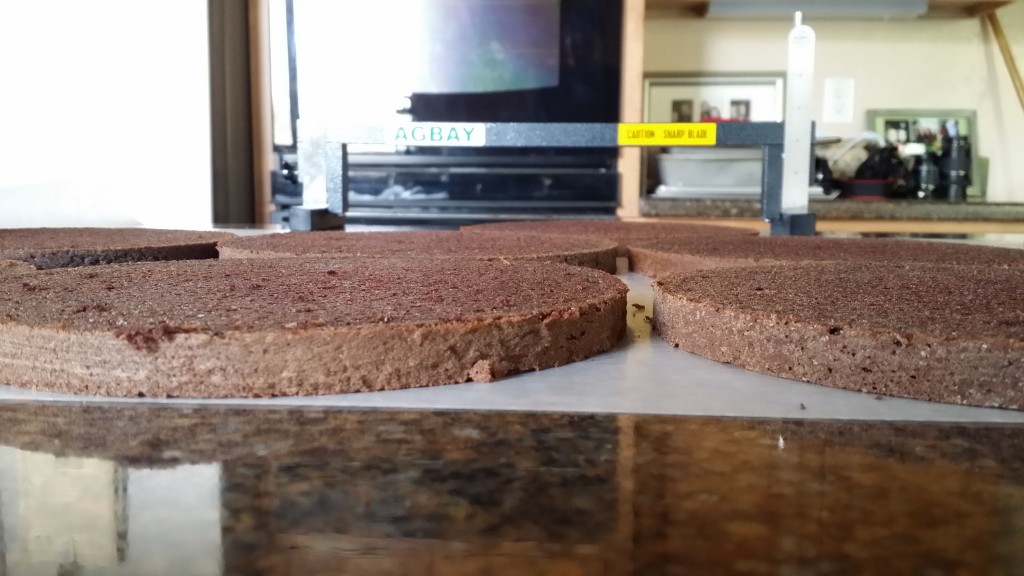
Cutting and filling the cake is first. I always make each tier 4 layers of cake. To do this with precision I use the Agbay to cut each baked cake into equal layers. My standard is to cut off the rounded top and about 1/8? off the very bottom. No one likes the darker bottom edge of the cake do they?! **Don’t worry, I don’t throw those away, these are the “cake scraps” I use them for the cake pops!!
I have the Agbay Jr and LOVE IT! Sometimes wish I would have gotten the bigger one, but so far, so good with the Jr. If I ever make a cake 14? in diameter I may have to invest! This is one of those “cake tools” I couldn’t make stacked or designer cakes without! It brings your cakes into the professional ranks without having to practice splitting cakes. Because splitting cakes is a TRICK, trust me! I mean look at this… If you can figure out a ruler you can use this. And more importantly get the SAME results!
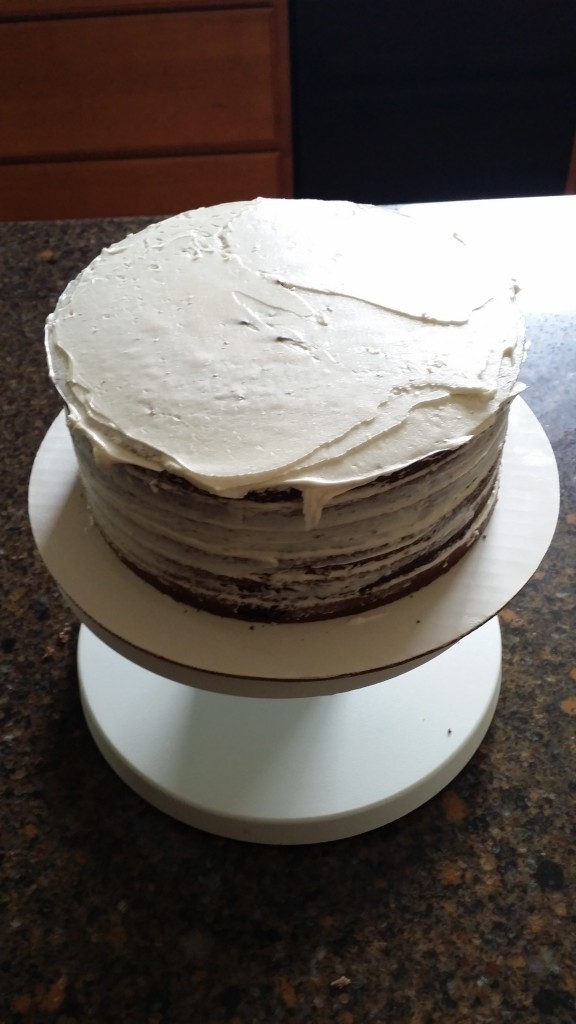
Next I filled the layers with vanilla buttercream and crumb coated the outside!
**I forgot to take a picture, but when you stack cakes on top of each other you need support so they don’t topple over or crush the layers underneath! This Army Men cake is a “double barrel” or “Tall Tier” meaning you take the same size cake tiers and stack them on top of each other to look like one tall cake!
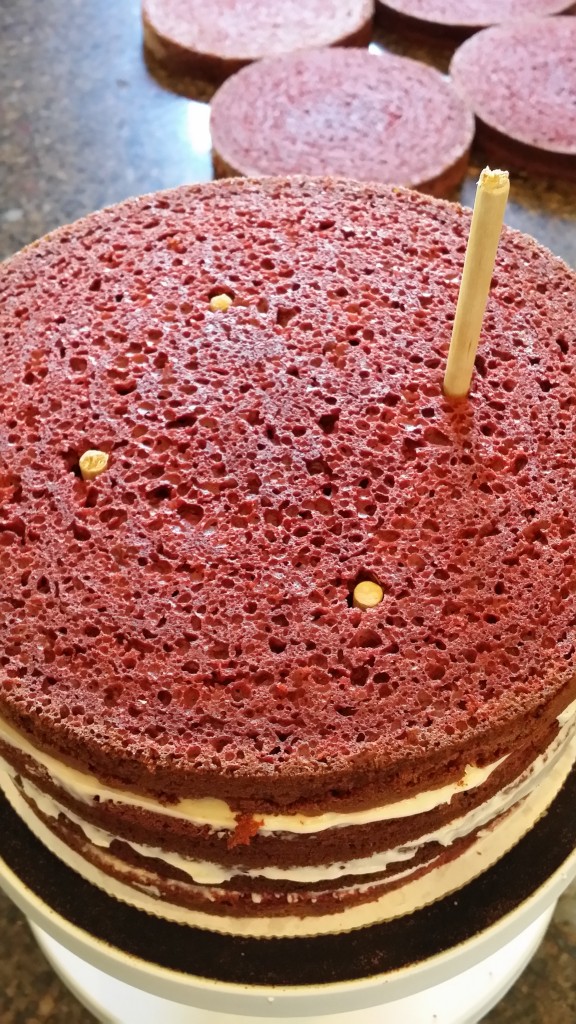
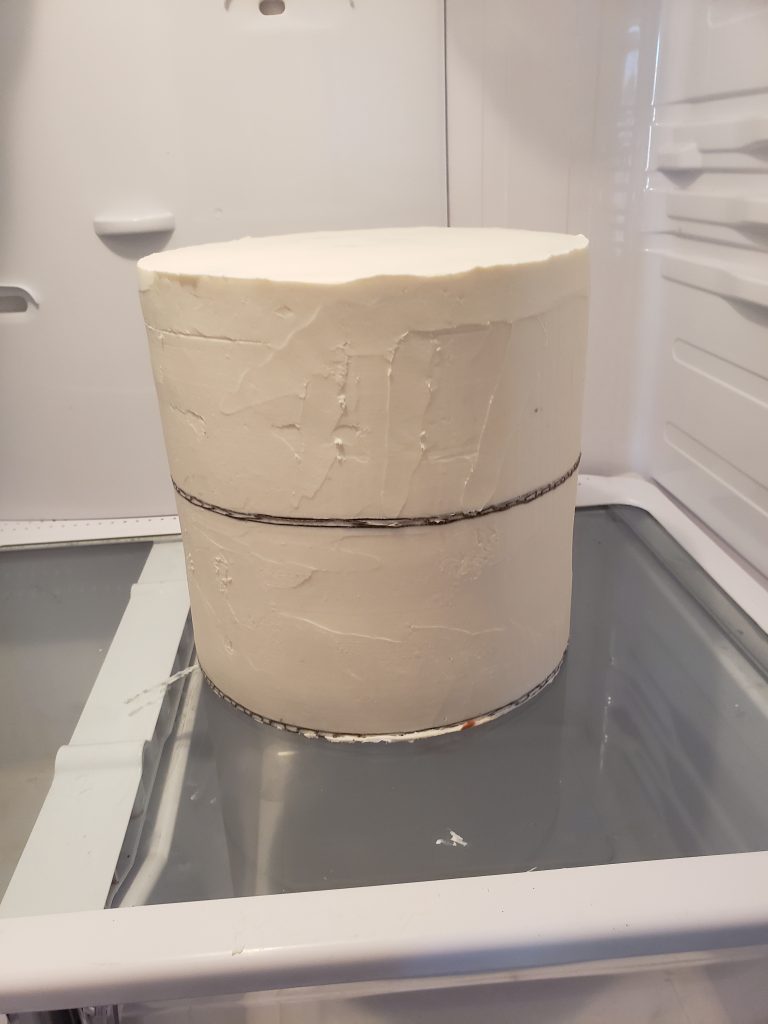
So to support the cake, I stack the cake layers about 4 inches high on a 8″ cardboard then insert wooden dowels in the cake. Then the next cardboard cake circle (with the next filled cake layers) will go on top of the supported cake tier. Next go around with your frosting and crumb coat the cake and set it in the fridge to harden up. It should look like this after crumb coating:
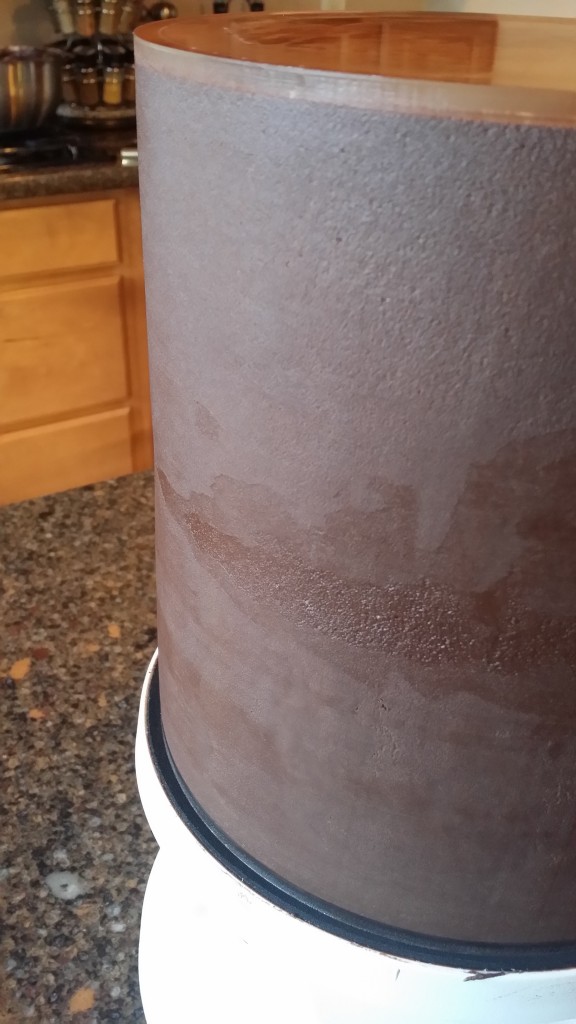
Next I took my 8.5″ acrylic discs and put one on either end of the cake (both tiers together) and filled it with butter cream and scraped off the excess so it was smooth! Again, I forgot to take pictures but here is a couple pictures with chocolate instead;)!

Just put as much buttercream (Or ganache works just as good!) and use a bench scraper that will be long enough to hit both discs at once and it will smooth it out just perfect!
Put it in the fridge to set, then the best way I have found to take them off is to just use fishing line! I wrap it around the bottom edge of the disk and just pull it around! It comes right off 🙂
Now for the fun part!! Decorating!!
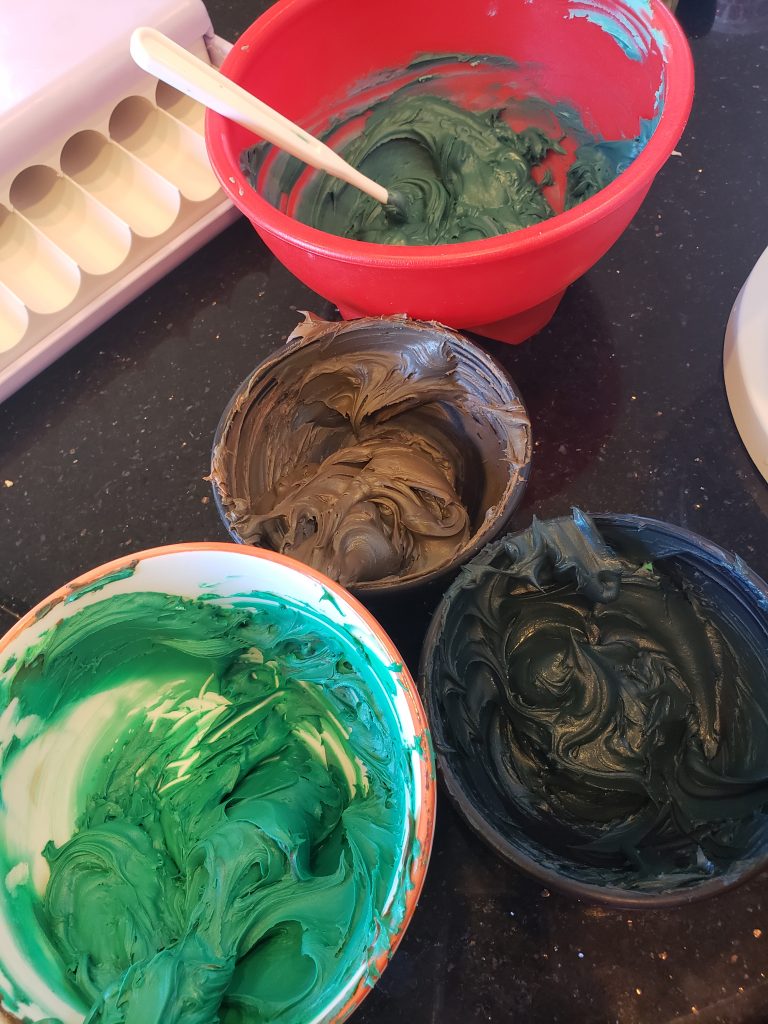
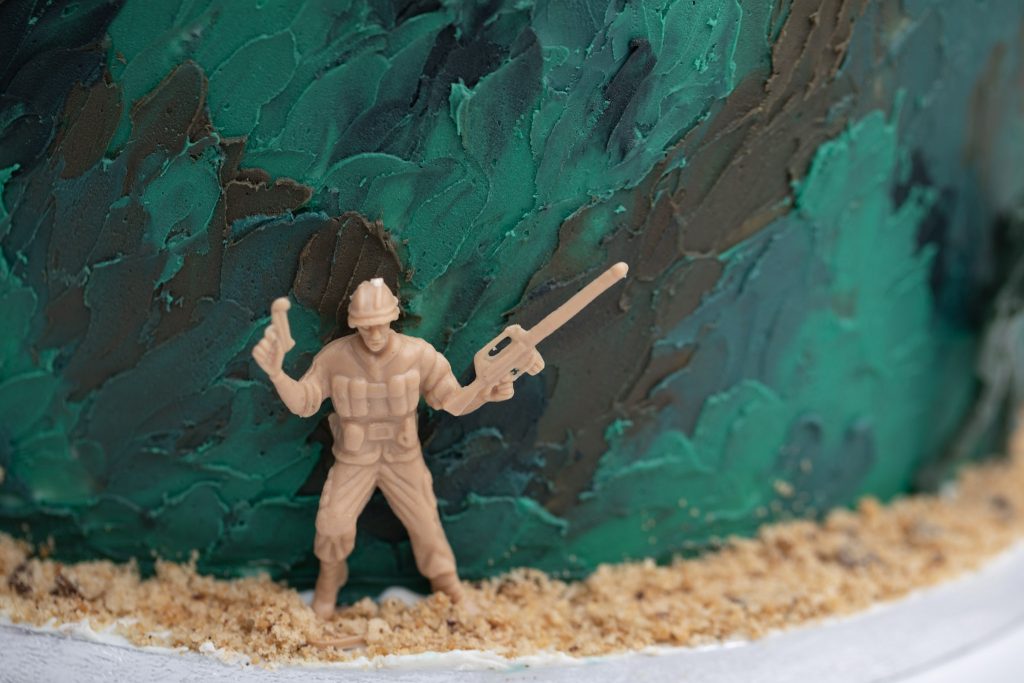
I took a scoop of buttercream and put it into a small bowl to color them! Using a dark green, almost black, a regular forest green, brown, and then I mixed brown and green to get that color in the back! The color I ended up using more of the darkest color and regular green color! Also This is about a cup of each color…. WAY TOO MUCH;)!! I could have done like 1/4 of a cup:)
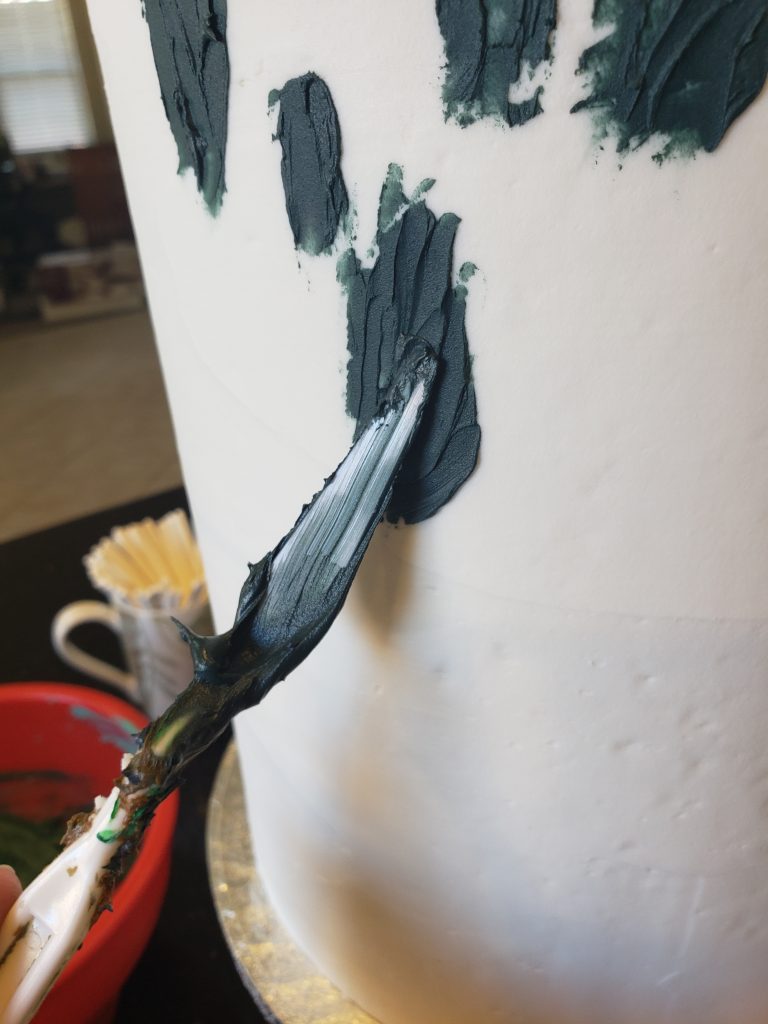
With the smallest amount of frosting on the back of the pallet knife (part of the cheap $4 paint brush pack you can get at WalMart) I spread the buttercream on the cake in small downward motions.
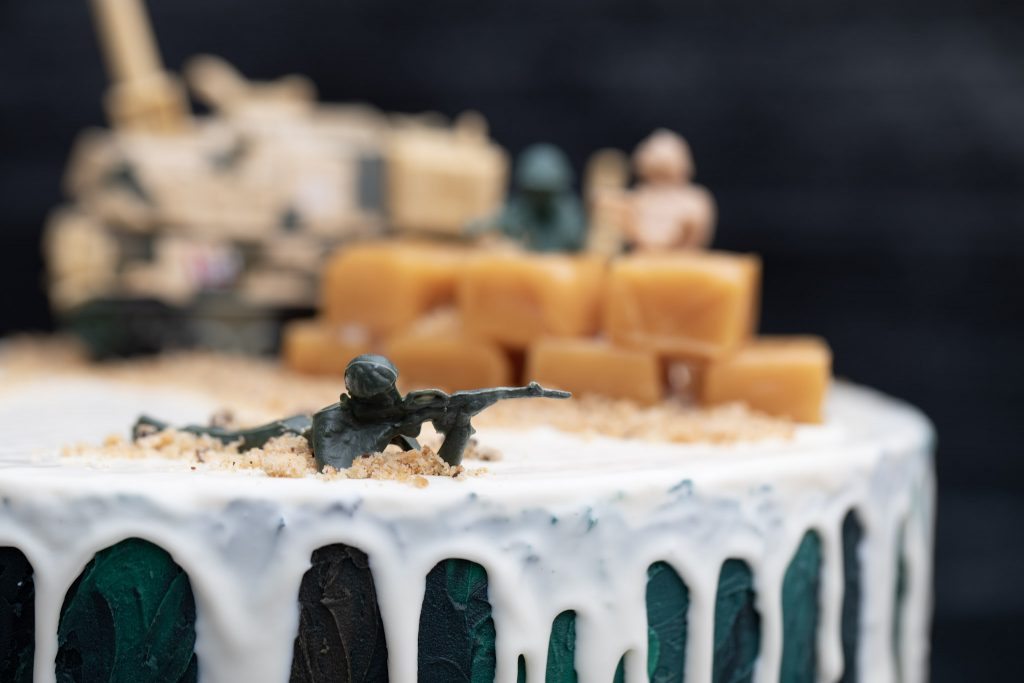
Then just trade off colors! No need to clean the knife or be too careful, it actually helps the blending process:) I left the top white so I could do a white chocolate ganache drip. To make it, I boiled 4 ounces of heavy cream and added to to 12 ounces of White Chocolate wafers (I love Winco!). Whisk to combine! As soon it was cool to the touch I put it in a zip lock bag and cut off the tip. Then with the cake on a turn table I went around the outside adding drips! Then filled in the center with the rest of the ganache.
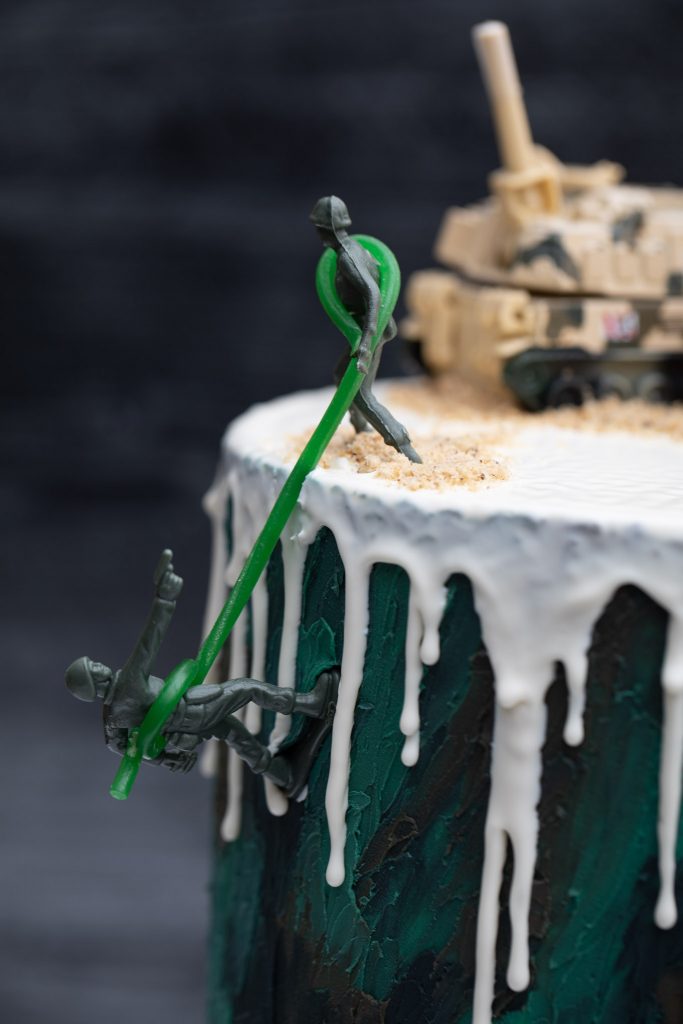
Now its time to play!! Adding the Army guys into little situations… I have this little “sniper” on the edge…
This Army Guy is helping another army guy up to his position (with the help of a Pull and Peel Twizzler!!) See the tanker in the background, this is in case they need to get around;)!
These 2 are holding their post behind a wall of soft caramels;)!
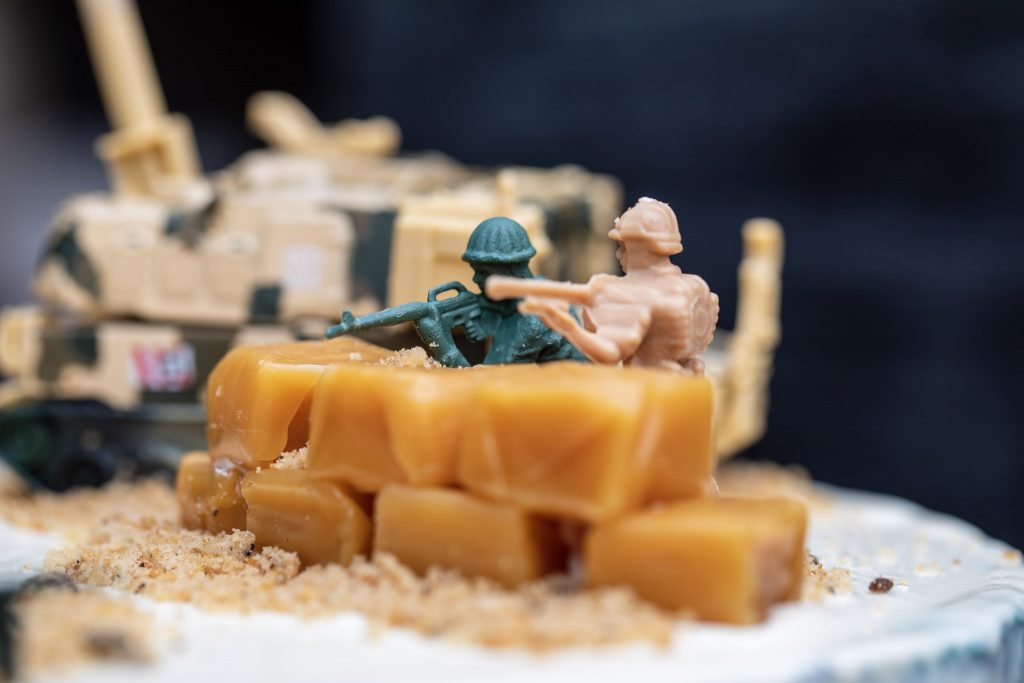
These guys are all surrounding the cake;)! The dirt you see? That is chocolate chip cookie crumbs!
Now if you remember in the beginning we cut off the tops and bottoms of the cakes before we stacked it! Instead of throwing those out, or snacking on them;) we make cake pops out of them!!
Now For the Camo Cake Pops!
These “Camo” or Camouflage cake pops were perfect for this cake!! With the Easy Roller, it is really easy to turn all those cake scraps into extra profit, or if this is a hobby, just extra treats:)!! The Easy Roller Rolls 21 cake pops at once!! That’s like having the whole neighborhood over to help roll cake balls! So don’t forget to Check out our Easy Roller (or our new Mini Easy Roller!) It is how we keep these tutorials coming:)!!
If you want to see exactly how to make these cool “camo” cake pops, hop over to my post here:)!!
Now one last thing! If you sell cakes or cake pops, it is so important to get good photos of your work!! It is how people know what you are capable of doing 🙂 I cannot tell you how many counter top photos I have, but never again!! Now that I have found these Replica Surfaces I can take photos and eliminate all the background noise of the microwave or oven, or that spoon in the background that I didn’t see until the cake was gone and the pictures were uploaded!! I love these!! They are super light weight, easy to store, portable, and work perfect!! I thought they might be too mall for this cake, but I was pleasantly surprised!! Here is one of the behind the scene photos and how it looked in camera! <3