
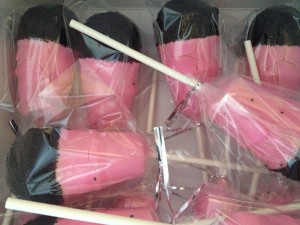

These are super fun cake pops for any music enthusiasts:)!!
You will need:
•Cake Mix
•3 eggs
•1/2c. vegetable oil
•1 1/4c. water
•Candy Melts
•mini ice cream cones
•black sprinkles
It took me a bit to find these super tiny ice cream cones, I was just about to go begging for empty “kid cones” at McDonalds, when I finally found these at Wal-Mart… Go figure!!

Look how tiny these are!!

Once you have secured these little guys the rest is pretty easy;)!
Make your cake as directed on the box and then after it cools, turn that cake into cake pop dough, this is how I do it in case you were wondering!
We always start with The Easy Roller around here! Whether using it to roll perfect cake balls or just to portion cake dough for hand forming, it is an amazing tool that gives you great results everytime. For these microphone cake pops, I will just need a ball shape. So I will use my Easy Roller to make all the cake dough into 1.25″ rounds. Hold for about 3 minutes while I get this whole cake rolled up;)!!

Next it is time to take your sticks and ice cream cones and poke them through. I poked a hole carefully with the cake pop stick clean first, then once I had a small hole, I dipped the stick in some candy melts and set them in the cones. It turned out kinda cool to have the stick dry in there at an angle! So when they are done, it was kinda like the mic was bent toward you;)!

Once the sticks are set into the cones it’s time to dip them in the base color. These were for a little girl, so I dipped them all in pink!

Place your cones to dry in a cake pop stand but before they dry, pop one of the cake balls on the wet cone. The cake ball will attach itself once the candy melts on the cone dry.

Once the candy melts have set on the cones, have ready your chocolate candy melts and black sprinkles!
Carefully dip the top half of the cake ball into the chocolate candy melts

Then while the candy melts on the cake ball are still wet, sprinkle the pop with black sprinkles. Since the cone is already set, it will just stick to the cake ball.

Then it’s just time for some finishing touches!
I added tsome pink pearl dust to make them shimmer, then 2 dots for the on/off switch.

Just dip a dry clean paint brush into the pearl dust and brush it on!

Bad picture, but you may be able to notice the shimmer?! Better in person for sure!!

Final note and where I messed up:/ I usually keep my cake pops in the fridge till pick up, not that they need to be in the fridge, but usually I find they keep nicer that way (I live in AZ where it is HOT!!) But for these pops… the fridge was a BAD idea!!! The next day when I took them out, all the candy melts that were covering the cones cracked!! So keep these at room temp!
