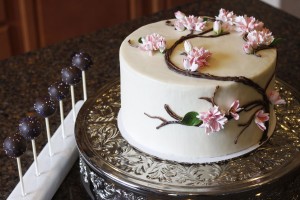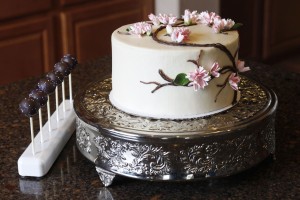
This last cake I made for a birthday is a Cherry Blossom Cake to go with a “Mulan” themed party! She ordered it about a 10 days in advance and I had a packed schedule just coming back from the Bash Conference, so I was struggling a little on time and a bit stressed on if I would have enough time to complete it . Since she wanted the cherry blossoms to be both open and closed I guess that would rule out my simple royal icing flowers I could do with an icing tip;)!! With my crazy schedule and without being able to make “fast flowers” I was starting to stress out a bit on if I had enough time for everything I had planned for the upcoming week! Luckily I had lunch with some friends and fellow cake artists over at the Sugar Sugar Cake Studio and when I told them about my upcoming cake, they told me they HAD FLOWERS that would work with a Cherry Blossom Cake!! At that very moment I knew I could do this cake quickly and make it look just as she had ask, after all the Sugar Sugar Cake Studio is KNOWN for their flowers!! If you haven’t networked with your local cake community you are missing out on fabulous tips and tricks of the trade!! Everyone has something to share and offer that could be mutually beneficial 🙂
I think the Flowers worked out PERFECT! And the Customer loved them, which of course is most important:)! Thank you for saving me Ted & Adam!! Want to see more fabulous cakes an flowers?! I added their Facebook button to make it easy for you to find them:)!
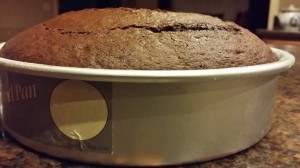
On to making this Cherry Blossom Cake:)! Of course you have to start with cake:)!! For “fancy cakes” I like to Doctor up a box cake mix!! If you don’t add a little something extra to it, when you go to stack them you might find they don’t hold up well, they may split or crack down the middle. So here is what I do! I add a package of pudding mix (the powder, not prepared) then add 1/3 cup of oil, 1 cup of sour cream and 1 cup of water and 4 eggs. Here it is in an 8 inch round pan! I have 3, 8 inch pans, so I always double the recipe and pour it into the 3 pans:)! So I can level the tops and cut a bit off the bottom and it is still a tall cake tier:)! (About 4 inches high)
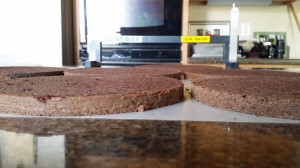
I use the Agbay Jr to level/ split cakes! It is a professional tool, and comes with a professional price tag, but for ease of use and consistent results you just cant beat it!! I have made less then 10 cakes and you probably couldn’t tell;)! If you like to make cakes like this, it will be one of your best investments and you will use it every time. So Like I said I cut the top round part of the cake and then 1/8 inch off the bottom. Yep, you heard that right!! I can cut 1/8 inch layers with this knife, perfect! I put these cake scraps in a bowl and set aside! Take a look at this picture and tell me you don’t NEED this;)!!
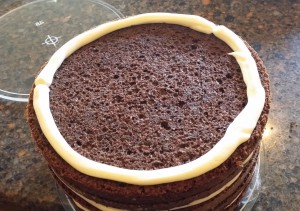
I filled this chocolate cake with a very soft filling! It is 2 boxes of pudding with only 3 cups of milk (a little thicker then the pie instructions) and a container of cool whip! If it were a wedding cake I would have made whipped chocolate ganache and mixed it with meringue but kids like pudding and cool whip;)!! This is still pretty soft after it sets so to use it as a filling you need to make a dam on your cake or the filling will eventually leak out the sides and mess it all up (been there, done that!!) Thank you Dawn Parrott for enlightening me on this one;)!! Again, talk to your cake friends:)!!! So what is a cake dam? It is a thicker icing that you put along the perimeter that will hold in your soft filling! This is the Cream Cheese frosting that I frosted the outside with! Recipe: 1 package of Cream Cheese – softened, 1 stick of butter, softened, 3 cups of powder sugar and a TBS of vanilla.
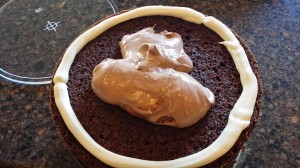
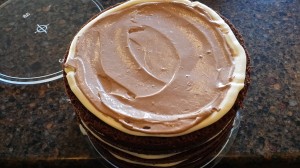
Next, spoon in your soft filling…
Spread it inside the dam and make sure it is all pretty level with the dam you made! Repeat till all your layers are filled!
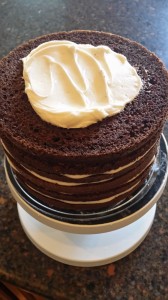
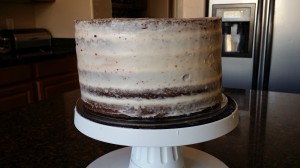
On that last layer is the cream cheese frosting that I crumb coated the whole cake with!
Once it looks like this, I put it back into the fridge to firm up a bit!
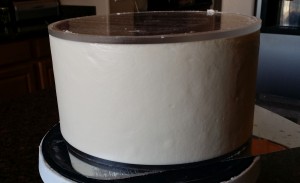
Next I put the acrylic discs on top and bottom and smear in a bunch of frosting 🙂 Again with the cake tools;)!! I have tried to smooth frosting and it is just not my strong suite! I need help!! I don’t want to spend an hour trying to get it completely smooth and then cry when it just doesn’t happen! So I got these! Its a no brainer! You put one on the top, one on the bottom and fill it full of icing, all the way around. Then take a bench scrapper, press it up against the acrylics, and turn the turntable removing the excess. Look at this!! Nope, that is not fondant!! It is delicious cream cheese frosting:)!! This goes back in the fridge till its firm! You can even put it in the freezer if you’re short on time:)
Once it is pretty firm take a skinny tool, like a spatula or a pallet knife and run it around the bottom to loosen the bottom disc first. Replace the disc with your cake board and flip the cake over. Then take the pallet knife around the top and repeat! When the sides are perfect and firm it is easy to fill in little spots on the top with frosting that the disk may have messed up during removal. Again, I am not a pro, just invest in cake tools;)!! …And I think this this icing looks pretty darn good:)! Once the icing is perfected I took a toothpick and lightly drew where I wanted the cherry tree branches. Then, since this is a cake pop house…. I have way more candy melts then anything else!! So the cherry tree is 2 colors of chocolate candy melts, regular milk chocolate and I added a bit of white chocolate to the milk chocolate for a lighter accent color:)! I just traced over my lines with the chocolate! Easy:)! Once it was set I added the lighter color in a few spots! The final step for this cake was to add the Beautiful flowers from the Sugar Sugar Cake Studio:)!
Remember those cake scraps we set aside? The tops and a little of the bottoms of the cakes?! I took those and made cake pops!! Everyone that makes and levels cakes should offer cake pops as an add on!! It is just extra revenue you can add using the same cake, the parts you were going to throw away!! I admit, cake pops can be a bit time consuming by hand, but have you seen the Easy Roller?! This fun tool makes cake pops fast AND easy! …You can make cookies, and meatballs with it too;)! ..too big? Check out the Mini Easy Roller!
See, you can make a profit on cake pops with the Easy Roller:)! I hoped you liked this tutorial and picked up a tip or two:)! If you did, pin it to your Pinterest board, Share it on your facebook page or just tell you family and friends about the Easy Roller…it is how we keep these tutorials coming!

