

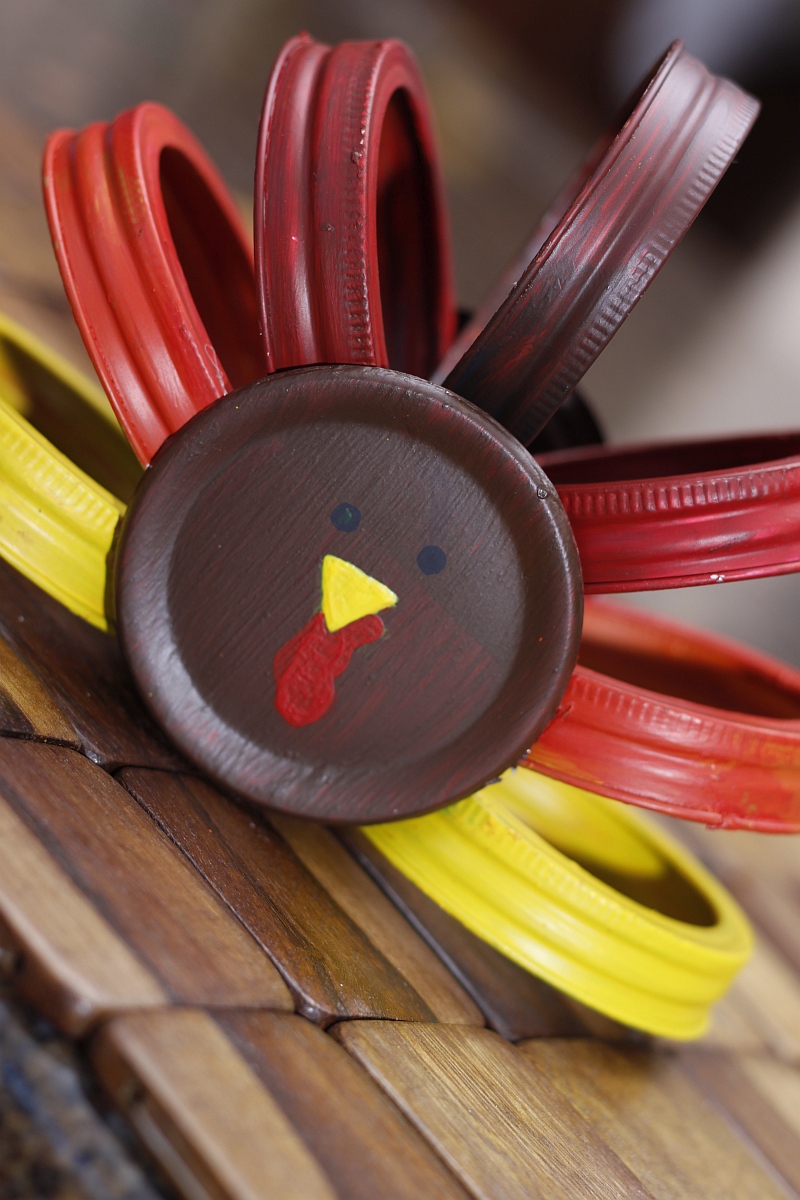
Looking for a fun way to display your cake pops this Thanksgiving? Check out this DIY Turkey Cake Pop Holder!


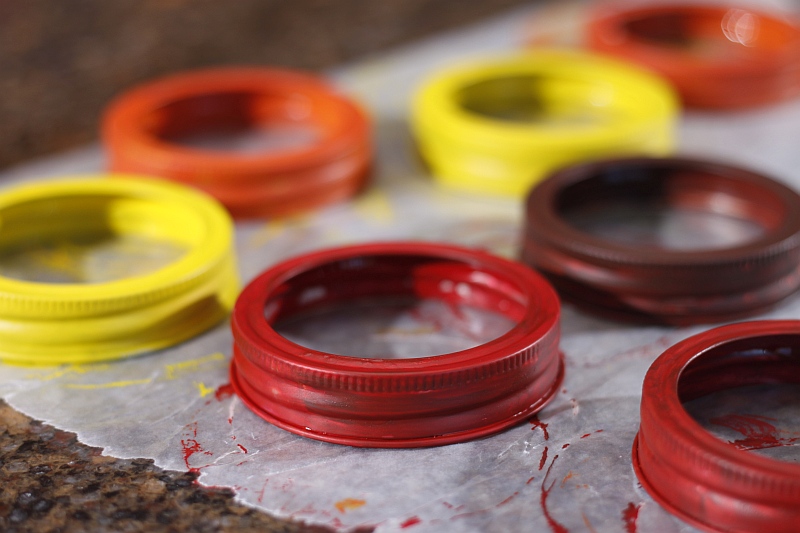
These are made using just a few Mason Jar Lids! You will need to round up some lids, paint and a glue gun to get ready for this craft idea! Don’t have any mason jar lids? Never fear! You can get just about any jar or just lids HERE, at Fillmore Container! I started with just a few colors of acrylic paint: Red, Blue and Yellow. I needed Yellow, Orange, Dark Red, and Brown so I ended up mixing the few other colors I needed.
- Brown= Red, Yellow, and Blue mixed together.
- Orange= Yellow and Red mixed together.
- Dark Red = Brown and Red mixed together.

Next Paint all your Bands, inside and out. It took me two coats to cover completely. If you have spray paint, that would work too.
I also painted 2 of the Lids brown for the face of the turkey. I used 2 so both sides could be “the front.”
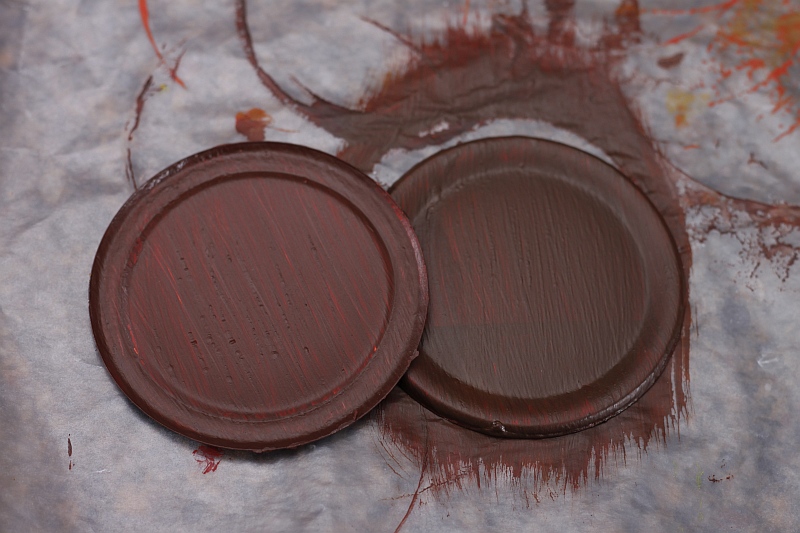
Next, when the lids were dry, I painted a simple Turkey face on the top.

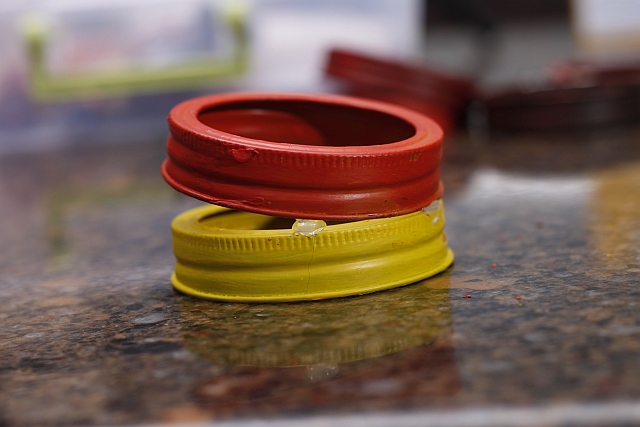
All that is left is to glue your pieces together! I started with the yellow and had the two bands about 1.25 inches apart from each other.

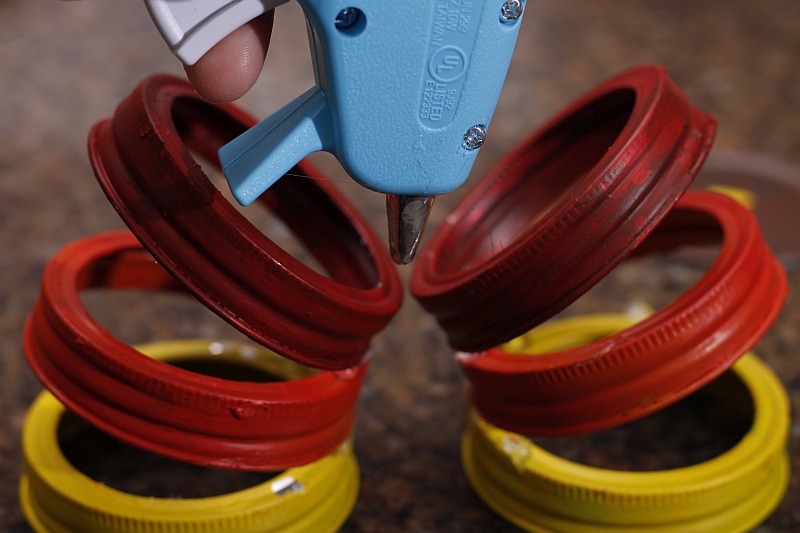
Then I just worked on one side at a time, gluing the Yellow to the Orange. I added two little drops of glue on both sides of the “V” area on the lids, as a place for the lid on top to rest (so it would stay fanned out – and not fall!)
\
Then the Orange to the Dark Red. Then Repeated the entire process on the other side. Once I got both sides to the Dark Red band, I glued the two halves together by placing a bead of glue between the two dark red bands.
Then added a generous amount of hot glue to the brown band and placed it right in the middle.

All that is left to complete the Turkey, is to glue the face to both sides of the bands or as I like to call them, “the feathers!”
Now all you need is your cake pops!! Start by making (or even buying a cake!) If you use a box mix like us, the average yield is approximately 30 cake pops per box mix. Bake the cake just like it calls for on the back of the box. Let it cool to the touch and crumble and need it down to a doughy consistency. If you use a stand mixer (or food processor) it will knead the cake down for you into dough in just a couple minutes. Take a look, you won’t believe this is cooked cake unless you see the process;)!
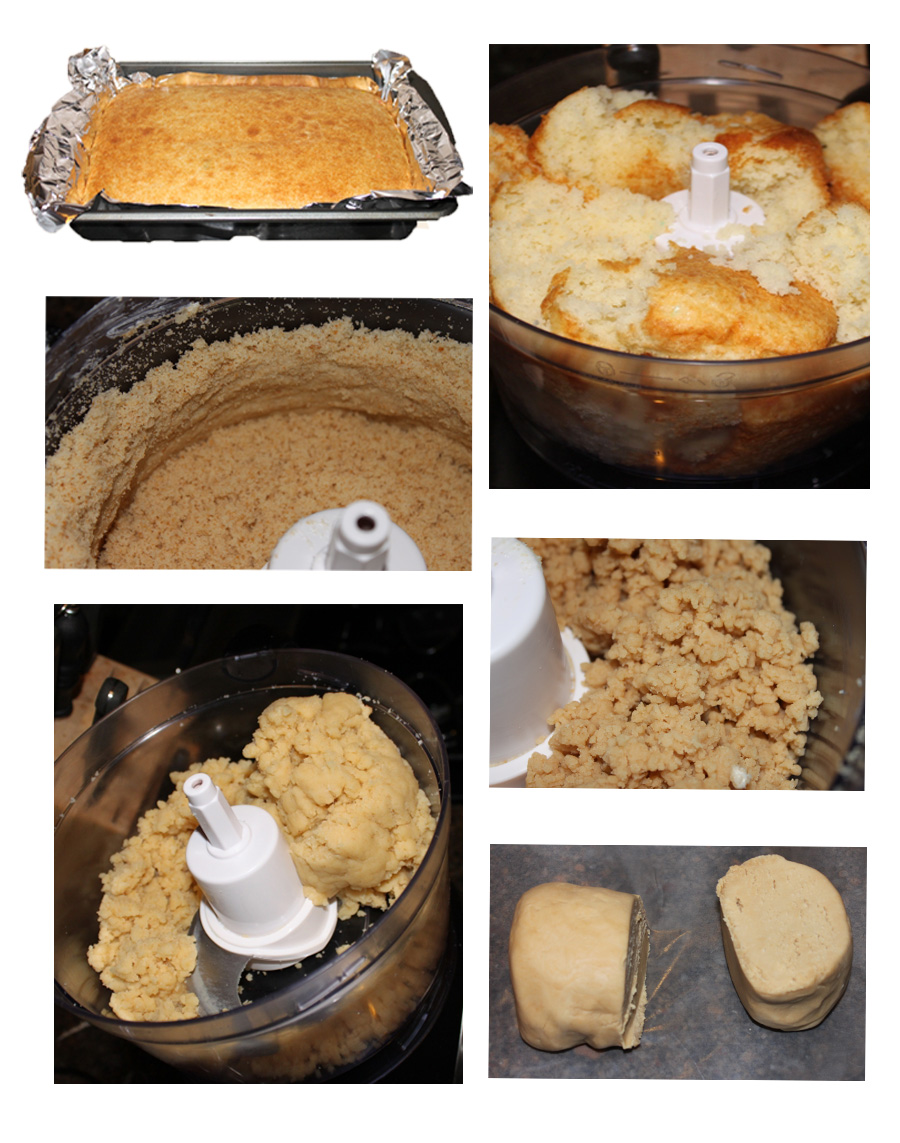
You can also do this part by hand! Just grab some gloves and knead the cake till it turns to dough. If you do this by hand you may need a couple TBS of frosting to really get it going. Next roll your cake into 1.25 inch balls. The Easiest way to do it is of course in our Easy Roller or New Mini Easy Roller! Take a look on how that works here, it’s just 30 seconds:
If you are really serious about cake pops (or Cookies & even Meatballs!) check out the Easy Roller, it is the same concept but rolls 21 at once rather than 9! Next melt down your candy melts or chocolate almond bark in the microwave on 50% power (or defrost) for 30 second intervals until it is melted. then dip your cake pop stick into the chocolate, then into the cake ball. Next dip the entire ball in the chocolate candy melts or almond bark.
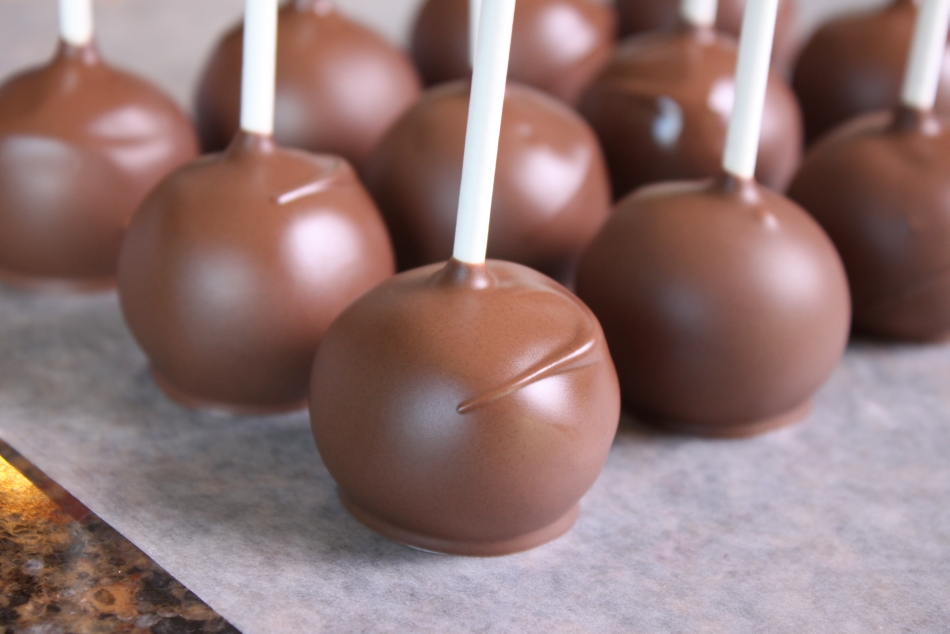
Let them set upside down like this on wax paper until they have set. Then melt the white chocolate candy melts in a sandwich bag and cut just the tip off one of the corners and with even pressure squeeze the bag while turning the pop with your other hand. See how we do it in this quick video.
Next all you have to do is wait for that to set and then wrap them up in a little 4X4 bag and put them in your new Turkey Cake Pop holder! 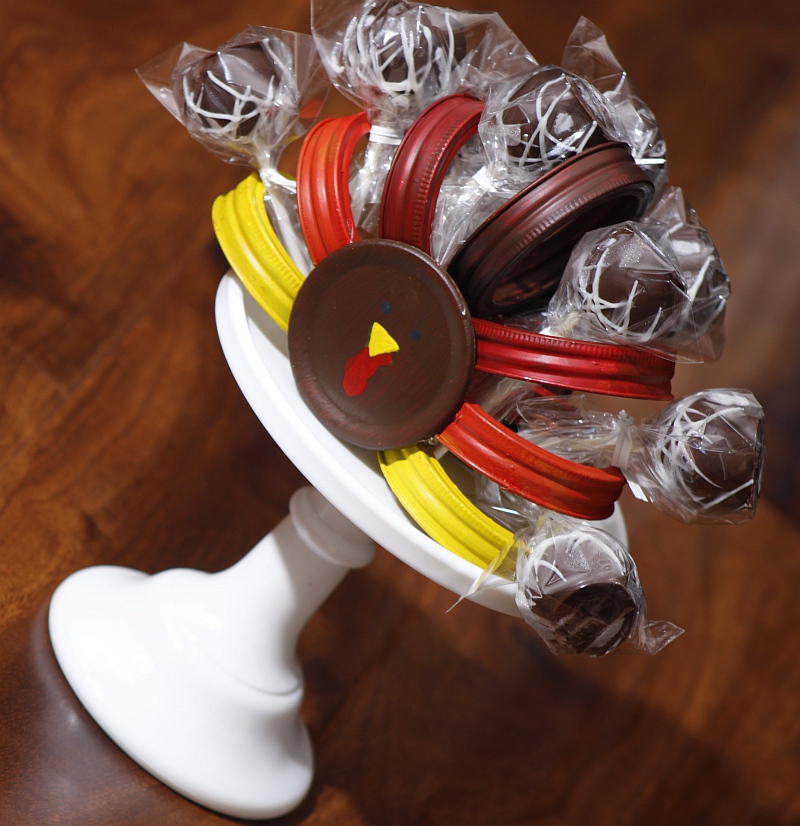
If you like the tutorial don’t forget to check out and share our Easy Roller or New Mini Easy Roller with your friends! It is how we keep these tutorials coming:)!