
Let’s learn how to make these Cupids Vault Arrow Cake Pops!
WHAT YOU WILL NEED:
- Box Cake Mix of your choice (Or your favorite recipe)
- 3 Eggs
- water
- Vegetable Oil
- Milk Chocolate Candy Melts
- Toothpick
- Red Candy Melts
- Small Candy Wrappers
- Mini Easy Roller (optional)
- Arrow Mold
- Pink Candy Melts
- Mason Jar/Lid
- Heart Sticker
- Red Paint
- Gold Glitter
- Ribbon
- Glue
THE BASICS:
All Cake Pops start off with a baked cake, and these Cupid Cake Pops are no different! This can be store bought or your best recipe. Next you are going to crumble it down and knead those crumbs into a “Play-doh” like consistency. I always use my Food Processor to do this, but a mixer (with a paddle attachment) works just as well! It is much faster than doing it by hand and you will get more consistent results. Take a look at the steps it goes through in about 1 minute! First it will break down into fine crumbs, then they start to stick to each other and form a bit bigger of a crumb and finally if you leave it in long enough it will turn into a big ball of dough all by itself!
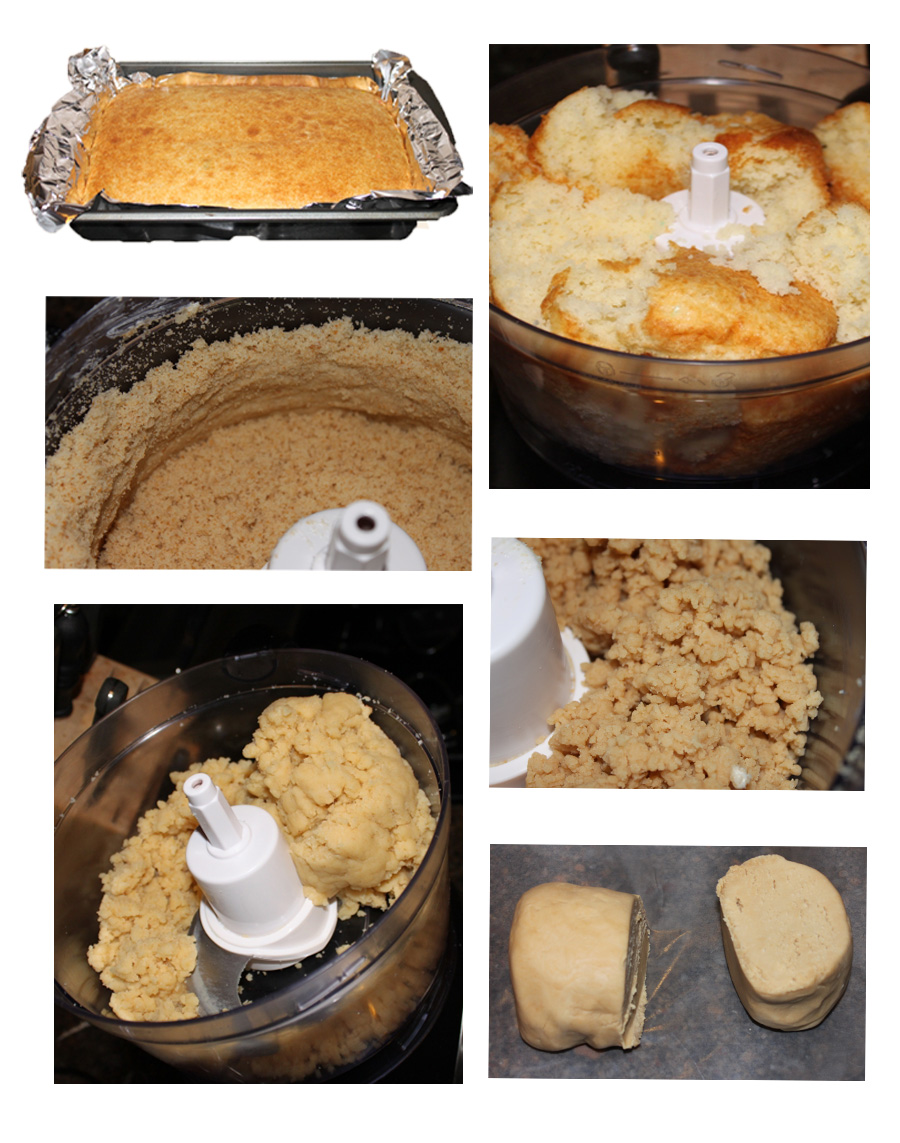
Next you will roll all your cake dough into 1.25 inch balls (about the size of a ping pong ball). For faster, more consistent results, the Mini Easy Roller rolls 9 cake balls at a time and will allow you to fly through this step!
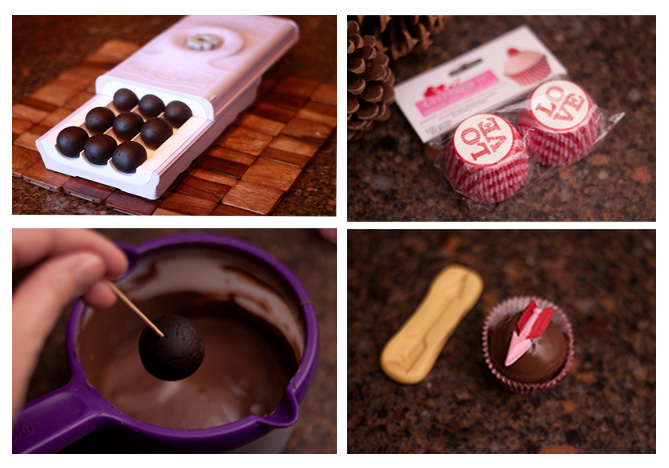
Once you have finished rolling, place the cake balls into the fridge as you prepare your chocolate candy coating, it is always easier in my opinion to dip cake balls if you refrigerate them for a bit first. We used chocolate almond bark on this project and to melt it down we simply put it into the microwave on 50% power in 30 second increments and stir each time until it has a nice even flow to it. Since these cake balls will not be placed on a stick, we use a toothpick to dip the cake ball into the chocolate almond bark. Tap off any excess and place it into the candy wrapper to set. Twist out the toothpick and cover the hole with a little bit of chocolate (preferably before the chocolate sets so it all blends in as one coat). Next place the candy arrow right on top.
![]()
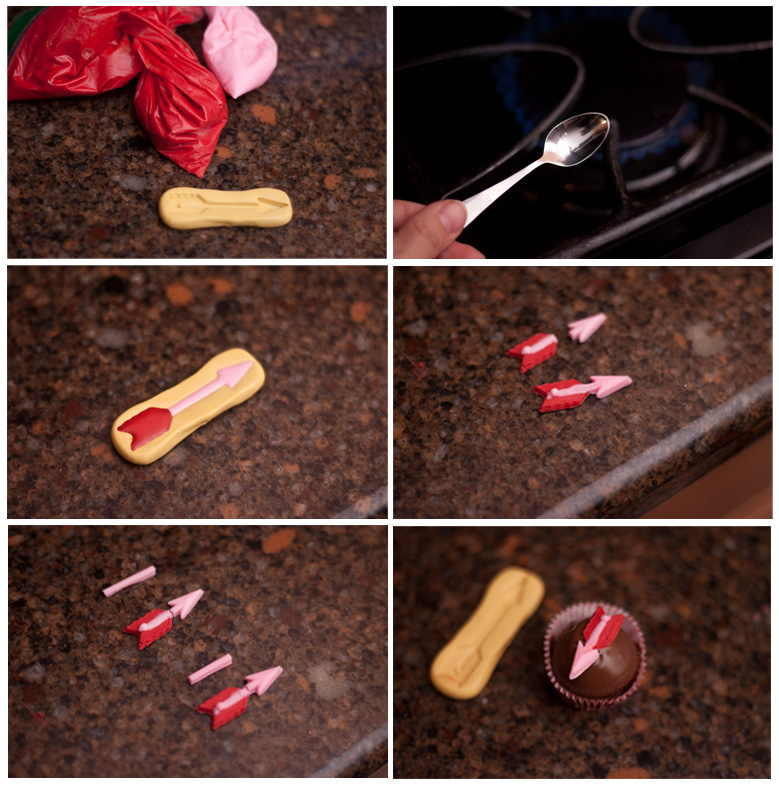
DECORATING FUN:
To make the candy arrow I used a candy mold (you can find this one at Lollicakes by Ella). I used pink and red candy melts to make the arrow. The only problem was the arrow was a bit too long for my cake pops and since I didn’t want them to break I needed to cut them down. After they set I broke them at both ends and discarded the middle portion of the arrow. I heated a spoon and touched both ends of the arrow and put them togther to re-set. This the the small arrow I used.
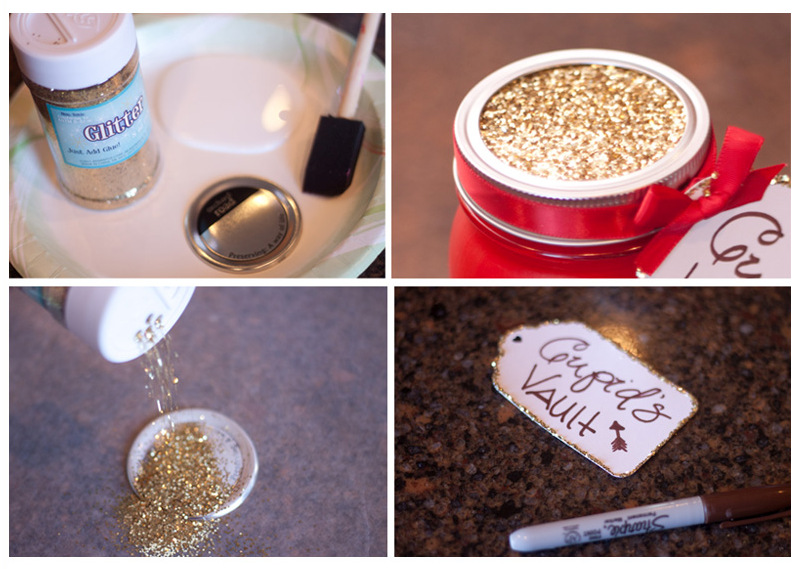
To decorate the Mason Jar, I cut a heart sticker from some scrap vinyl with the Cricut Explore™ (However any heart sticker will do) and placed it on the Mason Jar where I wanted the “window” to be. Next with Red Paint I painted the entire jar. About 3 coats. Once I was finished I pulled the heart sticker off, it is best to peel the sticker as soon as you are done painting. If you wait for it to dry make sure to use your fingernail or a thin sharp object to trace around the sticker to cut the paint free – so you don’t pull off the paint with the sticker! As soon as the paint is fully dry you can add your cake truffles!

![]()
To decorate the lid I used regular school glue and gold sprinkles. Just paint the glue over the lid and sprinkle the glitter. Just make sure you do this over a piece of wax paper so that you don’t get glitter all over the place, (and of course I am speaking from experience)! Once that is dry, place it over top of the Mason Jar. Add your ribbon around the band and of course the Tag!
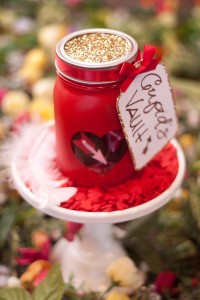
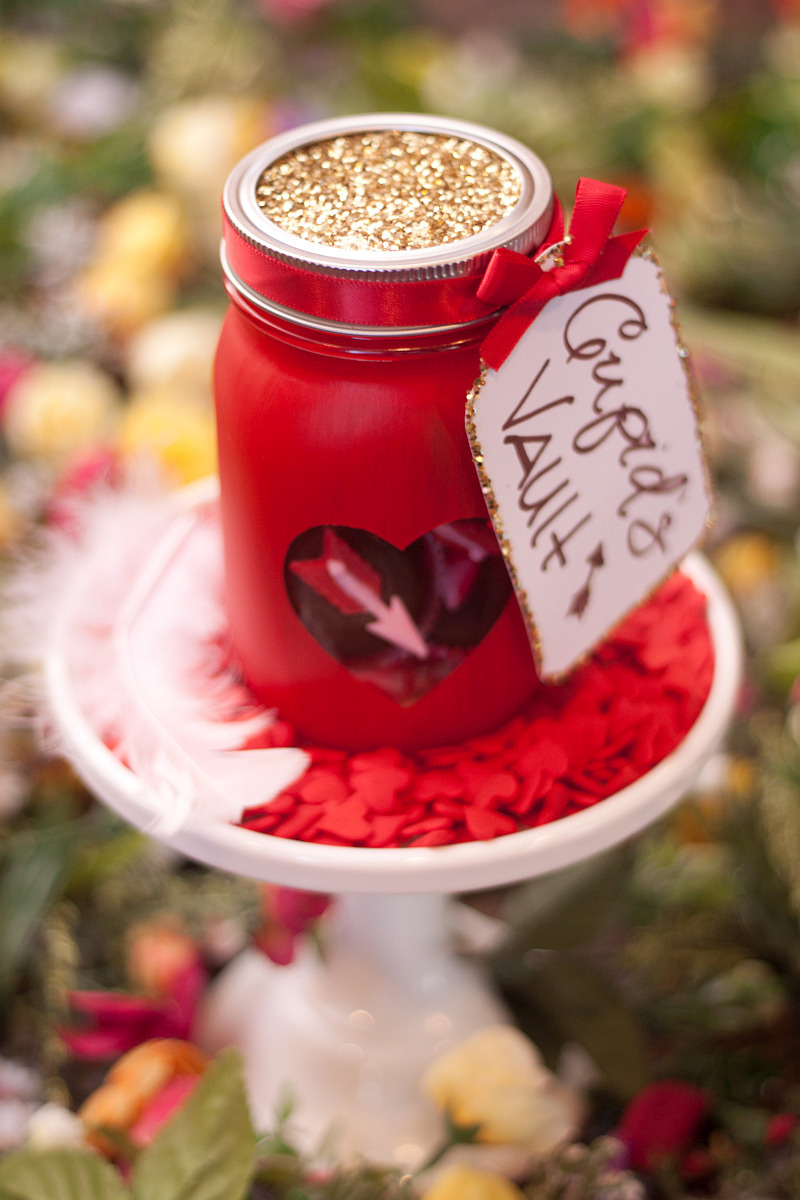
FINAL PRESENTATION:
Perfect for your Valentine or even fun as a teacher gift this year!
![]()
If you need help finding anything in this post, here are a few resource links:
-
-
-
-
- Fillmore Container for Mason Jars and lids
-
-
-
-
-
-
- HCP Easy Roller for the Mini Easy Roller
-
-
-
-
-
- Lollicakes by Ella for the Arrow Mold
-
-
-
-
-
- Cricut Explore™ for cutting anything
-
-
-
-
-
- Papermart.com for Ribbon
-
-
-
-
-
- Joann Fabric and Crafts for Candy Melts, Paint, Candy Wrappers, Glitter, Tag, etc.
-
-
If you like the tutorial don’t forget to check out and share our Easy Roller or New Mini Easy Roller with your friends! It is how we keep these tutorials coming:)!