
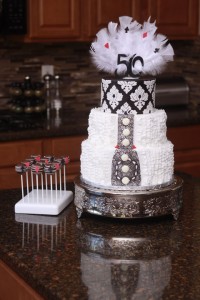
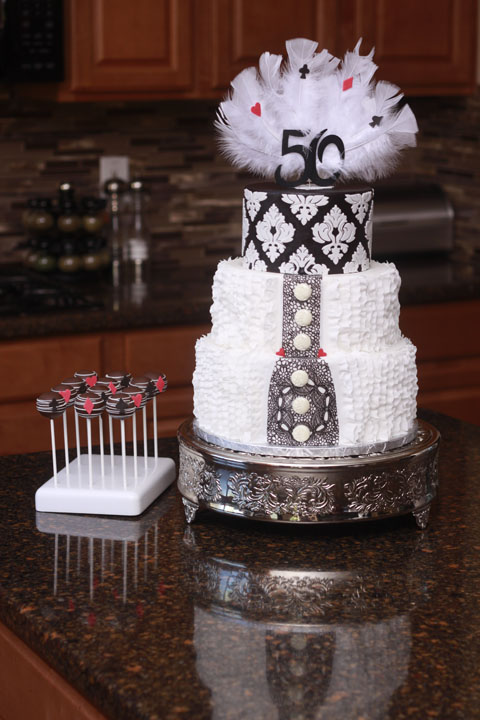
This is my ‘Las Vegas Cake’ with a little show girl flair! Let’s walk through how I made it, stepbystep.
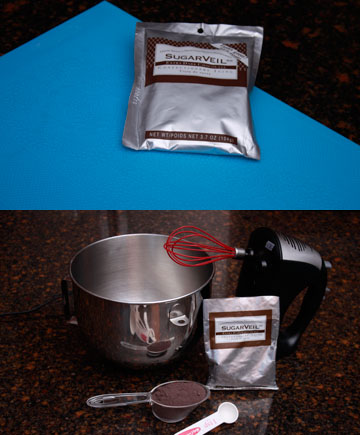
I started with Chocolate Sugarveil and the SugarVeil Circle Bouquets Mat. It dries a very pure black, so it makes for a beautiful, delicate, edible black lace.
I don’t need much SugarVeil Icing for this cake so I measured out 1/3 cup of the Chocolate SugarVeil mix and 5 tsp of water. I used my hand mixer to mix it up for about 4 minutes. Check your local Michael’s for SugarVeil Icing otherwise you can order here.
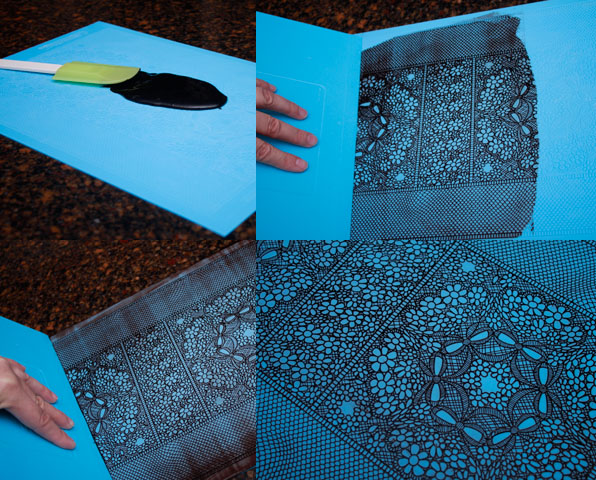
Pour the Sugarveil Icing on to the mat and use the spreader to move the icing all over. Swipe the icing several times back and forth and sidewise to ensure all the crevices are coated. Once you are confident the SugarVeil has completely coated the mat, rinse the spreader and go over it a final time. this will take the excess off and expose the design.
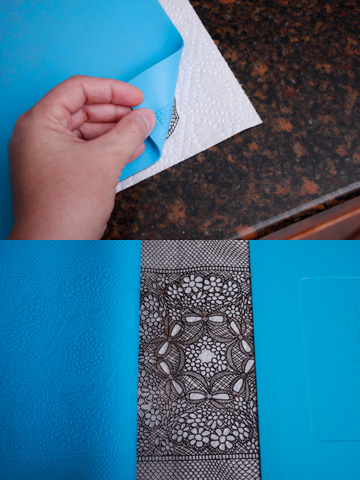
Let the SugarVeil set. This mat is very fine and delicate, so this one dried pretty fast. You can “oven set it” if you are in a hurry (it only takes about 3 minutes.)but I just let it dry on the counter. As soon as it can lift away from the mat with ease it is ready! I always put a piece of paper towel down and face the design to the towel. Peel back just enough of the mat to set the spreader across the top of the exposed lace design to hold it in place. Then pull the mat from the design and inch up the spreader holding the lace down as you go.
Baking the cakes! I made this cake a simple chocolate cake. I have always used boxed cakes (since I started with cake Pops and for cake pops it is really not worth the effort to bake a scratch cake) but for stacked cakes like this one I always doctor it up a bit to be able to hold the weight and not break apart under stress. No matter what box of cake it is -although with school aged kids it’s usually Betty Crocker for the box tops;), it could be chocolate, vanilla, marble, strawberry (you get the idea) this is what I do.
- Box of cake mix
- 1 cup of milk
- 1/2 cup sour cream
- 1 box instant pudding
- 4 eggs
- 1/3 cup of oil
Instead of what the box says to add.
Then make sure you have some good straight sided pans (These are 2 inch deep Fat Daddios, & I love them!) and fill them half to 2/3’s the way and bake! -Pic #1
Once the cakes have cooled I level them all. The fastest, least stress way to level a cake is to simply just use the Agbay. I even cut the bottoms off since I can cut just 1/8 of an inch at a time – Pic#2
Picture #3 For the chocolate mousse like filling. Don’t judge, everyone loves it and it’s inexpensive (you’re welcome).
- Box of chocolate instant pudding
- 1 cup of whole milk
- container of Cool whip
To make it, as I am sure you will guess;) Open the box of pudding add one cup of milk, stir. Then fold in the container of Cool Whip with a whisk. Set in the refrigerator until it sets. Which is pretty instant since there is only 1/2 the milk!
Use any kind of stiff frosting (or the left over ganache) as a dam and spread the filling between the layers.
Pic #4 below- I always coat the cakes in a layer of ganache so the sides look amazing (although with this cake it was more of a taste thing since the sides will be mostly covered up) To make this ganache I use 3 parts chocolate (I use mostly Almond bark and a little of the semisweet chocolate morsels and it always works and tastes great, no need to spend a fortune on “real chocolate” if you don’t want to) to 1 part heavy cream and mix well and let it set until it is the consistency of peanut butter.
To make covering the cake in ganache super simple, it’s all about the acrylic discs!! So easy! Put a dab of ganache on the bottom disc and attach it to the bottom cake circle. Then use a dab of ganache to attach a piece of parchment paper to the top disc (just make sure its about 1.5 inches smaller then the disk) Then coat the top of the cake with ganache and put the disk right on top. Make sure the sides are straight (the disc matches up on the top and bottom) and the top is level and then go around and slather it in ganache. Take a scraper and with the scraper touching the top and bottom disk scrape away the excess chocolate. Let it set in the fridge.
To remove the disc’s take the bottom one off first. I use a piece of fishing string and wrap each end around a piece of a wooden dowel (it reminds of the cutter they use to cut clay!) and then place it inbetween the cake and the disc and wrap the string around and pull. It will pop right off. Then Repeat for the top! You might need to fill some minor imperfections with a bit of soft ganache but it is minimal and easy 🙂

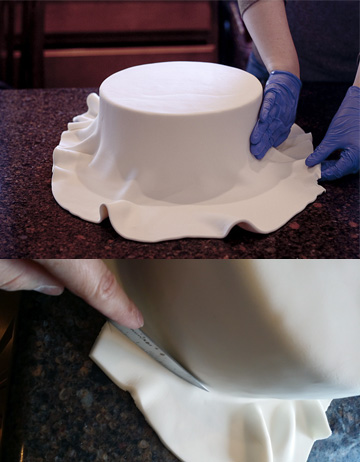
Next cover in Fondant. If you are not the best at covering cakes in fondant, this cake is for you 🙂 This will be completely hidden so don’t worry about small tears, elephant skin, nicks, you name it! So cover it with confidence and trim the excess at the bottom. Cover the bottom and middle tier in white and the top in black.
I started with the 2 bottom tiers stacked, so don’t forget to add cake supports!! You can even use plastic drinking straws if you don’t have any other dowels, but make sure you sink four to five dowels in the tiers that will be holding weight (so the bottom two tiers) in a circle inside where the next tier will sit. Now find the “Front” and attach the SugarVeil lace made in the beginning. All you need to do is cut it out in the shape you like! I wish I would have gone up and around the top corner of the bottom tier, but it wasn’t really noticeable. To attach the SugarVeil, just spritz the cake with a bit of water and that will work like glue. Make sure to use a water spritzer, or you take the risk of using to much water and making it dissolve.
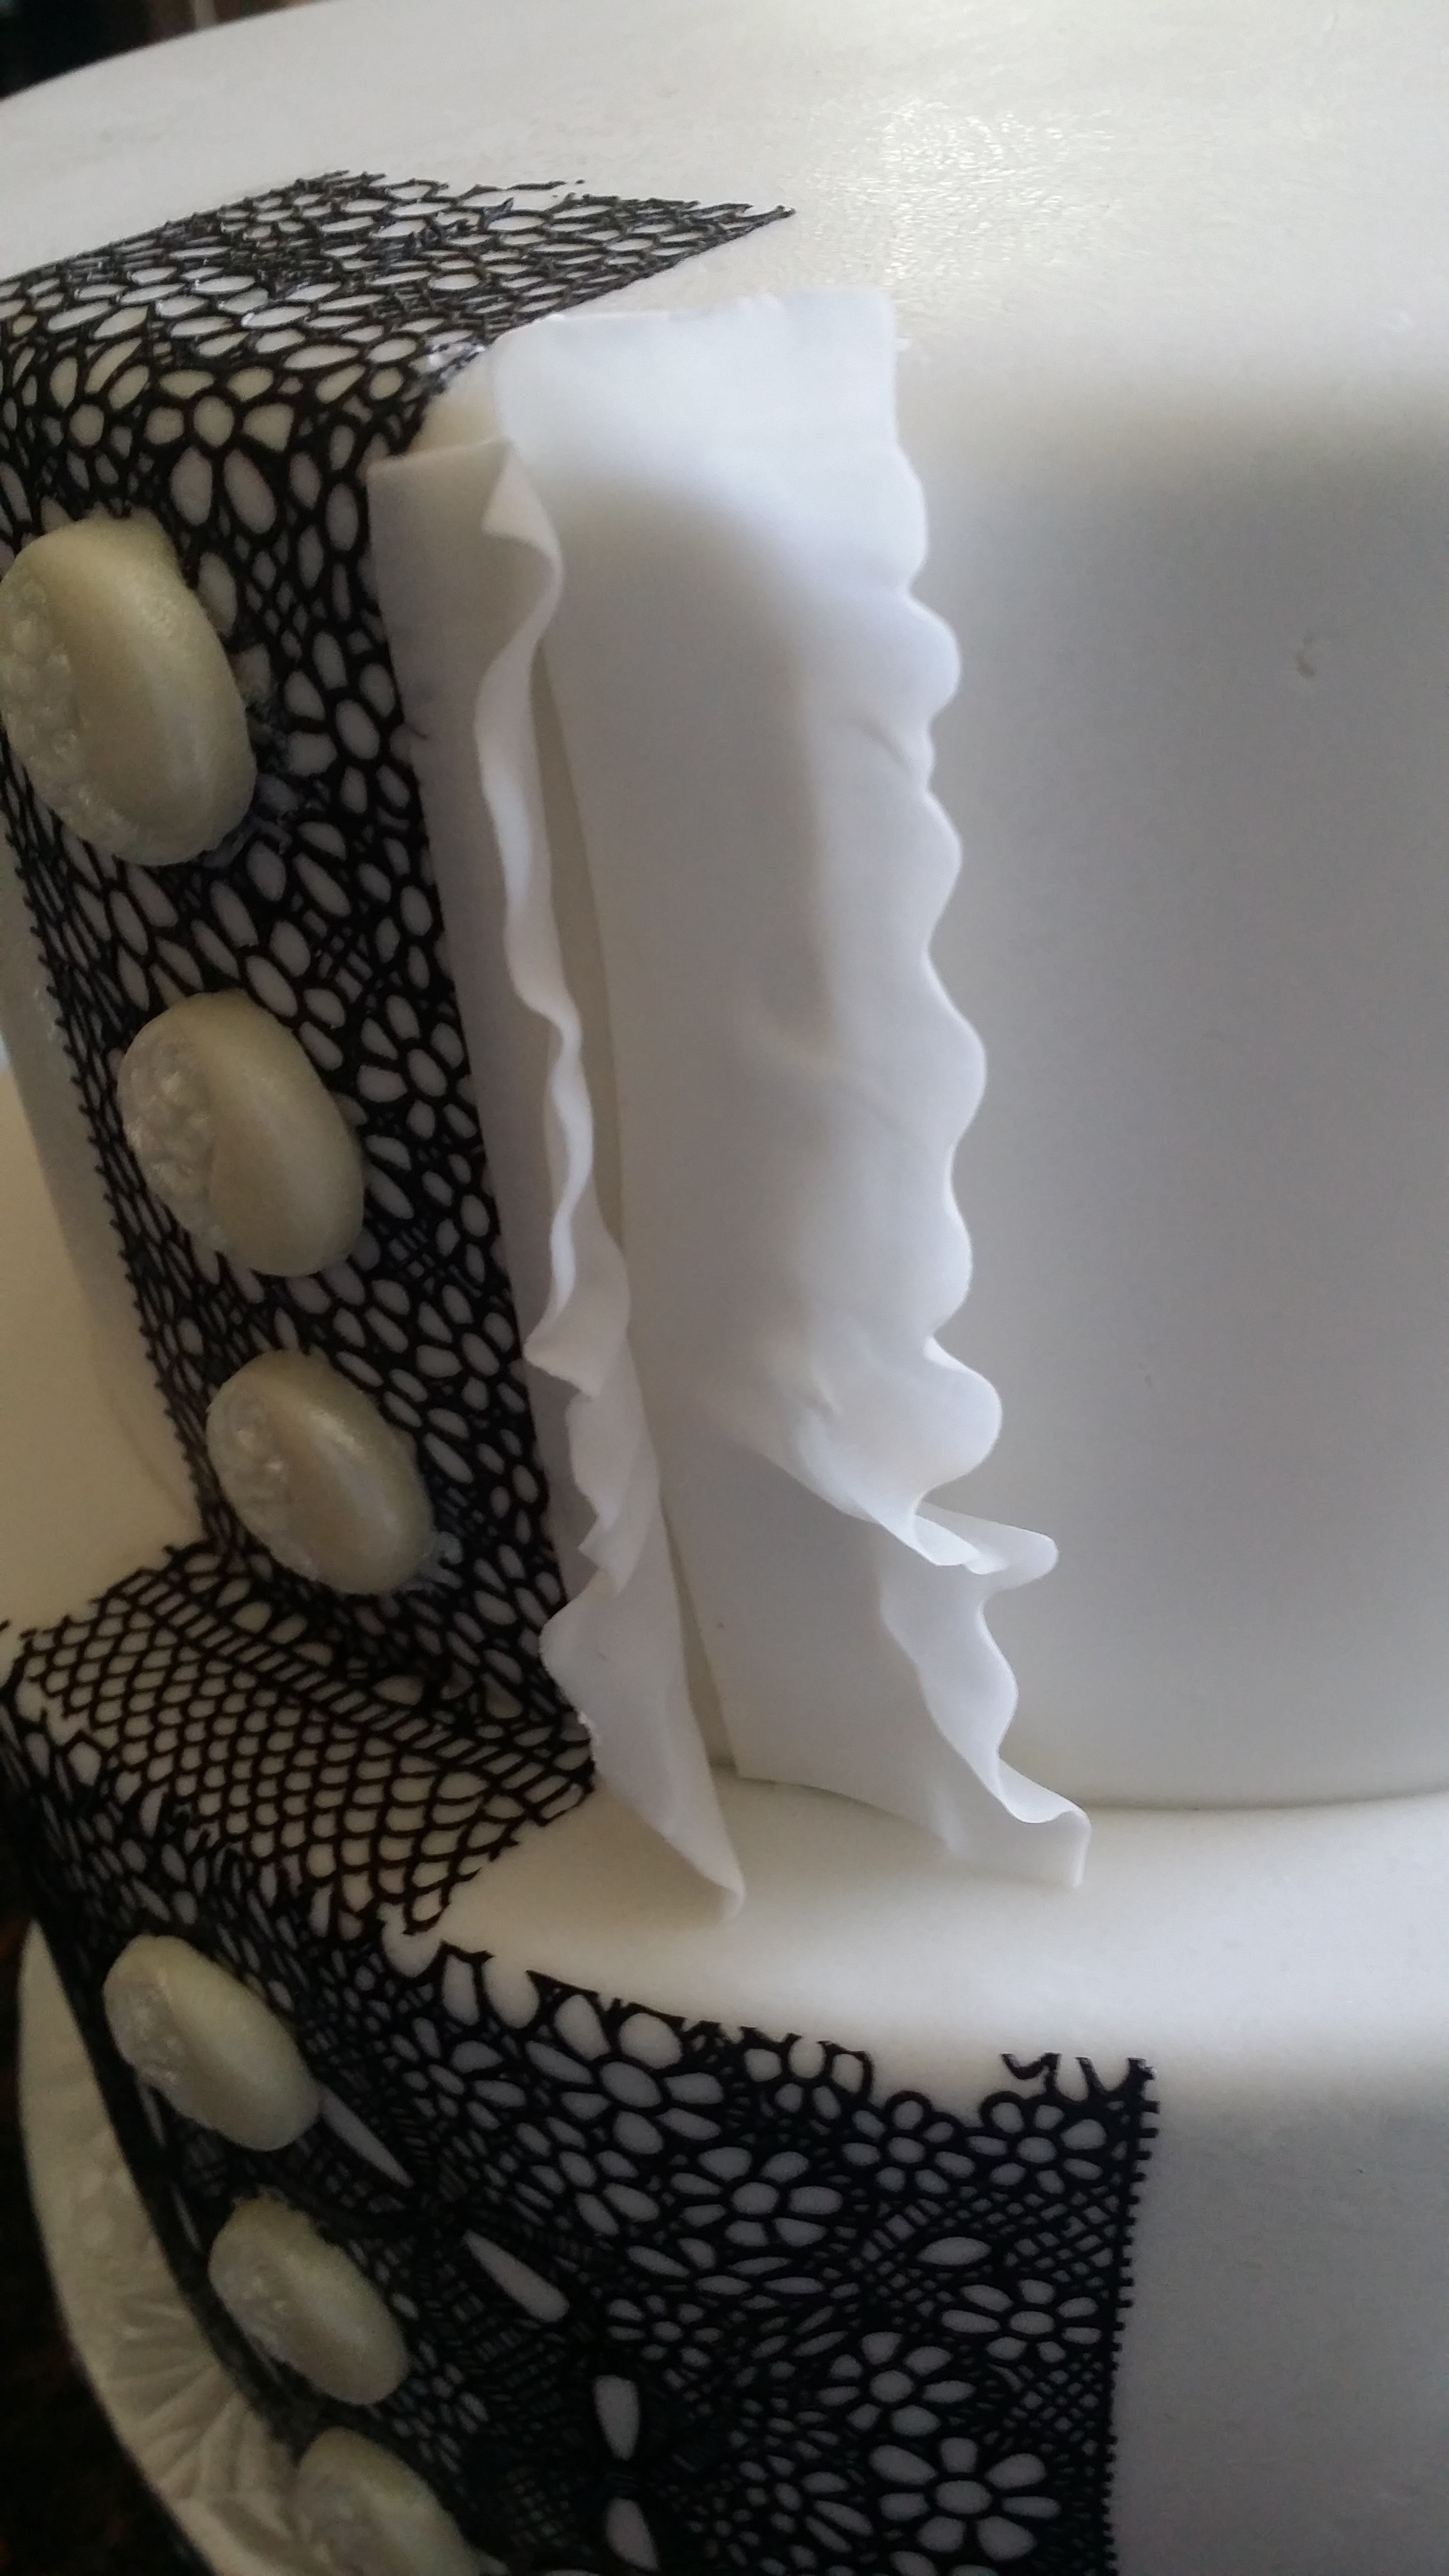
Next to make the fondant ruffles firm enough to stand, knead in a bit of Tylose Powder to it you will feel when it is firm enough, but a little goes a long way! Then roll out pieces of fondant very thin, the length of the cake tier about 1 inch thick. A LOT of pieces 🙂 Using a ball tool and some foam ruffle the edges by rolling the tool back and forth, forward and back on the one edge.
Now attach the ruffles by adding a bit of water to the straight side of the ruffle and placing it on the cake. Repeat with the next piece, just put it as close to the first piece as possible. Continue all the way around.

For the top tier I used this Damask Onlay. Run a piece of fondant through a pasta roller (if you have one) or roll it out with a rolling pin to just under the thickness of the design. Sprinkle a bit of cornstarch on the onlay and place the fondant right over it. use your rolling pin to force the fondant into the only design. Stop rolling when you see the green lines come through the fondant. Next with a toothpick remove the scrap pieces of fondant. Use the included guide to see which portions to remove.
Spritz the cake with a bit of water and place the onlay up against the cake and peel it back slowly and watch it adhere beautifully and effortlessly adhere to the cake. I also made one of the top center!
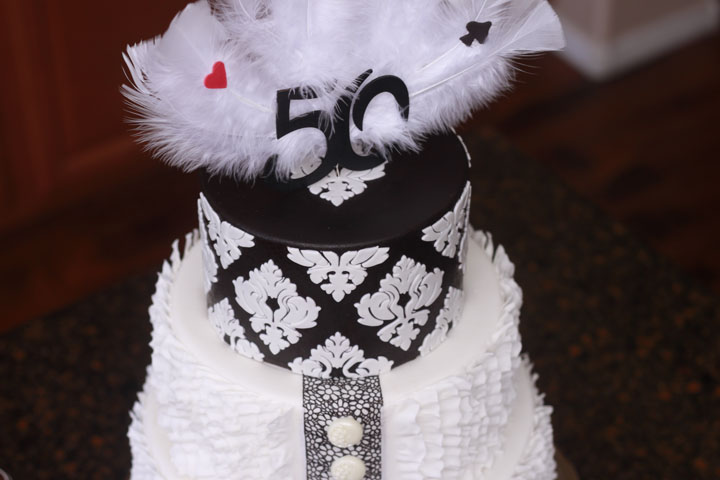
To make this topper I just glued some craft feathers in a fan shape to a small piece of paper at the base. I also glued in some fondant cut outs of a spade, heart, diamond and club (I made some extras of these and saved them for some matching cake pops!) to the feather. The “50” was a wooden cut out I painted black from Michael’s. They are both stuck into the cake with a toothpick that I hot glued to the backs.
Speaking of matching cake pops! Did you know you can use all those pieces you cut off the cake to level and stack it?! Cake Pops are the PERFECT way to control waste management in the cake decorating industry! All you have to do is knead your cake into a doughy consistency, we stick our extra pieces of cake into a food processor or mixer and turn it on until it is dough, but you can do it by hand if you really want to!! You might need a bit of that leftover ganache, or mousse to help it bind together since this doctored cake recipe is more dense. Here is how you do it!
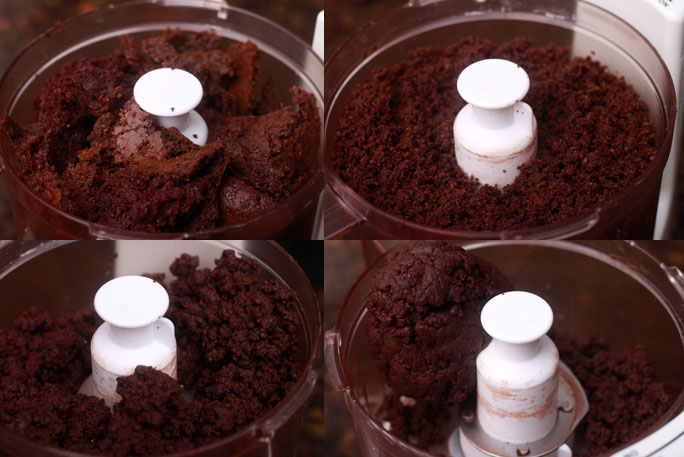
Just like that! Cake Dough for cake pops! Now to roll it in a ball, you can do that by hand as well, or you can make them super fast with one of the Easy Rollers! This is the Mini Easy Roller and it can roll 9 at once – Pretty Fast, Huh?!
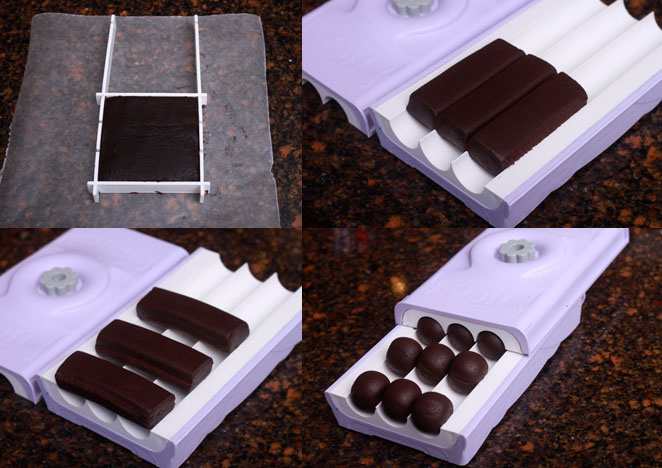
Now just grab a cake pop stick and dip it in some almond bark (melt it on defrost for one minute and then 30 second intervals) and then dip the entire pop. Add the fondant cut outs for decoration (or sprinkles, or just pipe a quick swirl) and Viola!

As always if you like these tutorials and want to see more please “like” and “share” our Easy Roller or New Mini Easy Roller with your co-workers, friends and family! It is how we keep them coming, it also means the WORLD to me:)!!
Now for the best part!! It’s Give-a-way Time!! In this Give-a-way we have for one lucky winner:
- SugarVeil Icing, 5 packets of the Original and 5 packs of the new Chocolate to try!
- The Damask Onlay from Marvelous Molds, or Onlay of your choice!
- One Mini Easy Roller
Just “Like our Pages” & fill out our entry form and we will email the winner next Friday 6/17/2016. Anyone can enter, please only one entry per person, all duplicate emails will be deleted.
CONGRATULATIONS Elizabeth! You WON!! We just sent you an email :)!!