
How do you stop Yellowing cake pop sticks?? If I were in the UK I would buy solid plastic sticks, but here in the USA the only plastic sticks you can get are hollow, which I don’t like as much:( I have heard there are things that cause it, like there is too much frosting in the cake dough or too much oil in the cake itself… Yep that is true, cake has oils in it (or butter) and the yellow stuff that quickly wicks up the sticks within 24 hours of making your cake pops is all the oil from whatever you put in your cake/icing:)! I tried a “diet coke” cake once and even that one had some problems with the stick yellowing. I am pretty sure it took much longer, but just the overall moisture in the cake pop dough will eventually come out some how, and the least form of resistance is to have the paper sticks absorb it. So here are some cake pops I made a week ago! Normally they would never last that long around the house, but this was for experimental purposes;)! I made these the same as usual, I dip the stick into chocolate, then into the cake ball and again dip into chocolate to coat the cake ball. I them tap off excess chocolate and into my favorite cake pop stand to dry! You can see the sticks are yellow all the way to bottom now!! What is “same as usual?”

I think it took me a few months of making cake pops before I noticed the yellowing sticks, so I think the occasional “eater” of cake pops would probably not even notice, but if it bothers you, here is a way to save your cake pop sticks from yellowing, without changing your recipe:)!! Exciting Right??
Start by dipping the cake pop stick in chocolate. You will want to dip the stick into the chocolate deep enough to cover where your cake ball will sit on the stick. I like to push the stick almost all the way through the cake ball, so I am dipping about 1.25-1.5 inches up the cake pop stick.

Tap off the excess chocolate and stick them into your favorite cake pop stand to set. Letting this set is key:)! Now if you have some free time you can pre-make as many of these chocolate coated sticks as you would like ahead of time and store them in a plastic bag or storage container. Noel from The Cake Poppery has also figured this little trick out and is just one of the tips and tricks you will find in his book Amazing Cake Pops!

Once that chocolate candy coating has set re-dip into the melted candy coating and then stick it into the cake ball and dip as normal. The only thing to watch for is to make sure the new chocolate candy coating on the stick does not come over the old candy coating. I dipped the stick pretty high up so you can see I am not going to get “new candy coating” higher then the already set candy coating on the stick. You don’t need to get as carried away as I did with the first candy coating dip, but again you want to make sure the cake ball and the new candy coating will be within that pre-coated area, otherwise the yellowing will still happen!

Dip and decorate as normal:)! This little flower is a cut out from the SugarVeil Flower Net Mat:)!

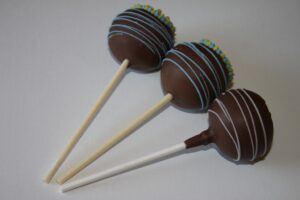
Once the candy coating is set you are good to go! No more Yellow Cake Pop Sticks!! YAY!! Check it out, I made these cake pops on the same day a week ago!!

So much better this way:)!

If you like our tutorials, check out and SHARE our Easy Roller (or our new Mini Easy Roller!) It is how we keep tutorials like this coming;)! You can order online HERE!