
Here you will learn to make cake pops! More specifically, Rib Cage Skeleton Cake Pops!
To get started, bake your favorite cake recipe. If you are just making cake pops, one box of cake will make about 30 cake pops if you are using the standard Easy Roller. If you don’t have the Easy Roller yet, think ping pong ball size once they are dipped.
You can also take all the tops and bottoms from a decorated cake, yesterday’s cupcakes, or even a store bought cake! Just crumble and knead it down until it is a pliable dough. Think the consistency of Play-Doh;)! You can do this by hand (you also will need a bit of frosting this way). However, it’s faster, and easier on the wrists if you just put your cake into the mixer or food processor. Just leave it in there until it turns to dough! No Frosting needed! However, if you’re looking for some extra sweetness, or special flavor, go ahead and add it all in at once!
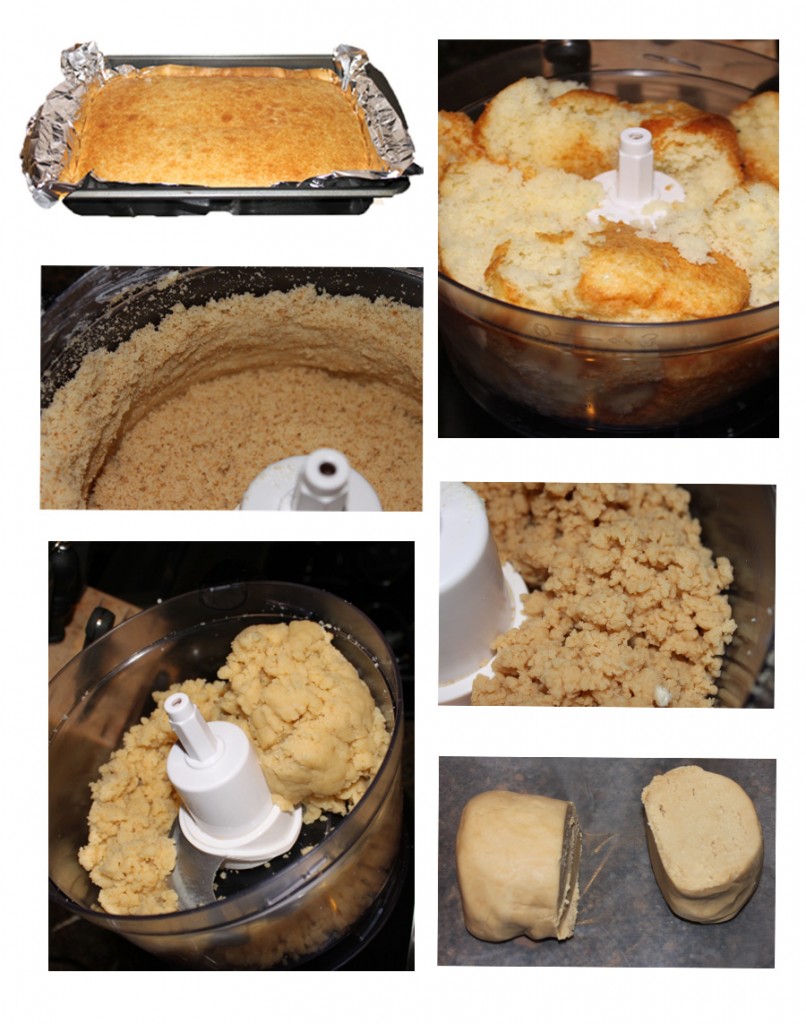
…if you don’t make cake pops often but you still would like to make them faster our newest “Mini” Easy Roller is now available! (This one rolls 9 at a time!) Once all your cake is rolled into balls dip them into melted candy melts. To prepare the candy melts, place the candy melts in a microwave safe container and place it into the microwave on 50% power (or defrost) for 1 minute, take it out of the microwave and stir. Put the bowl back in the microwave at 50% power, in 30 second increments until fluid)!
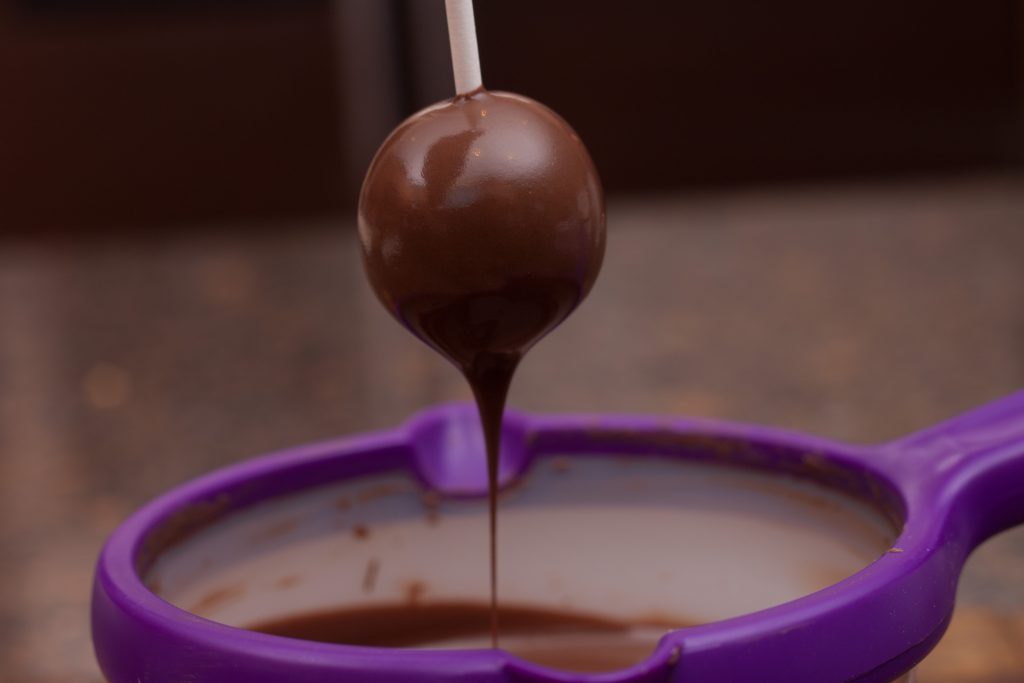
Tap off the excess and place them on wax paper until the chocolate sets.

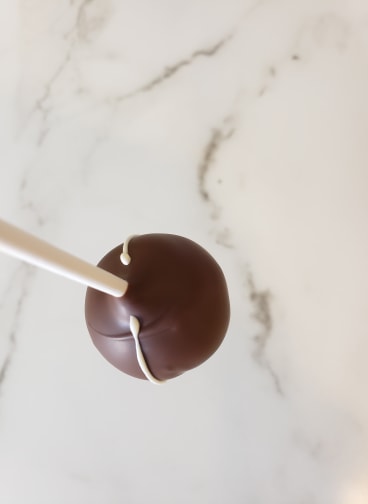
Next, microwave about an ounce of white candy melts (on 50% power, in 30 second increments) until fluid and pour it into a sandwich bag. Then cut off the tip of one corner.
Draw a line vertically down the front and the back:
Then you just connect these lines in a “c” shape:
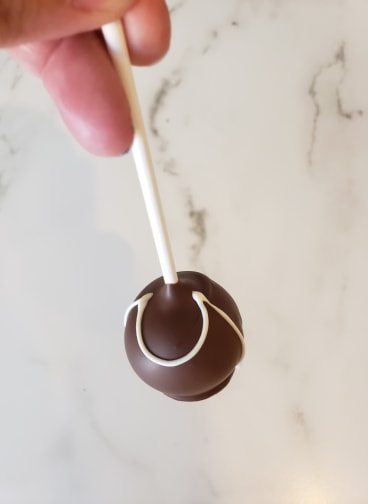
Continue until you have no more room!
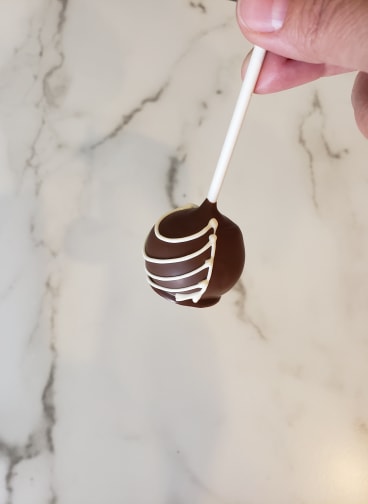
Next connect them on the other side:

Then Make the “sternum” a little thicker where they meet and Enjoy!!

As always if you like these tutorials and want to see more please “like” and “share” our Easy Roller or New Mini Easy Roller with your co-workers, friends and family! It is how we keep them coming, it also means the WORLD to me:)!!