I absolutely LOVE marshmallows so when MaddyCakes Muse told me you can MAKE them I was right on it!!
First came across Martha Stewarts Recipe and I must say the first time I made them they were perfect!! But the next time I must not have boiled the sugar long enough, (they just gave an amount of time, not a temperature) because they never “set!” What I found out was you need to bring the sugar mixture to a certain temp for them to turn out right!! So here is my new recipe that I use and LOVE! I hope you enjoy it!
Homemade Marshmallow S’more Pops:
- 1 cup cold water split in half
- 3 packets unflavored gelatin
- 2 cups sugar
- 2/3 cup light corn syrup
- 3tsp. vanilla
- ¼ tsp. cinnamon
- Crisco
- Wax Paper
- Chocolate candy melts
- Graham cracker crumbs
- Candy thermometer
- Easy Roller (optional)
Directions.
- Put 1/2 cup of water into a stand mixer …it needs to mix a LONG time so I recommend a stand mixer if you don’t want your arm to fall off;)!!
- Then add the 3 packets of gelatin powder to the water in the mixing bowl.
Let that “bloom” ….or sit there while you get your sugar mixture together 😉
For the Sugar mixture:
- Put the other ½ cup water into a medium sauce pan
- Add 2 cups of sugar
- Add 2/3 of a cup of light corn syrup
On medium to medium high stir the sugar mixture and let it get to 240 degrees Fahrenheit! VERY IMPORTANT!! The marshmallows will be way too soft and not really “set” if you take it off the heat too soon!
Once the mixture gets to 240 degrees, turn on the mixer on low speed and slowly add the hot sugar syrup. Once all the sugar syrup is in the mixing bowl turn the speed on the mixer up to medium high for 1 minute and then bring it up to high speed for next 5 more minutes. After about 6 minutes of mixing add the flavoring. You can substitute the vanilla and cinnamon for a flavor of your choice. But for these S’more Pops this is what makes them AWESOME! Let the flavor mix through for another 1-3 minutes. When it has about tripled in size and if you put a thin dab on the counter if it dries firm it’s done! The total time mixing is about 8-10 minutes.
I turn this mixture out into a WELL GREASED silicon pan. You can use a regular pan, but I find they are easiest to release from a silicon pan! WARNING** They are SUPER STICKY**!! So also grease your spatula before sticking it into the marshmallow mixture. After I dump all the marshmallow mixture into the pan I take a piece of wax paper and grease one side of it well. Then I take the wax paper, greased side toward the marshmallow and use it to push the mixture into the corners of the pan and flatten out the top. You can try to do this with the spatula but I think it much easier with the wax paper!
Once you get the marshmallow all flattened out into the pan place it in the refrigerator for about 2 hours. When it’s firm it’s ready to cut!
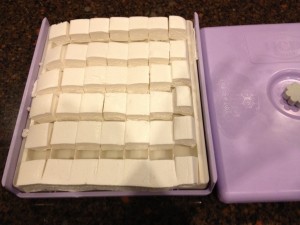
The Easy Roller is not just for Cake Pops!! (No I am not going to “roll” the marshmallows) I also use it to cut my marshmallows into perfect 1.25” squares (I think homemade marshmallows are supposed to square) First, like everything that touches this sticky marshmallowiness you have to grease the Easy Roller really well! Then you’ll have to push down a lotlittle harder to cut marshmallows then cake dough, and kind of slide it back and forth, but it works!! No more pizza cutter or scissors for uneven marshmallows for me!! Here are the pictures:
Grease the Easy Roller insert well! This stuff is STICKY!!
Turn the marshmallows on to the Easy Roller.
Place the lid over the top and push down. As you push down slide it back and forth to help cut the strips out!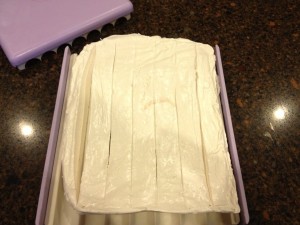
Replace the strips the other way… if you are not using the Easy Roller to roll, you can use it to portion 49 pieces at a time! So go instead of just 3 strips, go ahead and stack on as many strips as you can!
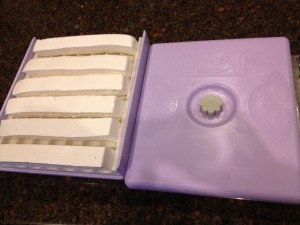 Place the lid back on top and push down while sliding a little to ease the cutting!
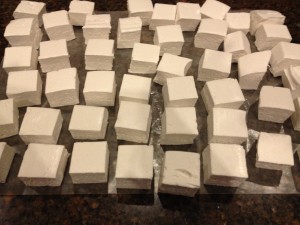
Look at that!! I made 42 perfect little 1.25″ square homemade marshmallows:)!! Don’t ya just LOVE the Easy Roller!! Then take a sheet of greased wax paper to place them on so you can start dipping them in chocolate! (if you just want them to be plain marshmallows mix together about 1/2 and 1/2 of corn starch and powdered sugar and sift over all the sides – so they are not so sticky!) But if you want to cover them in chocolate you can skip this sugar coating step:)
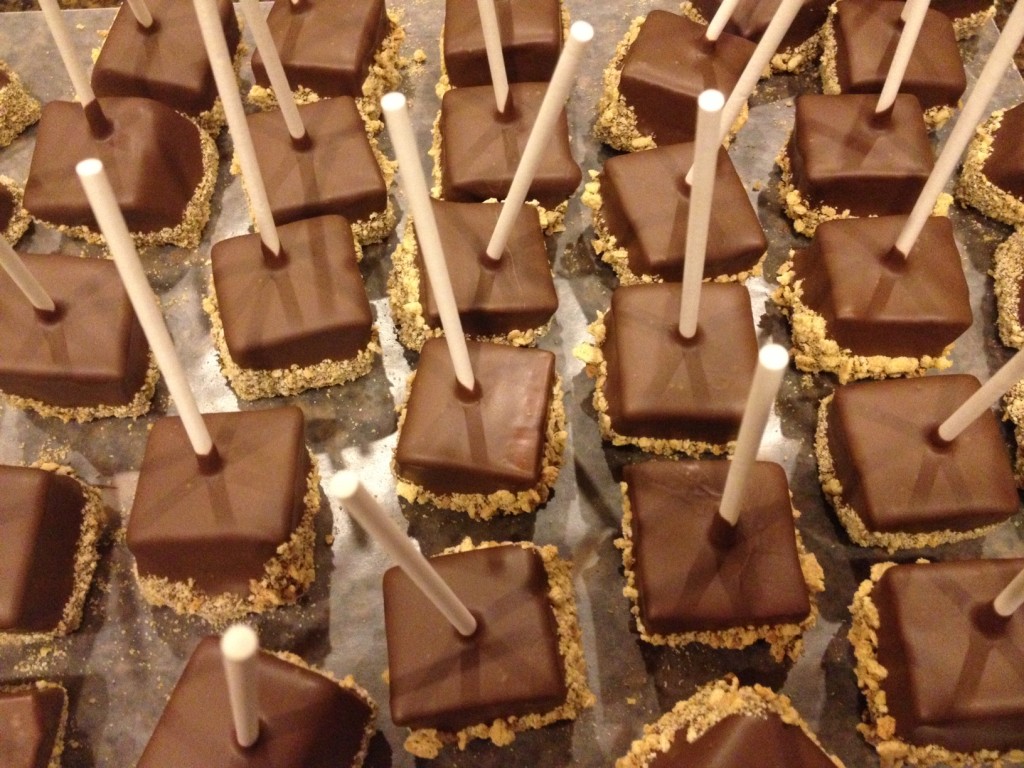
After you have them all cut and laying on a piece of greased wax paper (they are STILL super sticky) melt you candy melts on half power in the microwave and dip them into the warm chocolate candy coating. (not too hot or it will start to disintegrate the marshmallow;) Then roll the bottom of the pop into the crushed up graham cracker and let the chocolate Set on a clean piece of wax paper. As soon as the chocolate coating has set it’s time to EAT… YUMMMMM!!! I like them better this way, you can pack them up or display them at your next party and it is a S’More you DON’T have to eat over the sink;)!
Don’t forget to take a look at our Easy Roller, it is how we keep these tutorials coming to you:)!


