

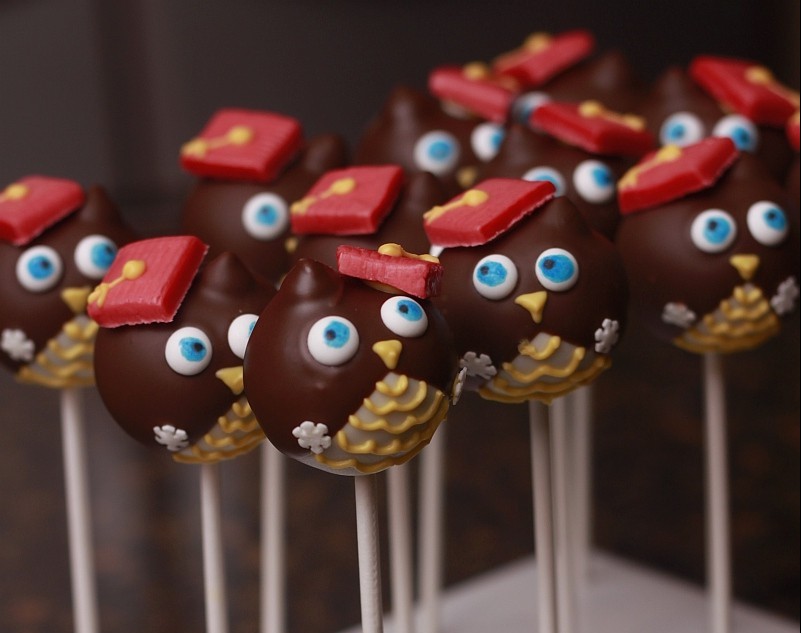
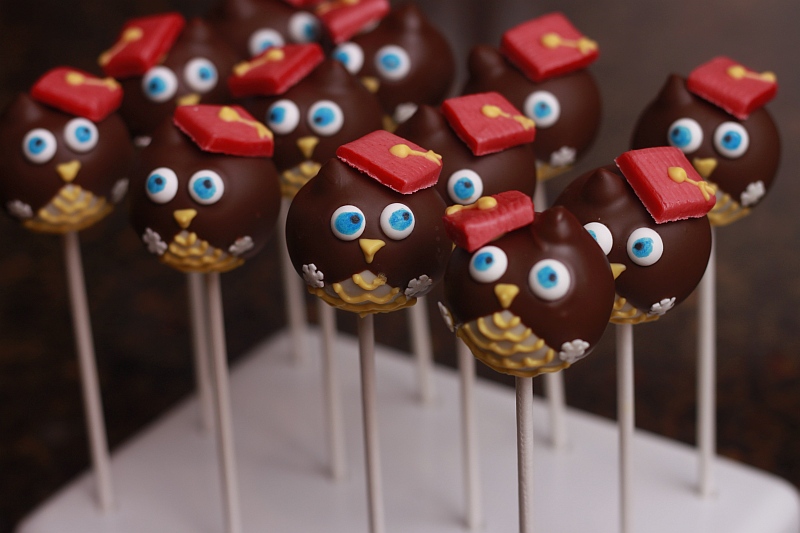
Graduations are around the corner…try these Cute Owl Graduation Cake Pops for your graduate this year!
To make these cute little cake pops, here are the steps!
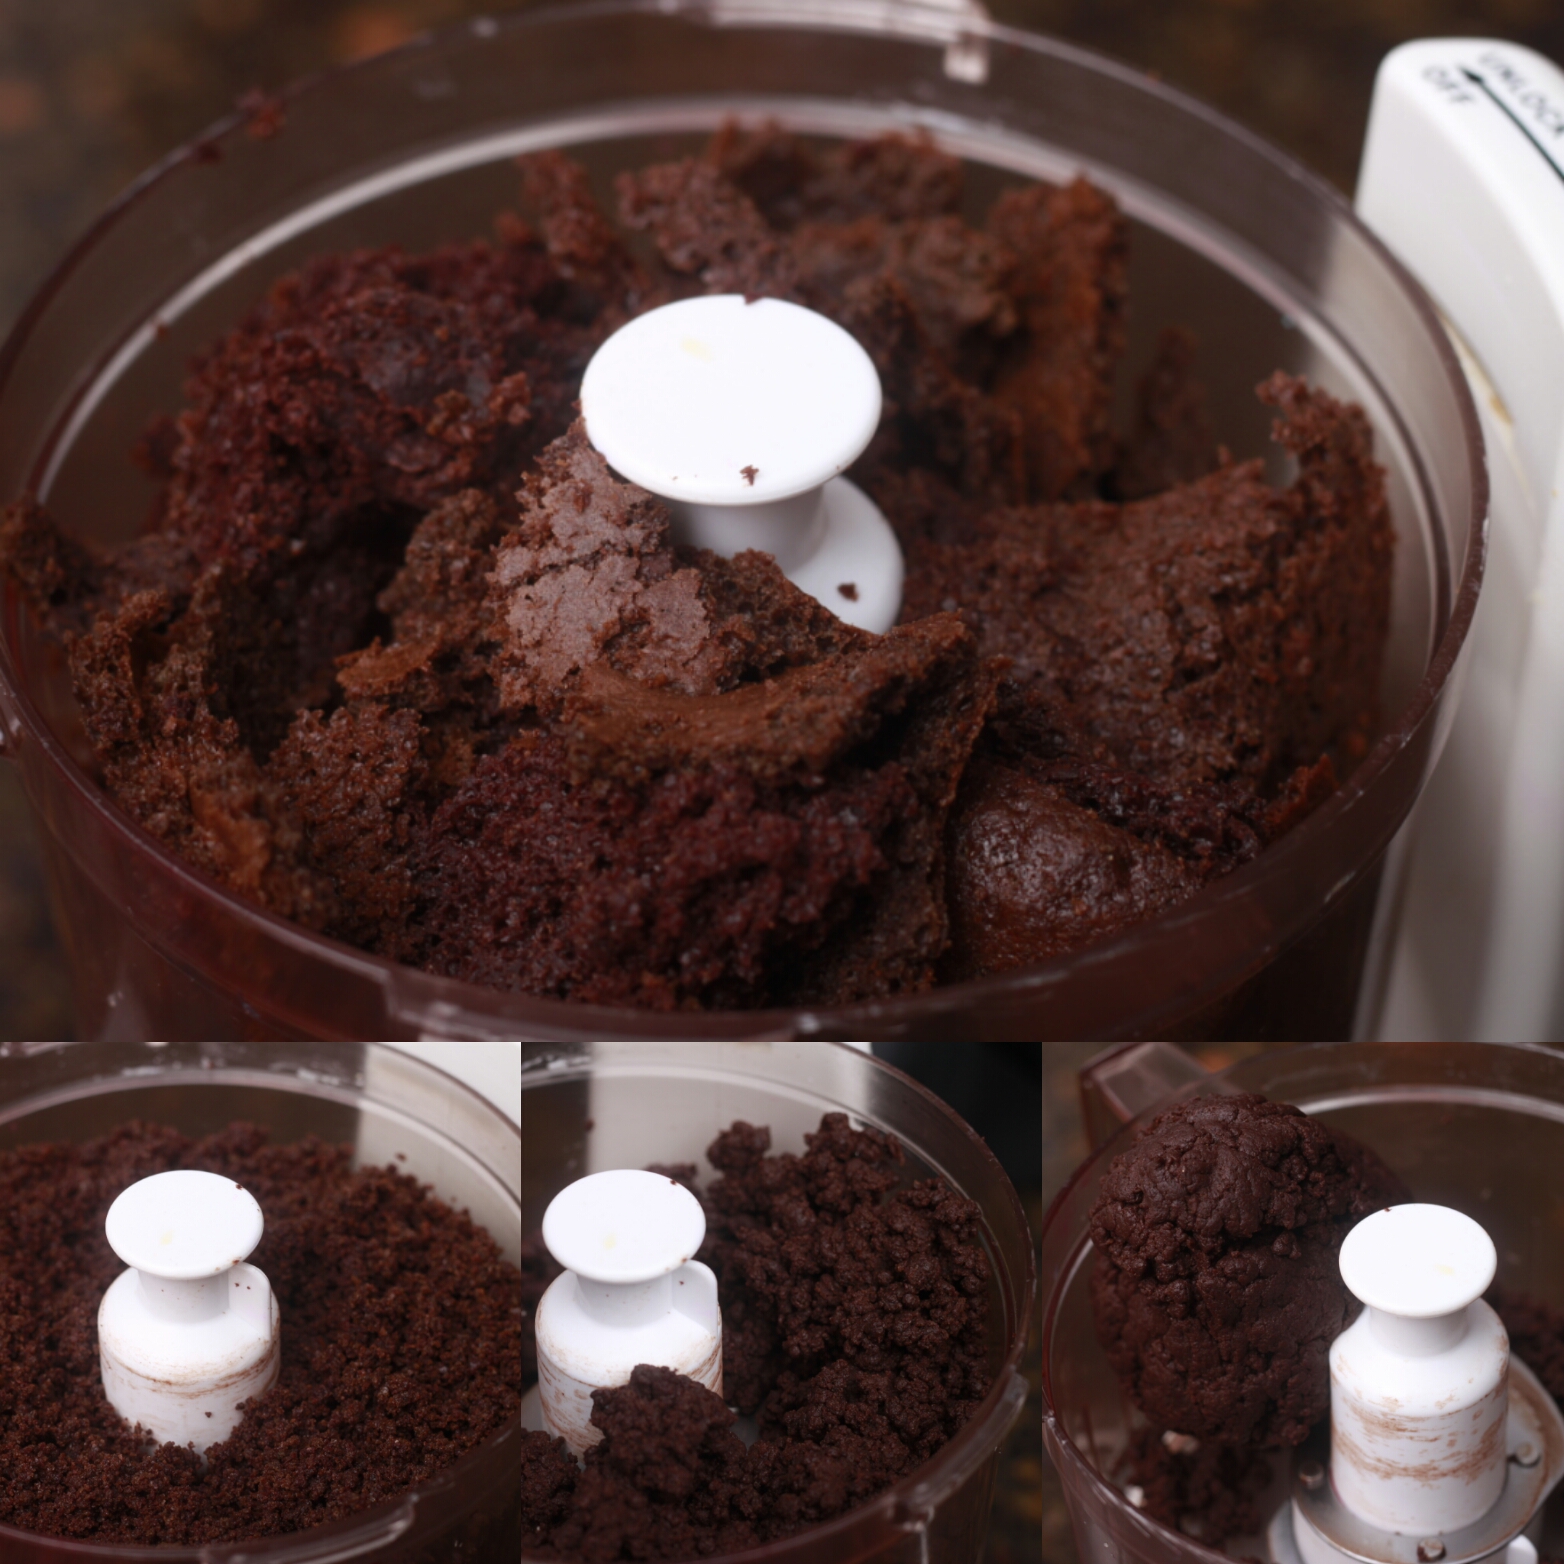
Bake your favorite cake recipe. If you are just making cake pops, one box of cake will make about 30 cake pops with the Easy Roller. All 1.25 inches in diameter. Think ping pong ball size once they are dipped. You can also take all the tops from a decorated cake, yesterday’s cupcakes, or even a store bought cake! Just crumble and knead it down until it is a pliable dough. Just like the consistency of Play-Doh! You can do it by hand (you also will need a bit of frosting this way). However I have found, it’s so much faster if you just put your cake into the mixer or food processor and leave it in there until it turns to dough. If you are mixing the cake this way, you only need frosting if you want to add some extra sweetness or a special flavor.
Here is what it looks like! I put the whole cake in the processor (or as much as will fit) and turn it on! This is what the stages it goes through looks like! The final picture is what it looks like when it’s done 🙂
Next, take it out of the food processor. Make sure to give it a quick knead by hand. Just to make sure it will form one piece of dough and then roll them into balls. We do this step with the help of our newest available “Mini” Easy Roller! It can roll 9 balls at a time! If you have 30 Seconds, this is worth a quick watch!
Need to make more than that at once?! Try the Easy Roller it’s more than double the size! So it can roll an entire cake in no time at all, since it rolls 21 cake balls at one time & they are all the same size!
Once you have all your cake pop balls rolled, cover them and put them in the fridge. They can set up in there while you get your decorations ready. The colder the cake pop balls the easier they are to dip! But if they are too cold, beware that they crack after they have set! 🙁 So only keep them in there 15-20 minutes at the most.
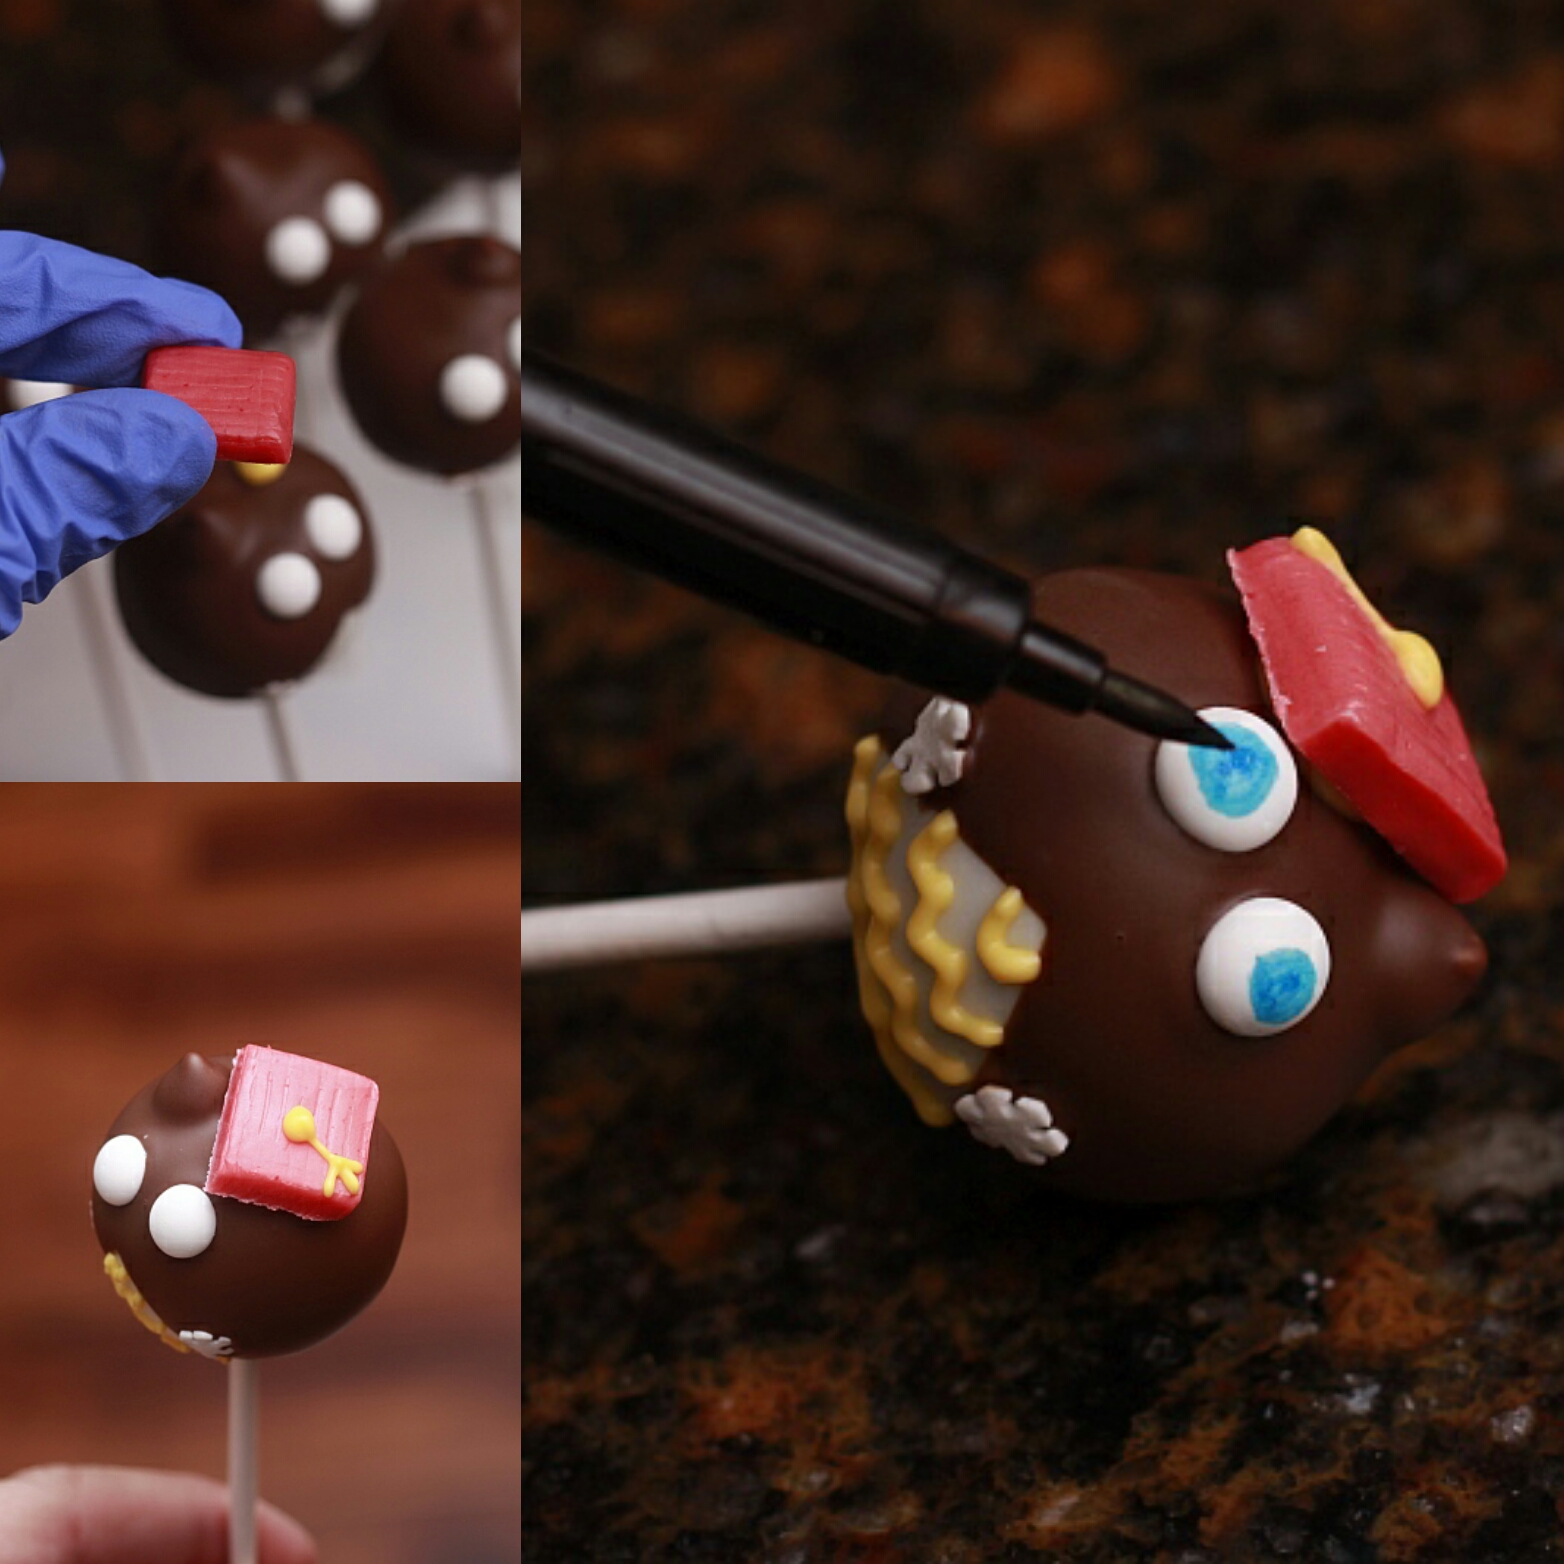
First step is to cut some Starburst candies in half. I went to Winco so I could pick out all the red ones from the bulk bins;)!!

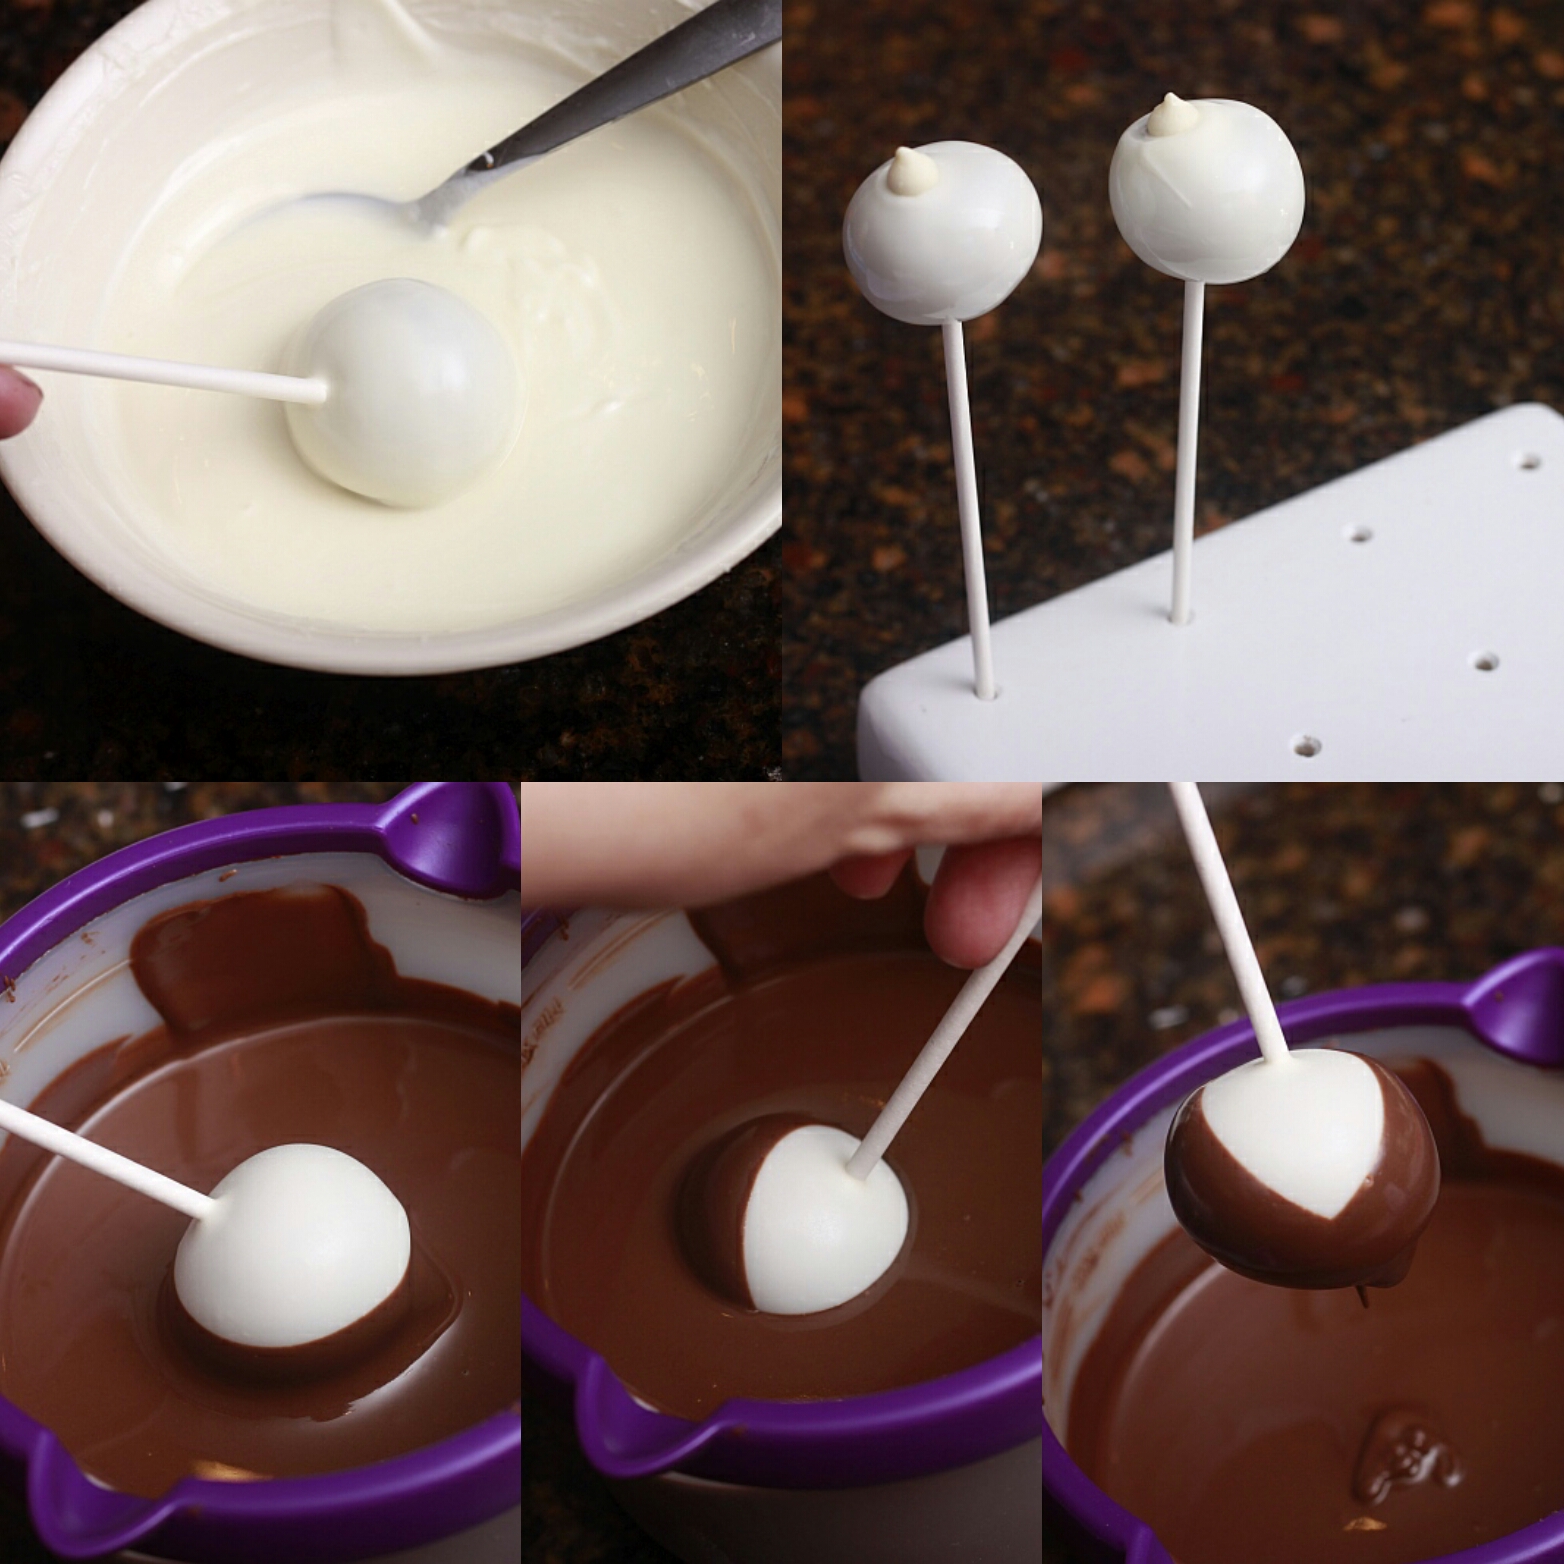
Now melt your white candy melts (or Almond bark) on 50% power (Or defrost) for 1 minute. Stir it and put it back in for 30 second increments (at 50% power) until it is fluid. Don’t get these too hot or it starts to clump up again and you will have to stir it forever for it to “come back.”
Now take your cake pop stick and dip it into the melts and then into the cake pop ball. Then submerge the whole pop into the white chocolate coating, and tap off the excess. Before the coating drys add a little chocolate chip to just one side. (Winco – if you have one is great for this too, as you can just get a handful of chocolate chips instead of the whole bag) Now wait for that set. You don’t want that chocolate chip falling off into the melts!
Now get a second bowl for the milk chocolate candy melts (Or almond bark) and melt them down the same way. You are going to “double dip these just like the “Tuxedo Cake Pops” meaning dip it into the melts sideways halfway and then the otherside sideways, halfway. It should come out with a white chocolate “V” in the center. Now tap of the excess by either holding it upside-down or tapping it gently with the back of the cake pop toward the bowl of chocolate.
Now before that sets all the way, add some Eyes and Feet! These are Bakerella’s DIY sugar eyes and snowflake sprinkle feet 🙂 If you add them before the coating sets you won’t have to add a dot of melts to “glue it on” it will just stick on! Then take your piping bag with any color (I chose yellow) and start piping the “U” shape in the white upside-down “V” space. Here are some pictures for you:
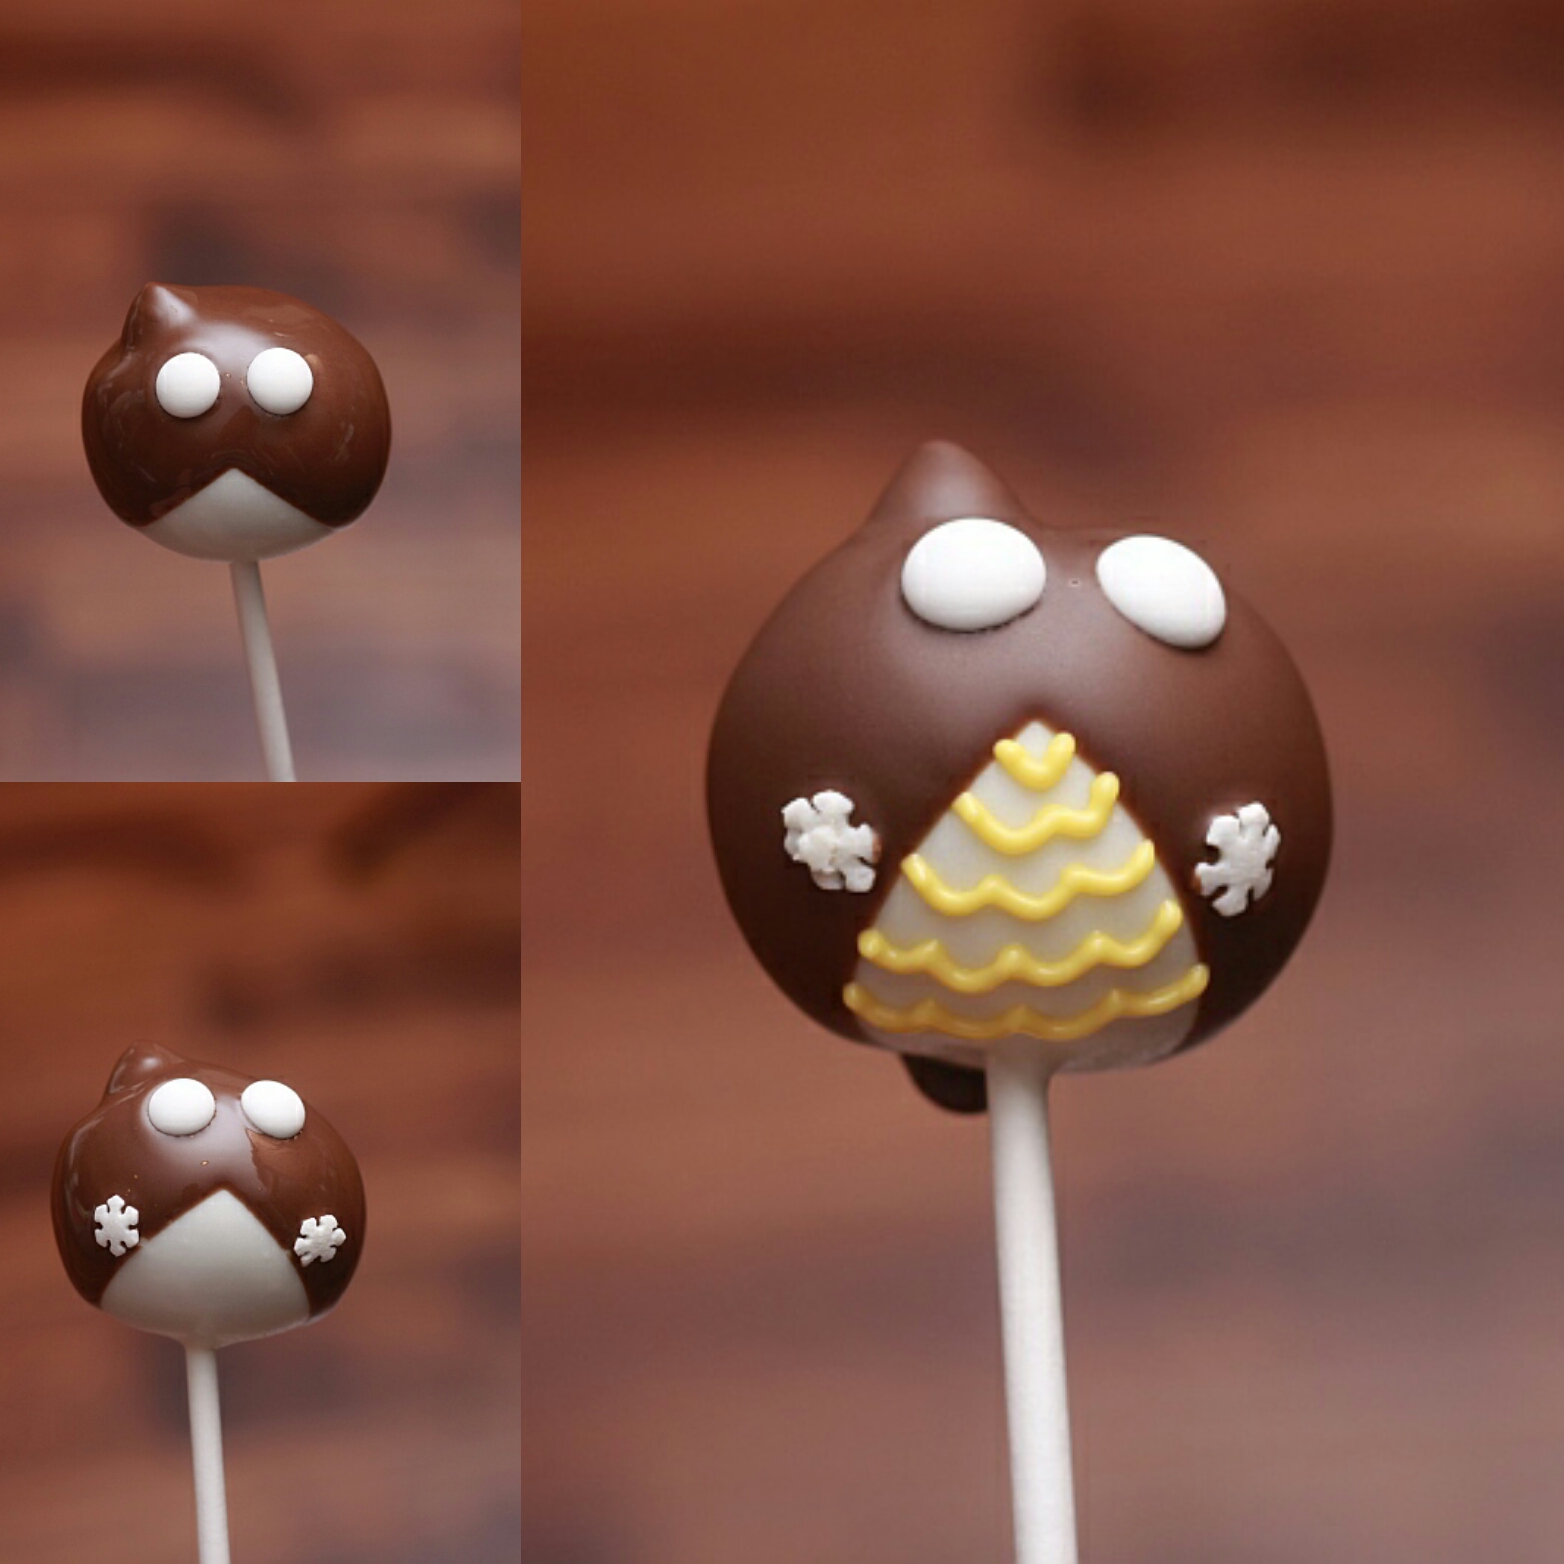
Now take some candy melts (color doesn’t matter) and pipe a dot to “glue on” the hat (Starburst half). (I thought the hat sunk in too far when I did this right after I dipped the whole pop in chocolate, so “glueing” on afterwards was a better option for me.) Then take your owl breast color and make the tassel on the top of the hat. I do this by piping a center dot first, then a long line to the end of the corner. Then tiny lines for the tassel. Now use an edible marker (these are Americolor brand) to fill in the eyes:
All that is left is a little triangle nose!!
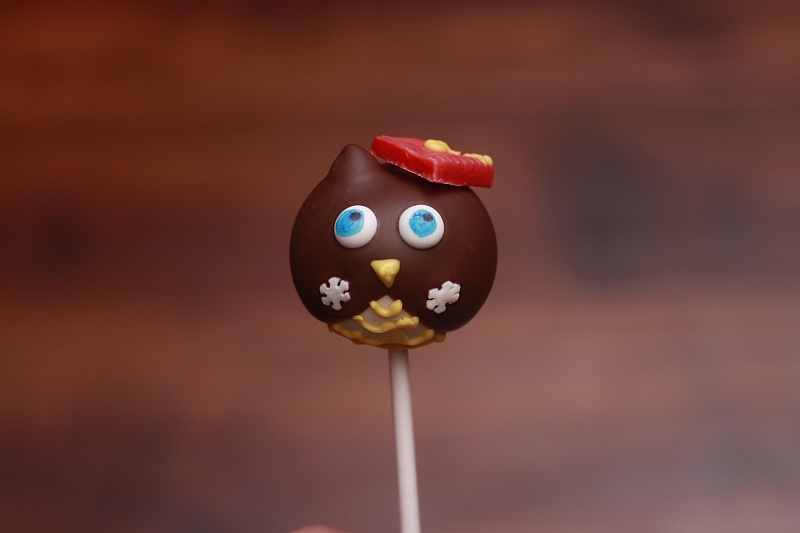
Didn’t these turn out cute?!!

If you are looking for a simplified version for graduation, check these out!
As always if you like these tutorials and want to see more please “like” and “share” our Easy Roller or New Mini Easy Roller with your co-workers, friends and family! It is how we keep them coming, it also means the WORLD to me:)!!