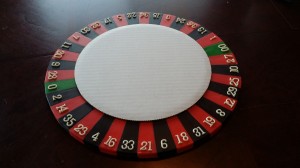
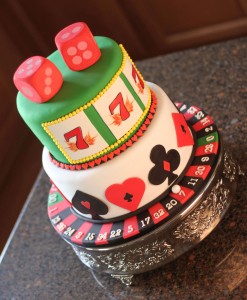
Casino Birthday Cake for my cousin! The very first step in making this Casino Cake was to measure our cake board in preparation for the Roulette Wheel! There are 38 numbers on an American Roulette Wheel, and if you were wondering about the number sequence, we are here to help;) 0-28-9-2-30-11-7-20-32-17-5-22-34-15-3-24-36-13-1-00-27-10-25-29-12-8-19-31-18-6-21-33-16-4-23-35-14-2
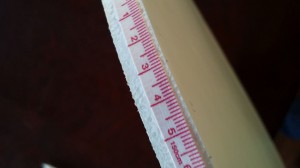
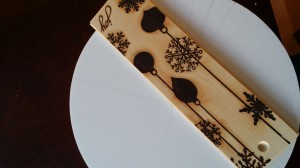
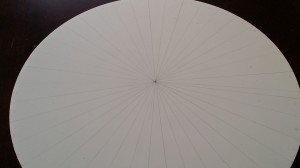
Mark 38 equal spaced tic marks on the edge of the cake board. Then with a straight edge from the center point to the outside tick point draw a straight line with pencil. If you do not have a ruler any straight edged object will do. We used a piece of wood we had laying around.
Once you have all your lines drawn, I marked up each portion with the corresponding roulette number.
Next, just to save a bit of fondant, take the cake board that will be sitting in the center and trace a line around that as well. My fondant strips need to just cover up to that circle as the rest will be covered by the next tier.
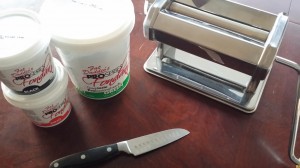
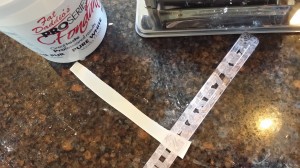
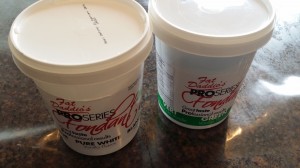
For the Wheel I needed red, black and green fondant! When it comes to coloring fondant (or anything edible) I will first always try to mix any pastel colors myself by coloring white fondant, but primary/dark colors… NO WAY!! Those are REALLY hard to mix by adding color. I can never seem to get them dark enough, at least without changing the overall taste or consistency! For this cake I needed red and black, but not much of either color. I was stressing about having to buy a box of each color and then having a ton of left over, wasting money on colors I would not use again for a long time. So imagine my “happy dance” when I saw the brand new Fat Daddio’s small 8 oz. containers of the Red, Black, Blue, Green. I just had to get them!! Aren’t they just perfect?! An 8 oz. container is just the right amount of each of the colors I needed. I had invested in a set of Fat Daddio’s cake pans last year for my first wedding cake and loved them, so I thought I would give the fondant a try! I am so glad I did, these were a HUGE life saver…not to mention money saver too for this small projects!
OK, back to the wheel!! So here is what I needed: Fondant (of Course), a pasta roller and a sharp knife.
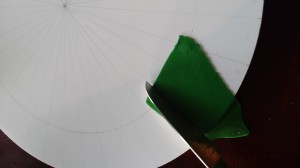
I started with the green. Roll the fondant through the pasta roller (or roll thinly by hand) and lay it on the board. It doesn’t have to cover the whole board from the center out to the edge, but it should be wider then the number section and longer then the exposed portion (make sure the cake board will cover any area without fondant – that’s why we traced the cake board as well) With the sharp knife cut along the pencil line on both sides and then wet the back just a bit to secure it to the board. There are only 2 green areas on the Roulette Wheel (on opposite sides) so I did those two first. The Green is the only color I cut both sides of the strip of fondant on the cake board.
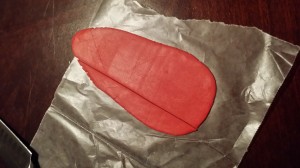
Once the green fondant sections were complete I went around the board alternating with the red and black fondant. As I said the green fondant was the only color I trimmed both sides on the cake board using the guide marks. It would be tricky to cut both sides of the next color,without messing up the one before it since it is perfectly in place. So what I did was roll the fondant, then before I put it on the cake board I cut one straight edge. Transfer that straight edge against the prior color and then cut the other side with the guide marks on the cake board. Then repeat with the Fat Daddio’s black fondant and continue alternating colors until your wheel is complete.
*Make sure to roll all the fondant for the Roulette Wheel in the pasta roller on the same number setting as you did the green (about #4 on mine).
Now lets make the numbers!! Again I always say it, and I cannot emphasize enough the importance of making “cake friends”. Not only can you share priceless tips and tricks but it can help expand your cake decorating tools…sharing is caring;) How nice was it that Lizzy’s Sweets and Treats let me borrow her number cutters! If you want to google it, they are called Tappits and they can be found in many different fonts 🙂
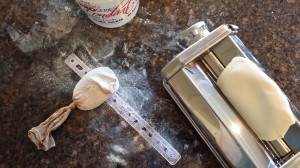
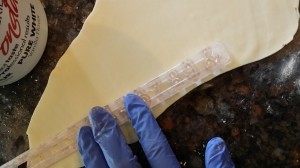
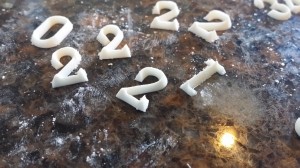
For the white numbers, roll the fondant out again and dust the number cutters well with corn starch. You may also want to keep a pin handy just in case one of them get stuck in there!
Next, press the heavily dusted number cutter into the fondant. Lift and tap them out. I did this a few times and then realized I should really be paying attention to the numbers I needed;)! Like I needed a bunch of 1’s and 2’s so then I made skinny strips and just pressed one number at time, it actually went pretty fast as it was easier to press through with just one number.
Once I tapped them out! Don’t these look perfect!! I could have never piped the numbers this well;)!!
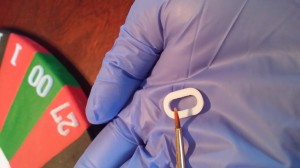
Next with a tiny paint brush and a little of my favorite edible glue (corn syrup) I coated the back side of the number and placed it on the wheel.
Done with this step! See how you can’t tell the number strips don’t go all the way to the center;)!!
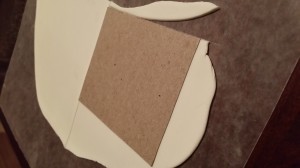
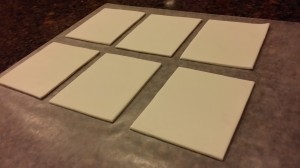
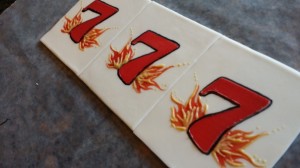
Moving right along… I wanted to have “Blazing 7’s” on one of the tiers, so I am pre-making them so that once the cake is baked and covered I can quickly add all these “off pieces.” I took a piece of cardboard (cereal boxes work well too) and then cut it to the size I wanted. Keeping in mind the size of the cake tier I was baking and what would be proportionate, I then rolled out another piece of white fondant and placed the cardboard over top as a cutting guide. With my sharp knife I cut along each side, remembering to press the knife instead of pulling it across the fondant so the corners would be sharp.
Always make EXTRA;)!! You just never know!! I only needed 3 but I made 6 just in case!!
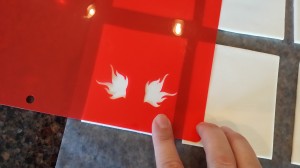
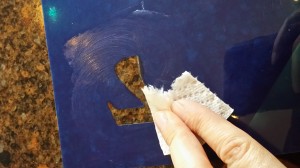
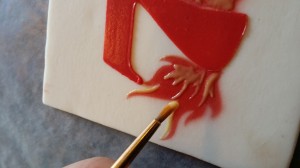
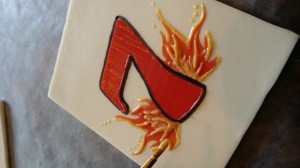
Next I used my Cricut Explore™ to cut some firey flames and a number 7 into separate school subject dividers! They are the perfect thickness of plastic for home made cake stencils:)! Who said the Cricut Explore™ was just for paper/scrapbook type crafts, I love mine for cake decorating!! Then it was time to break out the airbrush! (You could also use royal icing or candy melts)
I mixed up some orange and red…
Then I took a bit of Crisco and put a thin layer on the back side of my “7” stencil, gotta love the Cricut Explore™!! And placed in in between the flames.
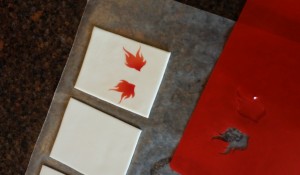
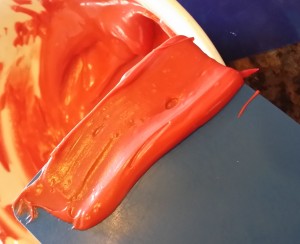
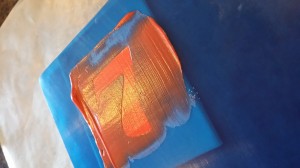
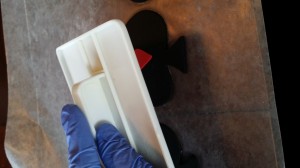
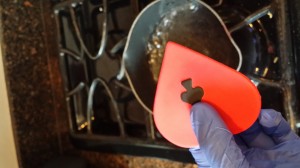
Next I melted red candy melts and used a thin piece of plastic to wipe it over the stencil. (This is a playing card deck cutter – but I have also used the top of a spatula – the cheap ones pull right off the handle and they fit in hand with more control)
Once my spreader was loaded, (I made sure it is coated the thickness of the stencil so I can hopefully cover the entire design in one pull) I started above the seven stencil and pulled the scrapper down over the whole opening.
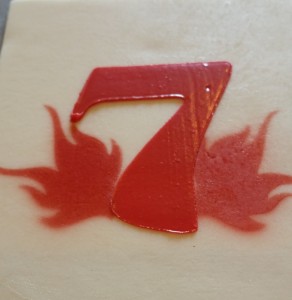
Try not to go over it too many times as the more you go across the more likely the candy melts (or royal icing) will creep under the stencil. It should look something like this now:
I thought it needed a little more, so I painted over the flames with yellow candy melts!
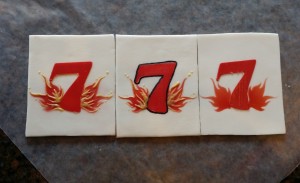
Still didn’t look right, so with my edible markers I traced around the Seven! What do you think?
I laid them all next to each other! Which is your favorite?!
I went with the outline…
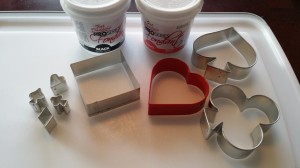
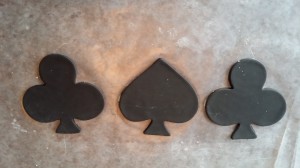
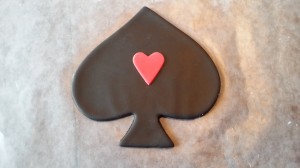
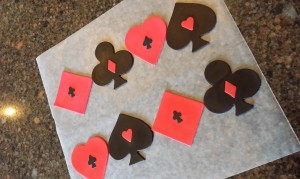
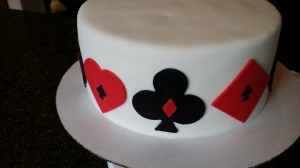
Alright, last step before I start baking cake was to make a few suits to go around the bottom tier. Again the little Fat Daddio’s 8 oz containers were PERFECT!! I had plenty for this step after the Roulette Wheel was complete! I used cookie cutters to get the shapes just right! If you don’t want to go out and get cutters, your best bet is to print the shapes out, roll the fondant thin and place the print out over the fondant and trace the shape to transfer a cutting line:)!
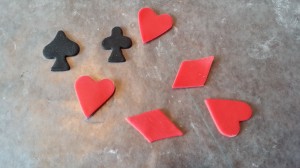
I cut a set of black and a set made from red fondant!
I wanted to add a little extra so I used these tiny cutters to cut out tiny ones to place in the center of each one!
I dabbed a bit of “edible glue” to the back and used my fondant smoother to place each one in the center.
What do you think:)?
I alternated the red and black shapes and made the tiny shape the same as the next big one! Take a look!
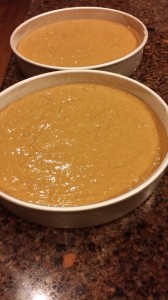
Finally… Cake Time!! The bottom will be 10″ and the top 8″! So for the bottom tier, in my 10 inch round Fat Daddio’s pan I made a Dr’d Spice Cake! I used Betty Crocker Spice cake (My kids gotta win the box top contests at school!!) and instead of the directions on the back, I add 4 eggs, one package of instant pudding (I had some pumpkin spice but otherwise vanilla is fine) 1/2 cup sour cream 1/2 cup of oil and 1 cup of milk. It’s pretty thick.
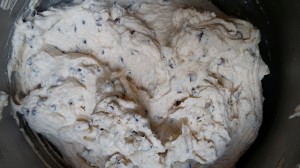
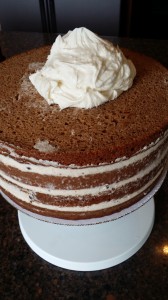
I filled this spice cake with Cannoli Cream! Yum!!! My favorite part of the Cannoli is the filling!! So why not fill a cake with it;)! The BIGGEST trick to Cannoli filling is to drain the Ricotta Cheese. If you skip this step it will be watery 🙁 For my Cannoli Filling I equal parts Ricotta and Mascarpone Cheese because I like it less grainy. I used 16 oz of both cheeses …I wanted a lot;) I had 3 layers of it in the cake and enough left over to make a spice roll!!
Drain Ricotta overnight.
In a large mixing bowl add the cheeses mix in 1 cup of powdered sugar, 2 teaspoons of Vanilla and 1.5 teaspoons of cinnamon. Then fold in the desired amount of mini chocolate chips, I used about 1/2 the bag.
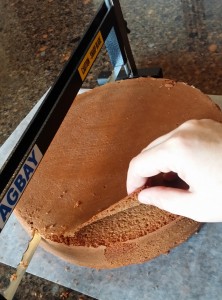
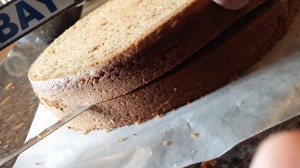
Now it is time to trim and layer the cake! I like to cut the tops off and then trim the tiniest amount off the bottom with my Agbay Jr, so when you cut into it, it is perfect!! No little darker edges of cake.
Isn’t that insane!! Don’t try this with one of those wire cake levelers… Agbay is where it’s at!! If you like to make filled and layered cakes this is the way to go!!
Once the tops and bottoms are removed I cut that layer in 2!
*Of Course I always reserve these scraps for cake pops!! Cake pops are a fabulous “waste management” tool for bakers;)!! Depending on your area and how they are decorated you can get $1-$4 per pop! Not bad for “Scraps” 😉 Pretty awesome! Especially when there is the Easy Roller or (Mini Easy Roller) to help you roll them all in a snap! Haven’t seen it? Take a look at this 30 second clip!
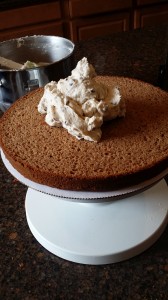
Sorry, back to cake!! Put a little frosting on the cake board and set the bottom layer on it and put it on a turn table if you have one! Then a huge dollop of Cannoli filling and start spreading!
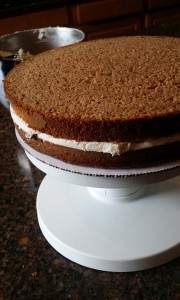
Then put the next layer of cake over top of the filling and Repeat until all your cake layers have Cannoli Filling:)
Then I crumb coated (a thin layer of frosting to seal in the crumbs) with Cream Cheese Frosting. 8oz Cream Cheese, 1 stick of butter, 1 TBS Vanilla and 3 cups of powdered sugar!
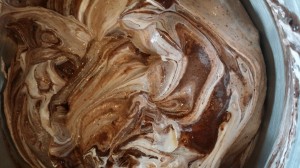
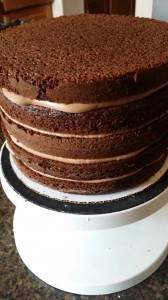
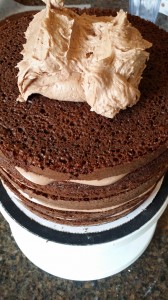
My 8″ layer was Chocolate cake, made the same way. Dr’d chocolate cake mix (only with chocolate pudding) and filled with a chocolate mousse type filling. Since this was more the “kid” tier I made it with kid friendly ingredients;)!! It was chocolate pudding (made with 1/2 the milk – so it was extra thick) and a container of cool whip. Mixed together until it is a solid color
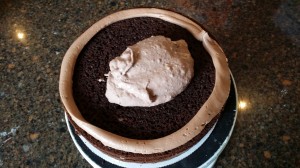
Since this was a looser filling I needed to build a dam so the filling wouldn’t ooze out! So I took the leftover cream cheese icing and added a bit of cocoa powder, put it into a piping bag, snipped off a big chunk of the bottom and drew a circle inside the perimeter of cake. The thicker icing around the edge will hold in the softer filling, thank you Dawn Parrot for that tip;)!! I have had a few oozy cakes in my past;)!
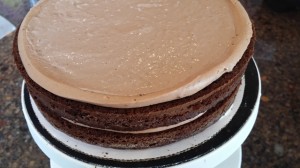
Just spread the filling evenly to the icing dam and layer away!
I like layers, can you tell:)
I crumb coated this cake in the same left over chocolate cream cheese frosting 🙂 Then into the fridge to firm up!
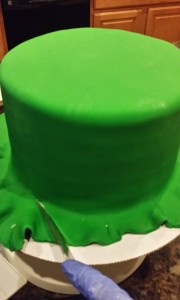
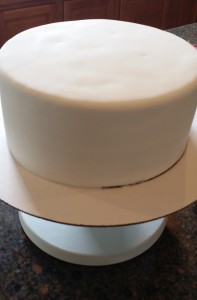
Since I needed more green and white fondant to cover my 10 and 8 inch tiers I got the 2 lb containers of Fat Daddio’s Fondant in each color! I use The Mat to roll out the fondant:) Pretty Easy put the fondant inside and cover it up and roll it out to the measurements for the cake that is on the outside:)! Then peel off the top layer and with the fondant still stuck to the bottom, carry it over to the cake and let the fondant fall over the cake.
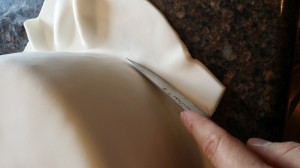
Once it is free from The Mat, smooth down the sides and use a sharp knife to trim off around the bottom. I think I could have used a bit more icing on this tier before I covered it, but with the decorations going over top of it, you will never know;)!
Repeat with the White Fondant!
Oh!! Don’t forget to insert supports for your cake!! I have seen it happen.. cakes fall! See those dimples in the top of the fondant?! Those are were I have wooden supports through the cake! You want to place them around the cake towards the inside, where the top tier will sit. This way all the weight of the top tier is resting on those supports and not squishing your bottom tier 🙂
This is the tier I will put the Red and Black Fondant “suit” off pieces around.
I made this cake over a few days and these pieces were a little stiff, so I boiled a little water and with a little steam I was able to give them a little bend to go around the cake!
A little more of my favorite edible glue and Ta-Da!
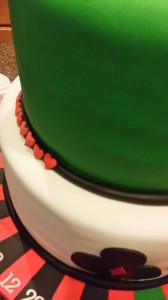
I placed this onto the Roulette cake board and stacked the green tier on top the white. Next I added a rope of black fondant to the base tier and around the green tier as well. For a little extra fun I added Heart Sprinkles (left over from Valentines Day) with more of my favorite “edible glue” (corn syrup, remember)!
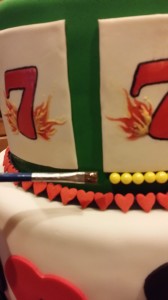
Next it was time to place the 7’s! Here is where I messed up… I’m in no way an expert and don’t mind pointing out my flaws if it helps the next person out. Although you probably wouldn’t have really caught on at first glance if I didn’t rat myself out! But again, in an effort to continuing education, let me tell you where I dropped the ball! I had wrapped up the 7’s so my kids wouldn’t touch them and they never really hardened like the “suits” did. So when I picked them up, they were already starting to distort on me (I picked them up like they were going to be hard…oops) So I had to hurry and “Glue” them on before I wrecked them… I wasn’t thinking and didn’t measure first, so the spacing is a tad off on the 7’s… Next time I will measure and mark where the off pieces will go, before I attempt to pick them up! Learn from my mistake;)! But again probably not noticeable if you aren’t looking for it.
To simulate lights and fun of the slot machines I added those Sweetworks yellow pearls! You know the Sixlet company now has so many candy choices that are perfect for cake decorating:) More Edible glue… and stick them on! I also used a Sixlet white gumball as the roulette ball.
I was going to try to make one more layer for the cake, but I needed a dinner break and to get out of the house!! Plus my friend was celebrating a huge promotion at work so it was time to let it go and enjoy life a bit;)! It’s all a balance. My mother in law brought me these foam dice from the dollar store and I decided to use them as the cake topper! I think it was just perfect and I got to get out for a few hours:)! Winner, Winner, Chicken Dinner! Take a Look all put together, with a gum ball on the winning number;)

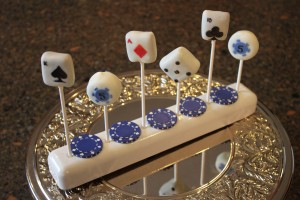
Remember all those cake scraps?! Why not make these matching cake pops to go with? HERE is the tutorial!
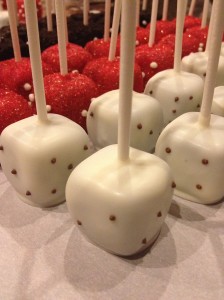
Or just these Dice Cake Pops! HERE is that tutorial:) 
You can order yours Here we ship worldwide:)!

