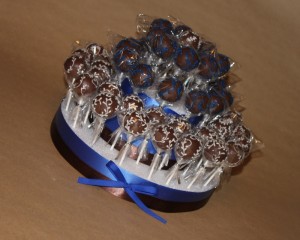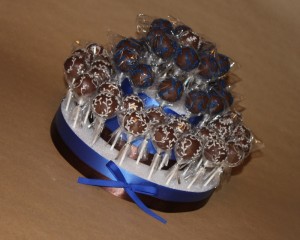
How to make a USA “cake” of Cake Pops! This “cake” can also be modified to be used for all kinds of occasions!
Here is what you will need:
- Styrofoam disks /or rings
- Ribbon
- Glue dots
- Toothpicks
- Cake Pops
I always buy 2 disks of the same size for each cake tier. depending on how many cake pops you fill it with will depend on what size you start with!
This combo will hold a little more then 4o cake pops! May be hard to tell by the picture but the bigger one is 12″, the middle one is 10″ and the small one is 6 inches! If you start with the largest one (16″) get ready to put on 100 or more cake pops!
 Since you have to buy two of each size, to save money you can replace one of the layers (the bottom layer on the 40 cake pop cake, and the middle layer on the large 100+ cake pop cake) with the syrofoam rings. One ring is the thickness of 2 disks, however, you don’t want to forget if your bottom tier is the one with the hole and you drop it thinking you are grabbing it in the middle for support (almost lost one that way). It’s better to use the ring in the large cake design so you still have a full bottom and the hole is the center of the cake.
Styro disk vs. styro ring
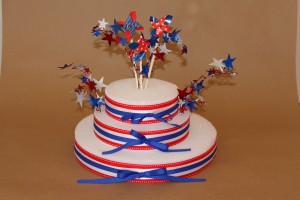
Next step, Toothpicks!! I found that toothpicks are the best styro glue (hot glue… don’t even bother, it will just melt the stryo instead of hold them together)!! All you do is snap off the top 1/3 of 12 toothpicks, unwrap the 2 Styrofoam discs, stack the similar sizes together and place the modified toothpick at “12” o’clock “3” o’clock “6” o’clock and “9” o’clock on each tier (tier equals 2 disks). Then set all 3 tiers aside. Next it’s time to decorate!! For this 4th of July display of course I am going to choose Red, White, and Blue!!
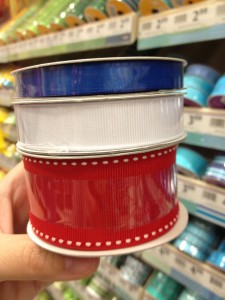 Look at the width on the ribbon and make sure that it will cover the tiers! The Red Ribbon is 1.5 inches wide, the white is 5/8 inch and the blue is 3/8 inch! The tiers are a bit thicker then the 1.25 inches, but it is close enough in my opinion. If you want you can also layer the ribbon so the base layer is 2 colors, but for this display I don’t think it’s necessary. I already said hot glue isn’t going to work to adhere the ribbon to the styro, so that is not going to work… I have tried tape (packing tape, scotch tape, masking tape) and that doesn’t work all that much better! Since you cant really use a toothpick here, the best way to get this to stay put is to use Glue Dots! I am not talking about dotting Elmer’s glue, there is actual “glue dots!!” A Huge THANKS to my best party crafting friend Maddycakes who introduced me to these amazing little circles of fun!! Here is what they look like…
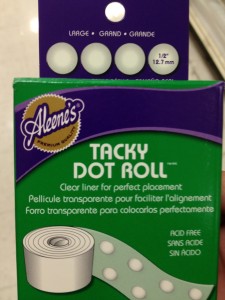 You can stick these all over and it doesn’t bunch the ribbon and it sticks great!! (if you try hot glue it totally distorts the ribbon wherever you put it!) It sticks to both the ribbon and the styro really well!
So decorate all your tiers with ribbon and glue dots and then get a few more toothpicks out! Maybe about 6!! Don’t break these, we use these at full size! Put 3 in the middle of your bottom tier half way in so they stick up (or a total of 4 toothpicks at the 12, 3, 6, and 9 position on the “ring”) like this:
Then hold the middle tier center and push it straight down over 3 toothpicks standing out. This way the 3 toothpicks are half way between the bottom tier and the middle tier. Repeat this step with the middle tier by placing 3 more toothpicks in the center tier and then place the small tier over those toothpicks! It should look like this:
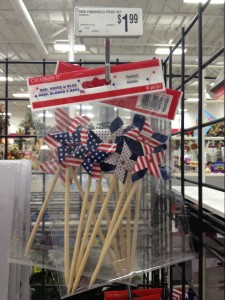
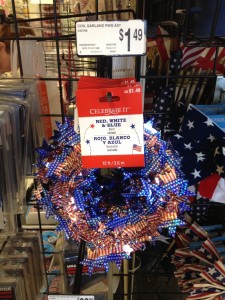
Oh!! I skipped a step!! I found this stuff at Micheal’s while I was there… you don’t need it, but it’s more fun… and it was 40% off;)!
Just stick them into the tiers where the mood strikes you;)!
Now all you need is Cake Pops!! You do need quite a few to really fill these up, so OF COURSE I suggest the Easy Roller to help you make them super fast!! 😉
It also helps that they are all the same size so you can figure how many you need and evenly space them! It’s also fun to stagger the sizes… I will show you pictures of other cakes I made with the different insert sizes all on one cake, when I am done;)!! When you place them in the strofoam make sure to use the stick to place them, if you grab by the ball and push, you will break the pops… seems like common sense, but I have wrecked more then one cake pop;)! The last few places get kinda tight;)!! Once it starts getting too tight, it’s best to take a couple out to make room for the last couple;)!
For this cake I made them pretty simple, just dipped in milk chocolate with some red white and blue star sprinkles:)!! Look how fun it turned out! What a great center piece!
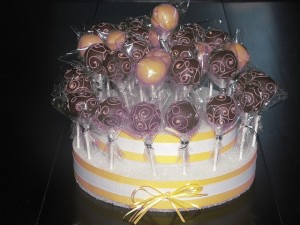
So now that you have the idea on how to make a cake, try it for different occasions! Changing the ribbon and cake pop design there is so many different uses!!
…and then there is my favorite!! This one I made all the milk chocolate bases with the standard insert from the Easy Roller. All but the top purple cake pop was made with the optional 1 inch insert and the very top purple one was made with the large 1.5 inch insert! It came out Awesome:)!! I did use the bigger cake model for this one, so there were a lot of cake pops on here (like 115)!! …but most of them were the small ones;)!
If you like the tutorial don’t forget to check out and share our Easy Roller with your friends! It is how we keep these tutorials coming:)!


