


Burlap and roses are such popular wedding and party themes right now, why not make Burlap Cake Pops!
I made these with SugarVeil Icing and the Woven Mat with little Royal icing Roses on top.
Here is how you make them.
First dust your SugarVeil Icing Mat with Cocoa Powder, and shake off the excess (that will give it the burlap color). Next mix the SugarVeil Icing. I just needed a small batch so 2/3 cup SugarVeil to 1/3 cup water, mix it per directions. This will be plenty to fill the mat. Coat the mat with the SugarVeil Icing. Making sure to swipe the spreader over the mat in all directions to really make sure it is packed into all the lines completely. Also make sure any bubbles are removed.
To set SugarVeil Icing quickly you can put it in the oven at 200F and for this particular mat it will be done in approx. 14 minutes. When you take it out of the oven, use a damp rag to go over the mat. Furthermore, pay special attention to the edges and let it cool on the cooking sheet for 10 minutes. You will know when it is ready when you bend the side and it easily separates from the the mat.
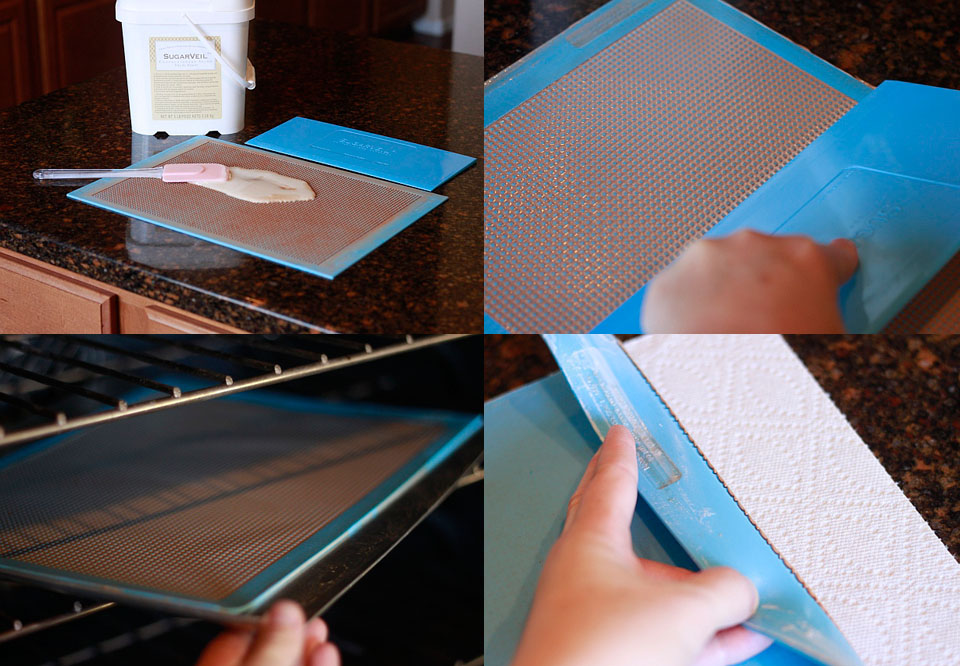
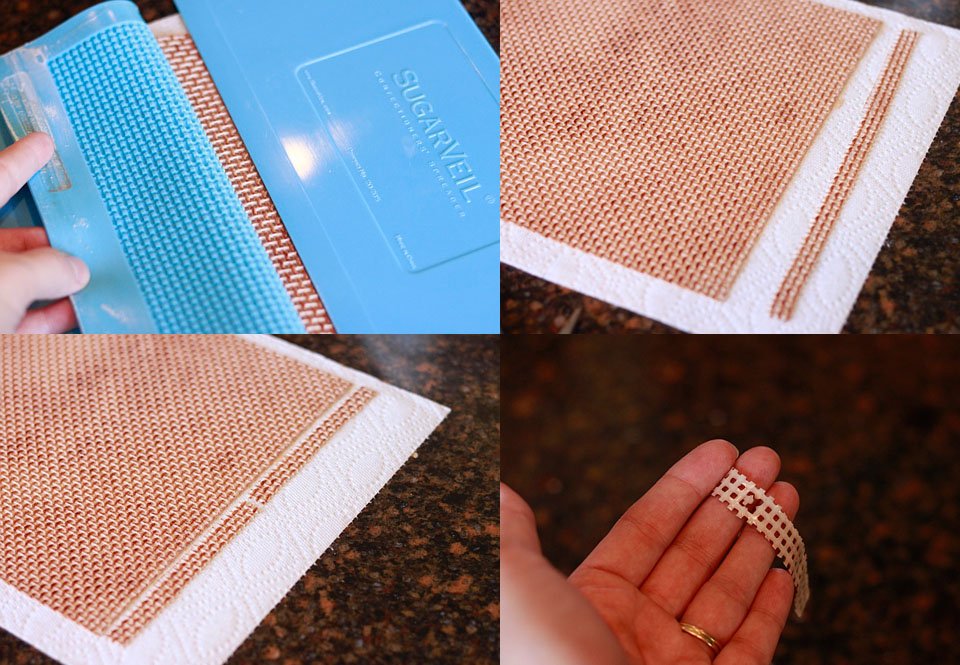
To Remove the Sugarveil Icing from the mat, turn the mat over (design side down). Use the spreader to hold down the SugarVeil piece and remove by pulling the mat away from the design. Next, I cut the SugarVeil into long strips 2 squares wide. Then I cut those strips in half. Finally at the half way point of each piece I cut an opening for the cake pop stick.
Now it is time to make the cake pops!
THE BASICS:
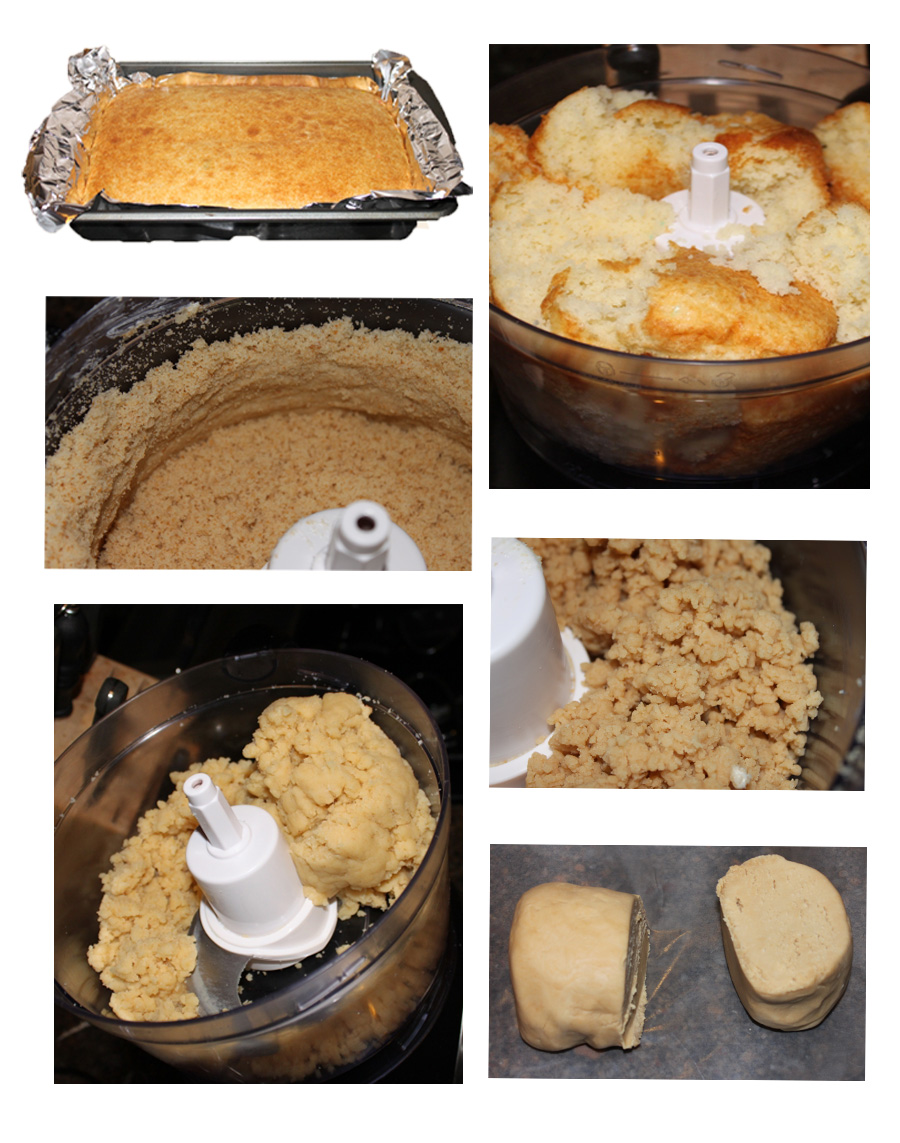
All Cake Pops start off with a baked cake, and these Burlap and Rose Cake Pops are no different! This can be store bought or your best recipe.
Next you are going to crumble it down and knead those crumbs into a “Play-doh” like consistency. I always use my Food Processor to do this, but a mixer with a paddle attachment works just as well! It is much faster than doing it by hand and you will get more consistent results. Take a look at the steps it goes through in about 1 minute! First, it will break down into fine crumbs. Then they start to stick to each other and form a bit bigger of a crumb. Finally if you leave it in long enough it will turn into a big ball of dough all by itself!
You can add frosting if you like, but I think they are harder to dip if you do! If you have a food processor or stand mixer, you won’t need any to bind it into dough (99% of the time)!
Next you will roll all your cake dough into 1.25 inch balls (about the size of a ping pong ball). For faster, more consistent results, the Mini Easy Roller rolls 9 cake balls at a time and will allow you to fly through this step!
Once you have finished rolling, place the cake balls into the fridge as you prepare your chocolate candy coating, it is always easier in my opinion to dip cake balls if you refrigerate them for a just bit, first.
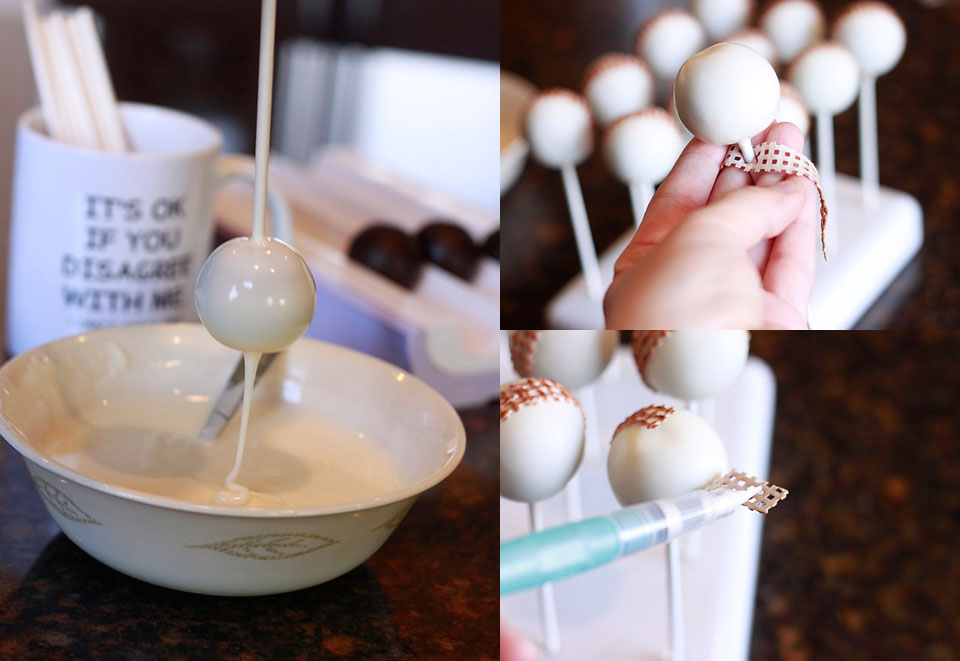
We used white chocolate almond bark on this project. To melt it down we simply put it into the microwave on 50% power in 30 second increments and stir each time until it has a nice even flow. Put your cake pop stick into the chocolate almond bark and then into your cake ball. Coat the cake pop in the almond bark/candy melts and tap off any excess and place it into your favorite cake pop stand to set.
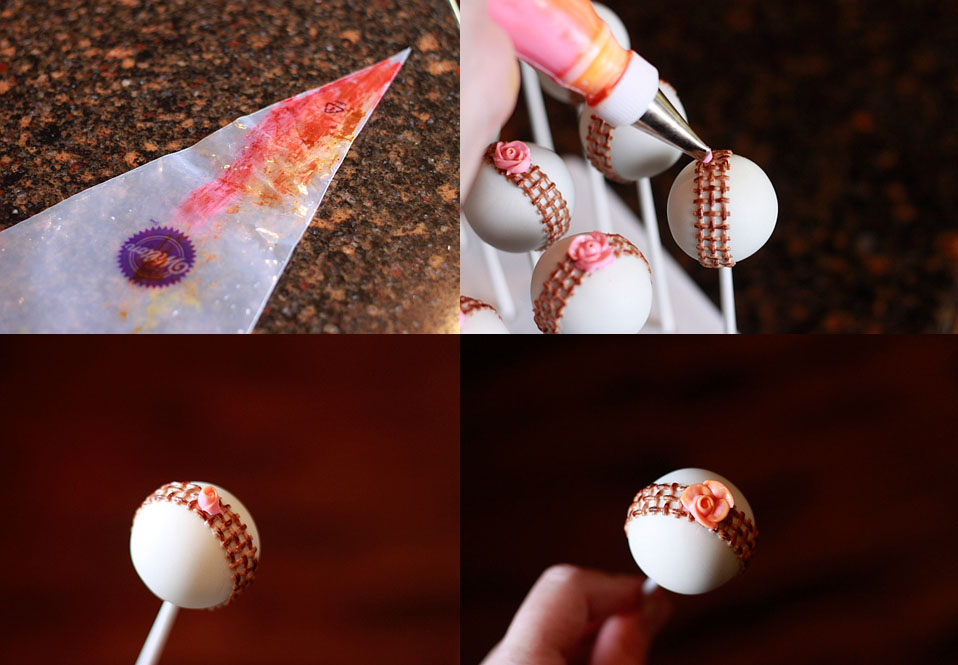
Next take you piece of SugarVeil Burlap and put the stick through the center hole you made and wrap it up to the top of the cake pop. Secure it down to the pop with a little water.
Now for the Rose!
I piped these roses directly on the cake pops with pink Royal Icing. I also streaked the piping bag with yellow and pink food coloring as well so the icing color would have a little more depth. I attached a small pedal tip, Bakery Crafts 101S – is the tip I used. And used this tip to pipe mini roses. With a small leaf tip (bakery Crafts 65) I added a few leaves to each one as well. To learn how to pipe a rose, check out this post with video here!
*You could do these roses in advance and store them in an airtight container until you are ready to use them. If you made them in advance, just use a little but of royal icing or some almond bark to “glue” them on to the cake pop.
When they are all finished they will look something like this!
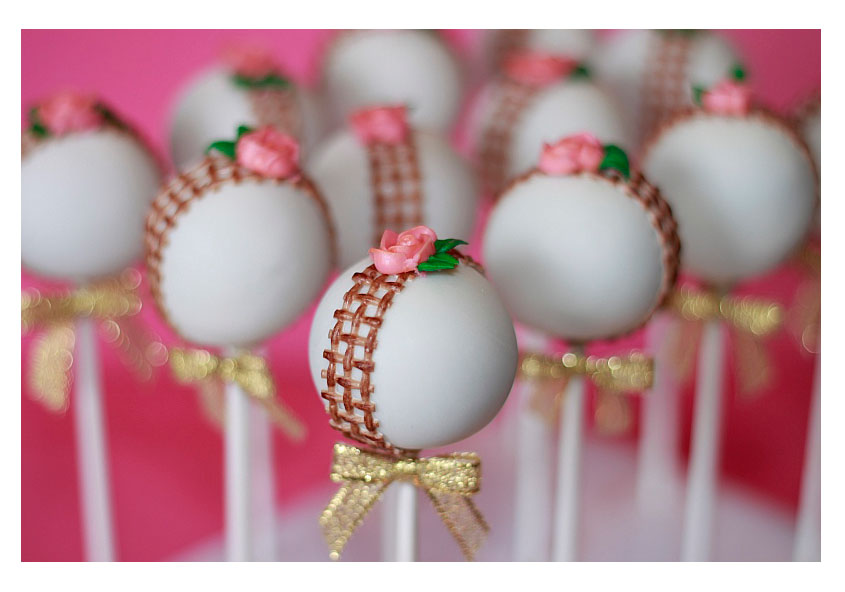

(little gold bows are from Papermart!) If you like the tutorial don’t forget to check out and share our Easy Roller or New Mini Easy Roller with your friends! It is how we keep these tutorials coming:)!