
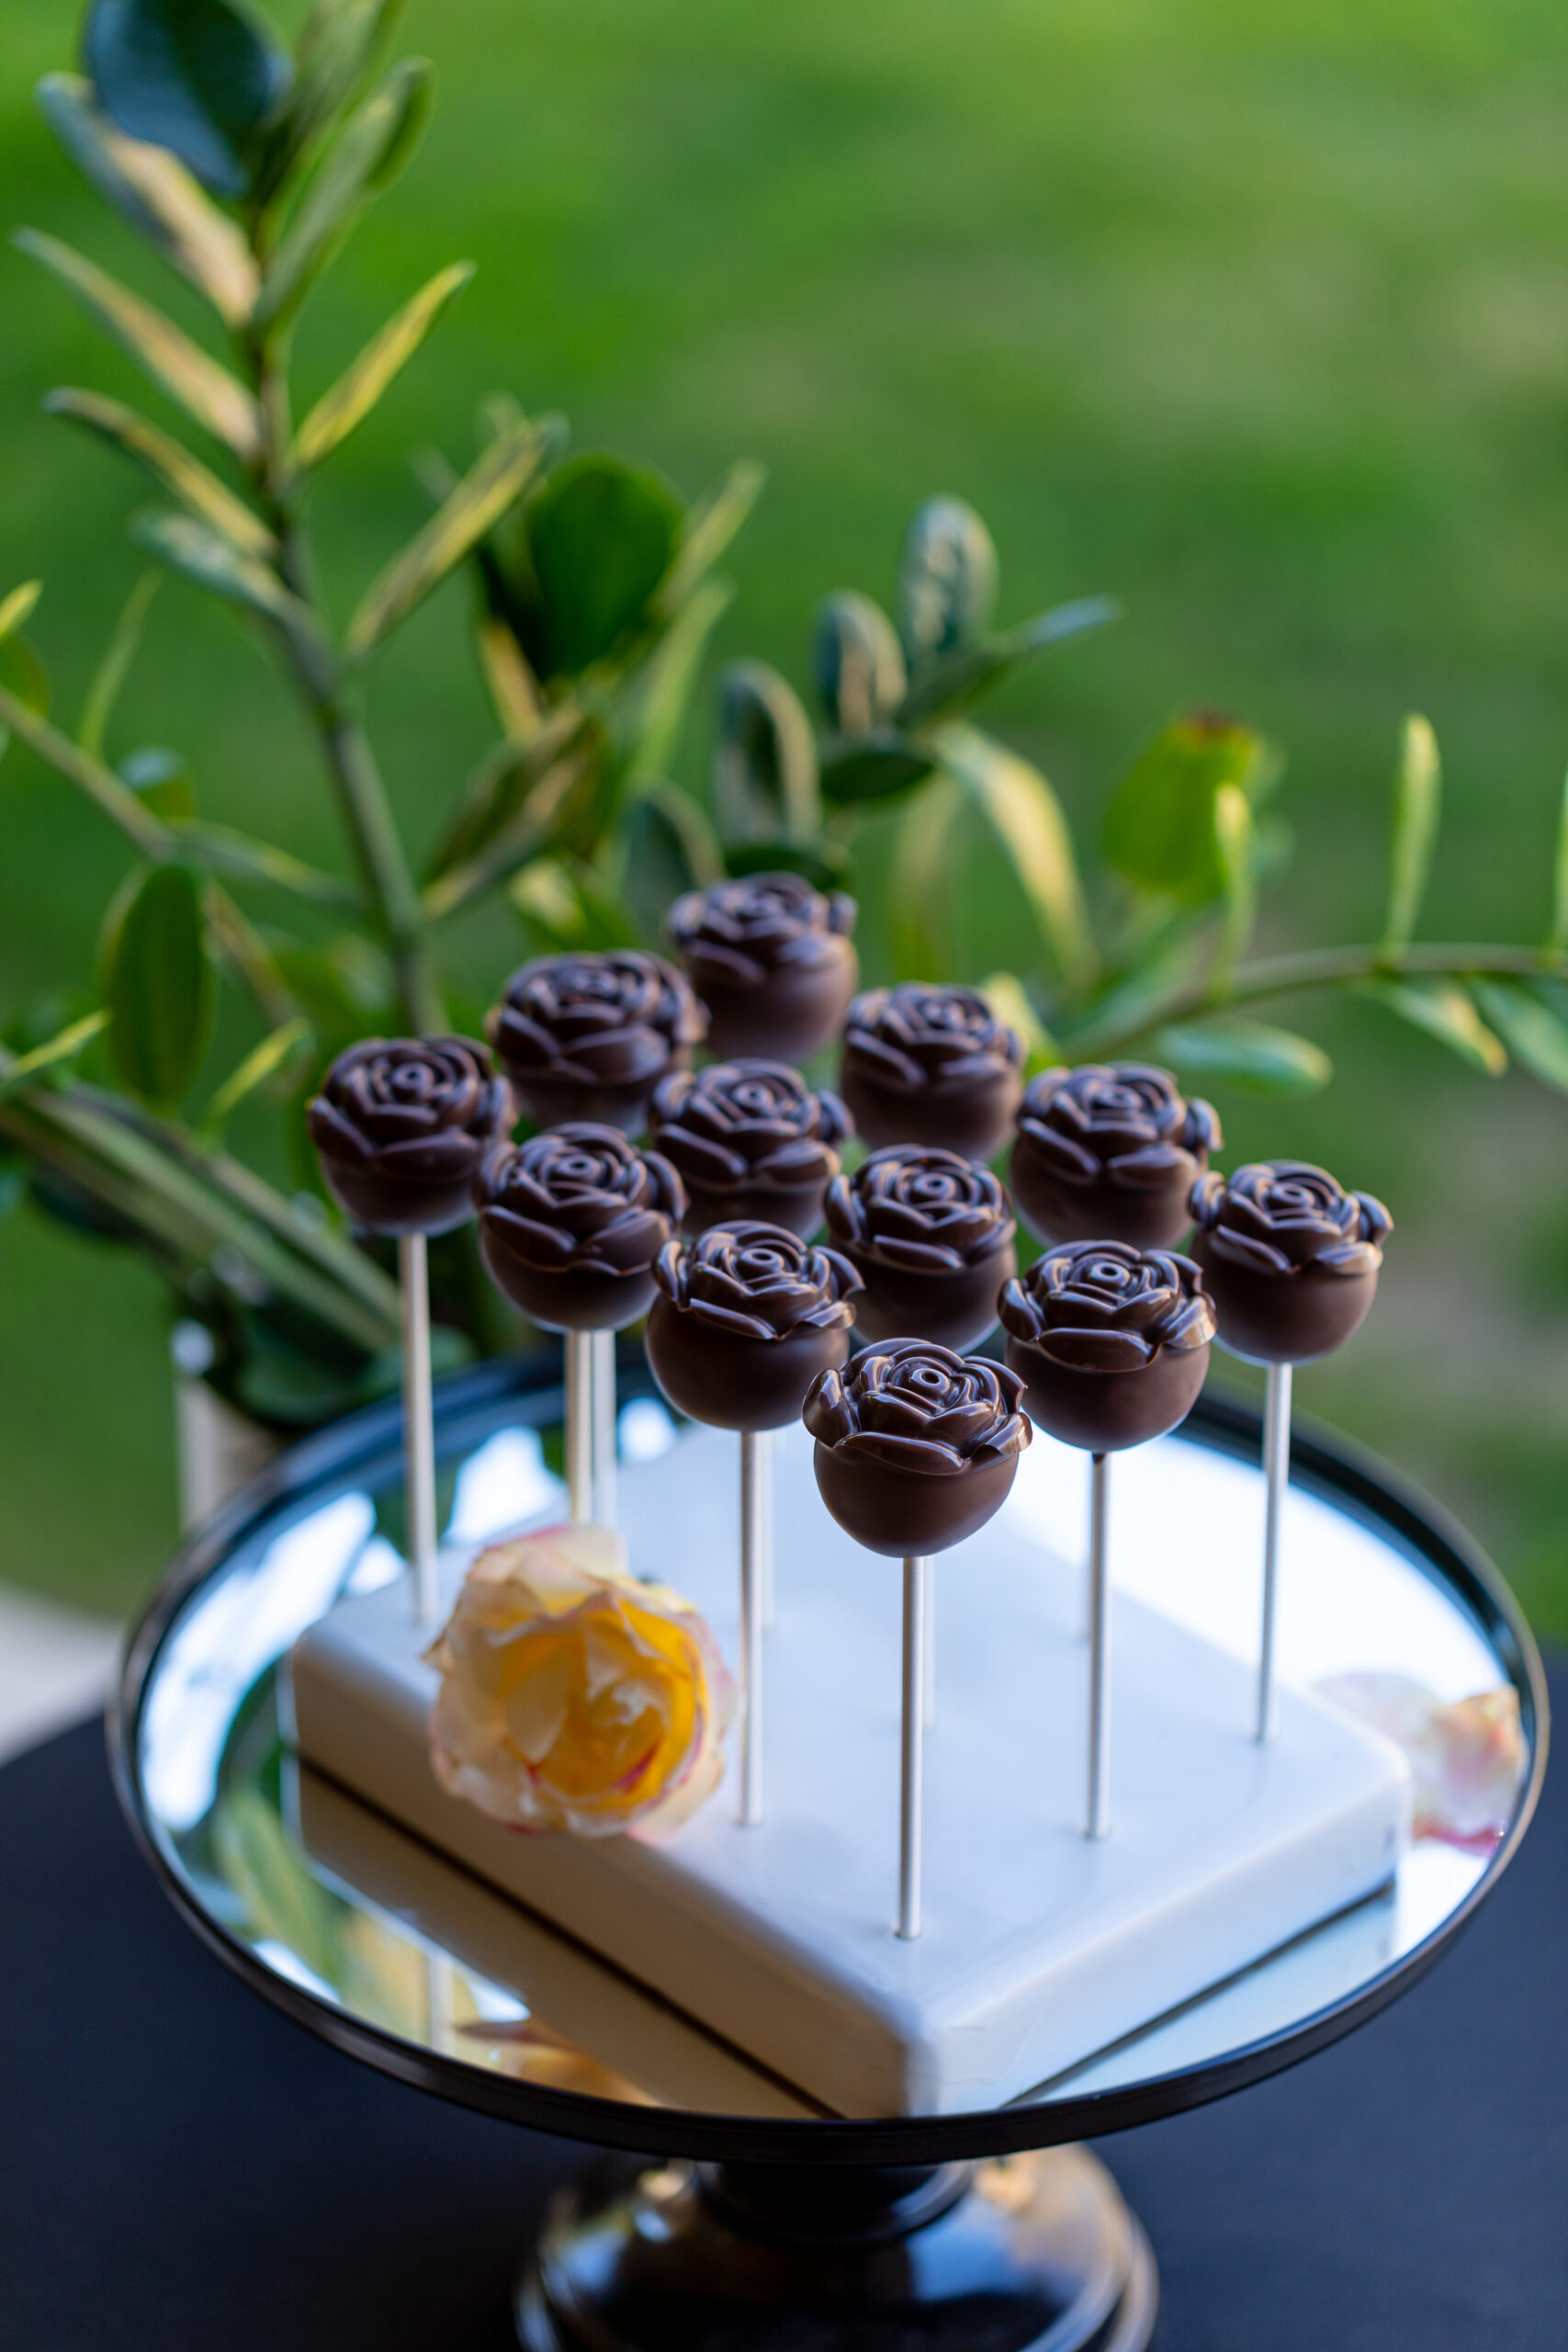
The Easiest Rose Cake Pops you will ever make! I am hesitant to say, but these might be the Easiest Cake Pops you will EVER MAKE!! And…
Category: Cake Pop Decorating Tutorials
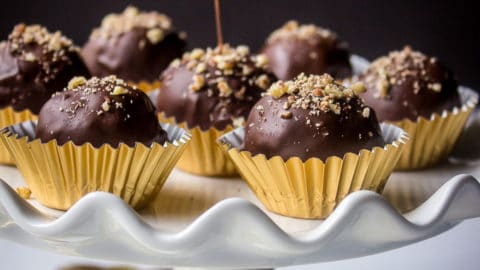
Pecan Pie Balls
I found this recipe over at Just A Pinch Recipes and I thought I just had to try it in the Easy Roller! Ingredients 2 1/2 cups pecans,…
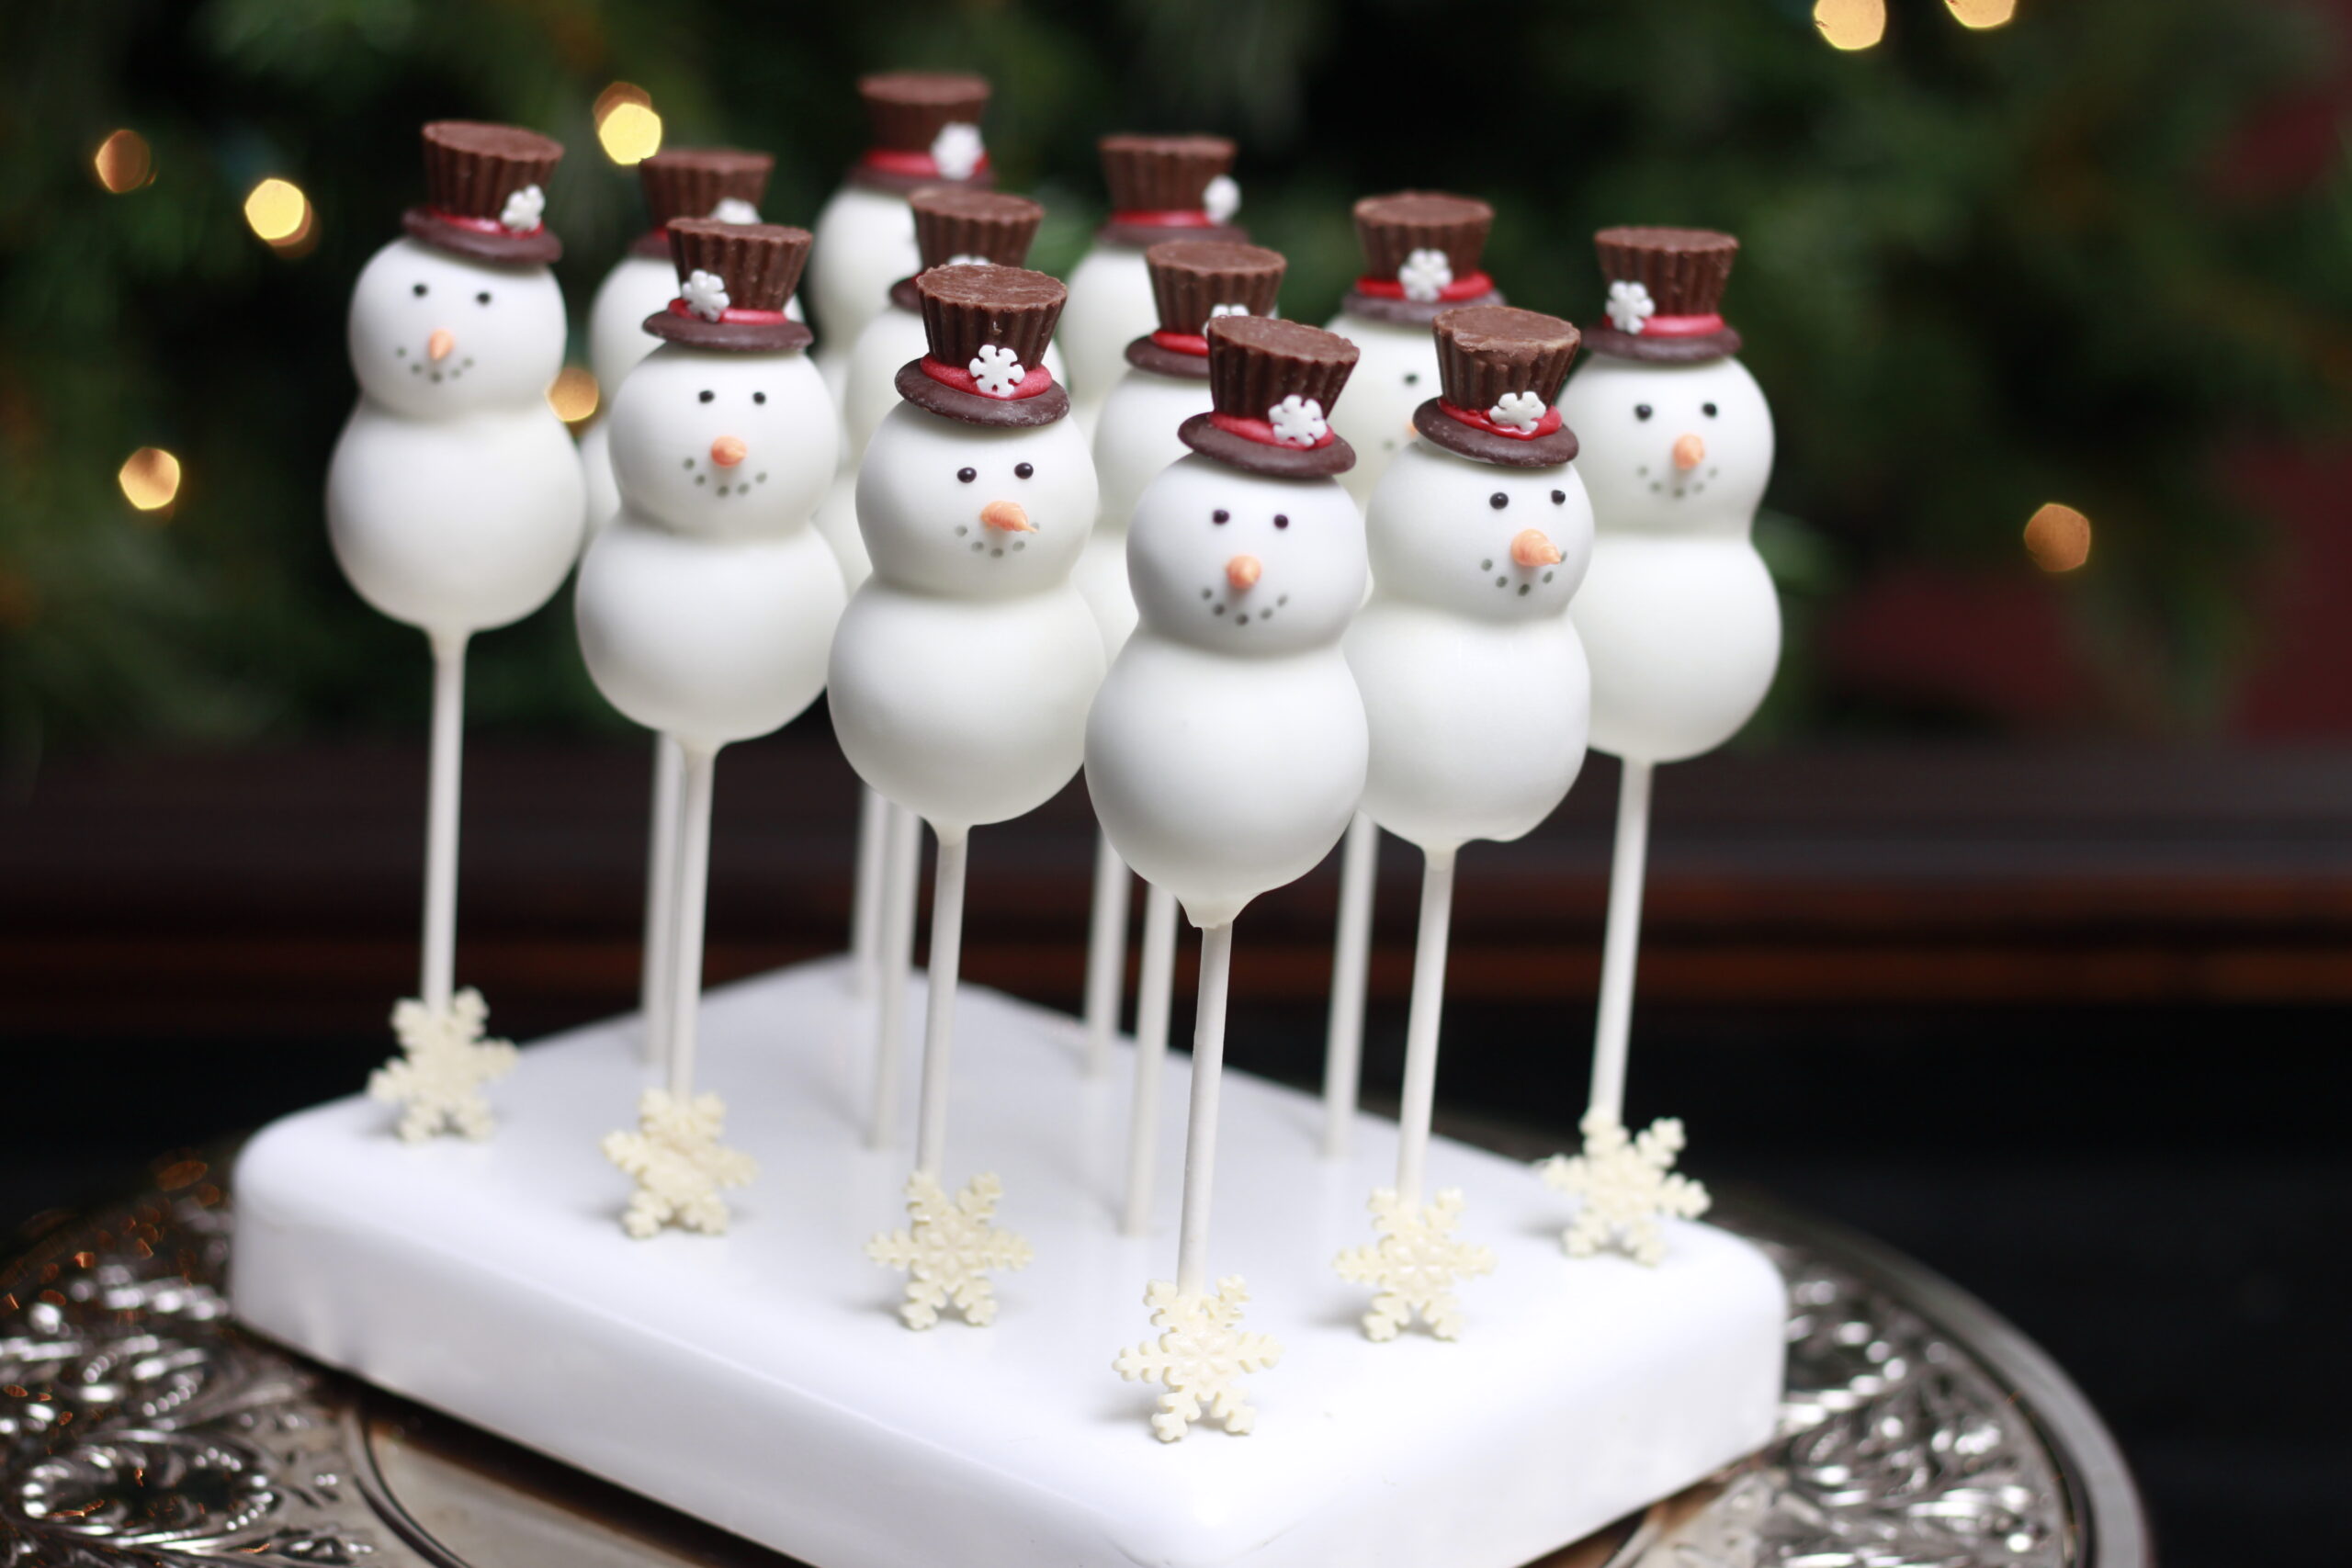
Snowman Cake Pops
Lets Make some “Snowman Cake Pops!” These cake pops are great for the wintery, Christmas, and holiday season! You Will Need: Easy Roller …or our new Mini Easy…

Tall Army Men Cake & “Camo” Cake Pops
If you want to learn how to make this Tall Army Men Cake & “Camo” Cake Pops stick with me! I love making custom birthday or occasion cakes…

Macrame Dream-Catcher
Once I found out my niece was pregnant and saw the theme she chose for her nursery I wanted to make this macrame dream-catcher for her new addition.

Baseball Wedding Cake
I was asked to recreate this baseball wedding cake & to add some matching cake pops! I was sent this Pinterest Image: Gobrail Photography From the Pinterest album:…
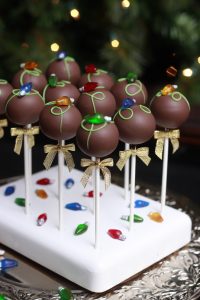
Holiday String Light CakePops
These are adorable holiday string light cakepops and perfect for your next Holiday Party! Have you ever used CakePlay Isomalt? You can use it to decorate all your…
Holiday Giveaway
*Giveaway Closed* This year we have an amazing giveaway for you! And I am excited you clicked over to see all the goodies I have collected for One…
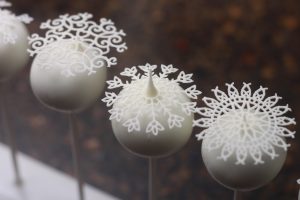
Snowflake Cake Pops
These “Floating” Snowflake Cake Pops were so easy and fun to make!
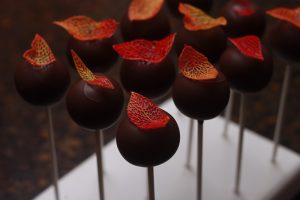
Fall Cake Pops
Come along with me to learn how to make these fall Cake pops! The colorful leaves on top representing fall are completely edible!